Review of Keyestudio's Micro:bit Robot Car KS4034F
By Dr Jennifer Martay PE, Course Leader for Medical Engineering at Anglia Ruskin University
Item received for free in exchange for feedback on kit. This review contains my independent opinions, with no influence from Keyestudio.
I am a Biomedical Engineer, interested in all things engineering and building up my electronics skills. This is the third Keyestudio
kit I've put together, and I've really enjoyed the others (Review of Smart House and
Review of Solar Tracker).
I also took a break halfway through this kit to put together my fourth Keyestudio kit: their Arduino robot car
(Review of Arduino Robot Car).
What did I think about this kit?
I really enjoyed this kit. This Micro:bit robot car is an extension and improvement on Keyestudio's Arduino robot car (KS0470).
Both the Arduino and this Micro:bit car can Object Avoid, Object Track, and Line Track. The Line Tracking in this Micro:bit car is much more accurate
than in the Arduino car. The other functions are similarly successful in the two cars.
New additions to the Micro:bit car include multi-color LED lights on the bottom and front of the car. These lights are a bit of a novelty but
definitely increase the fun-factor for my kids!
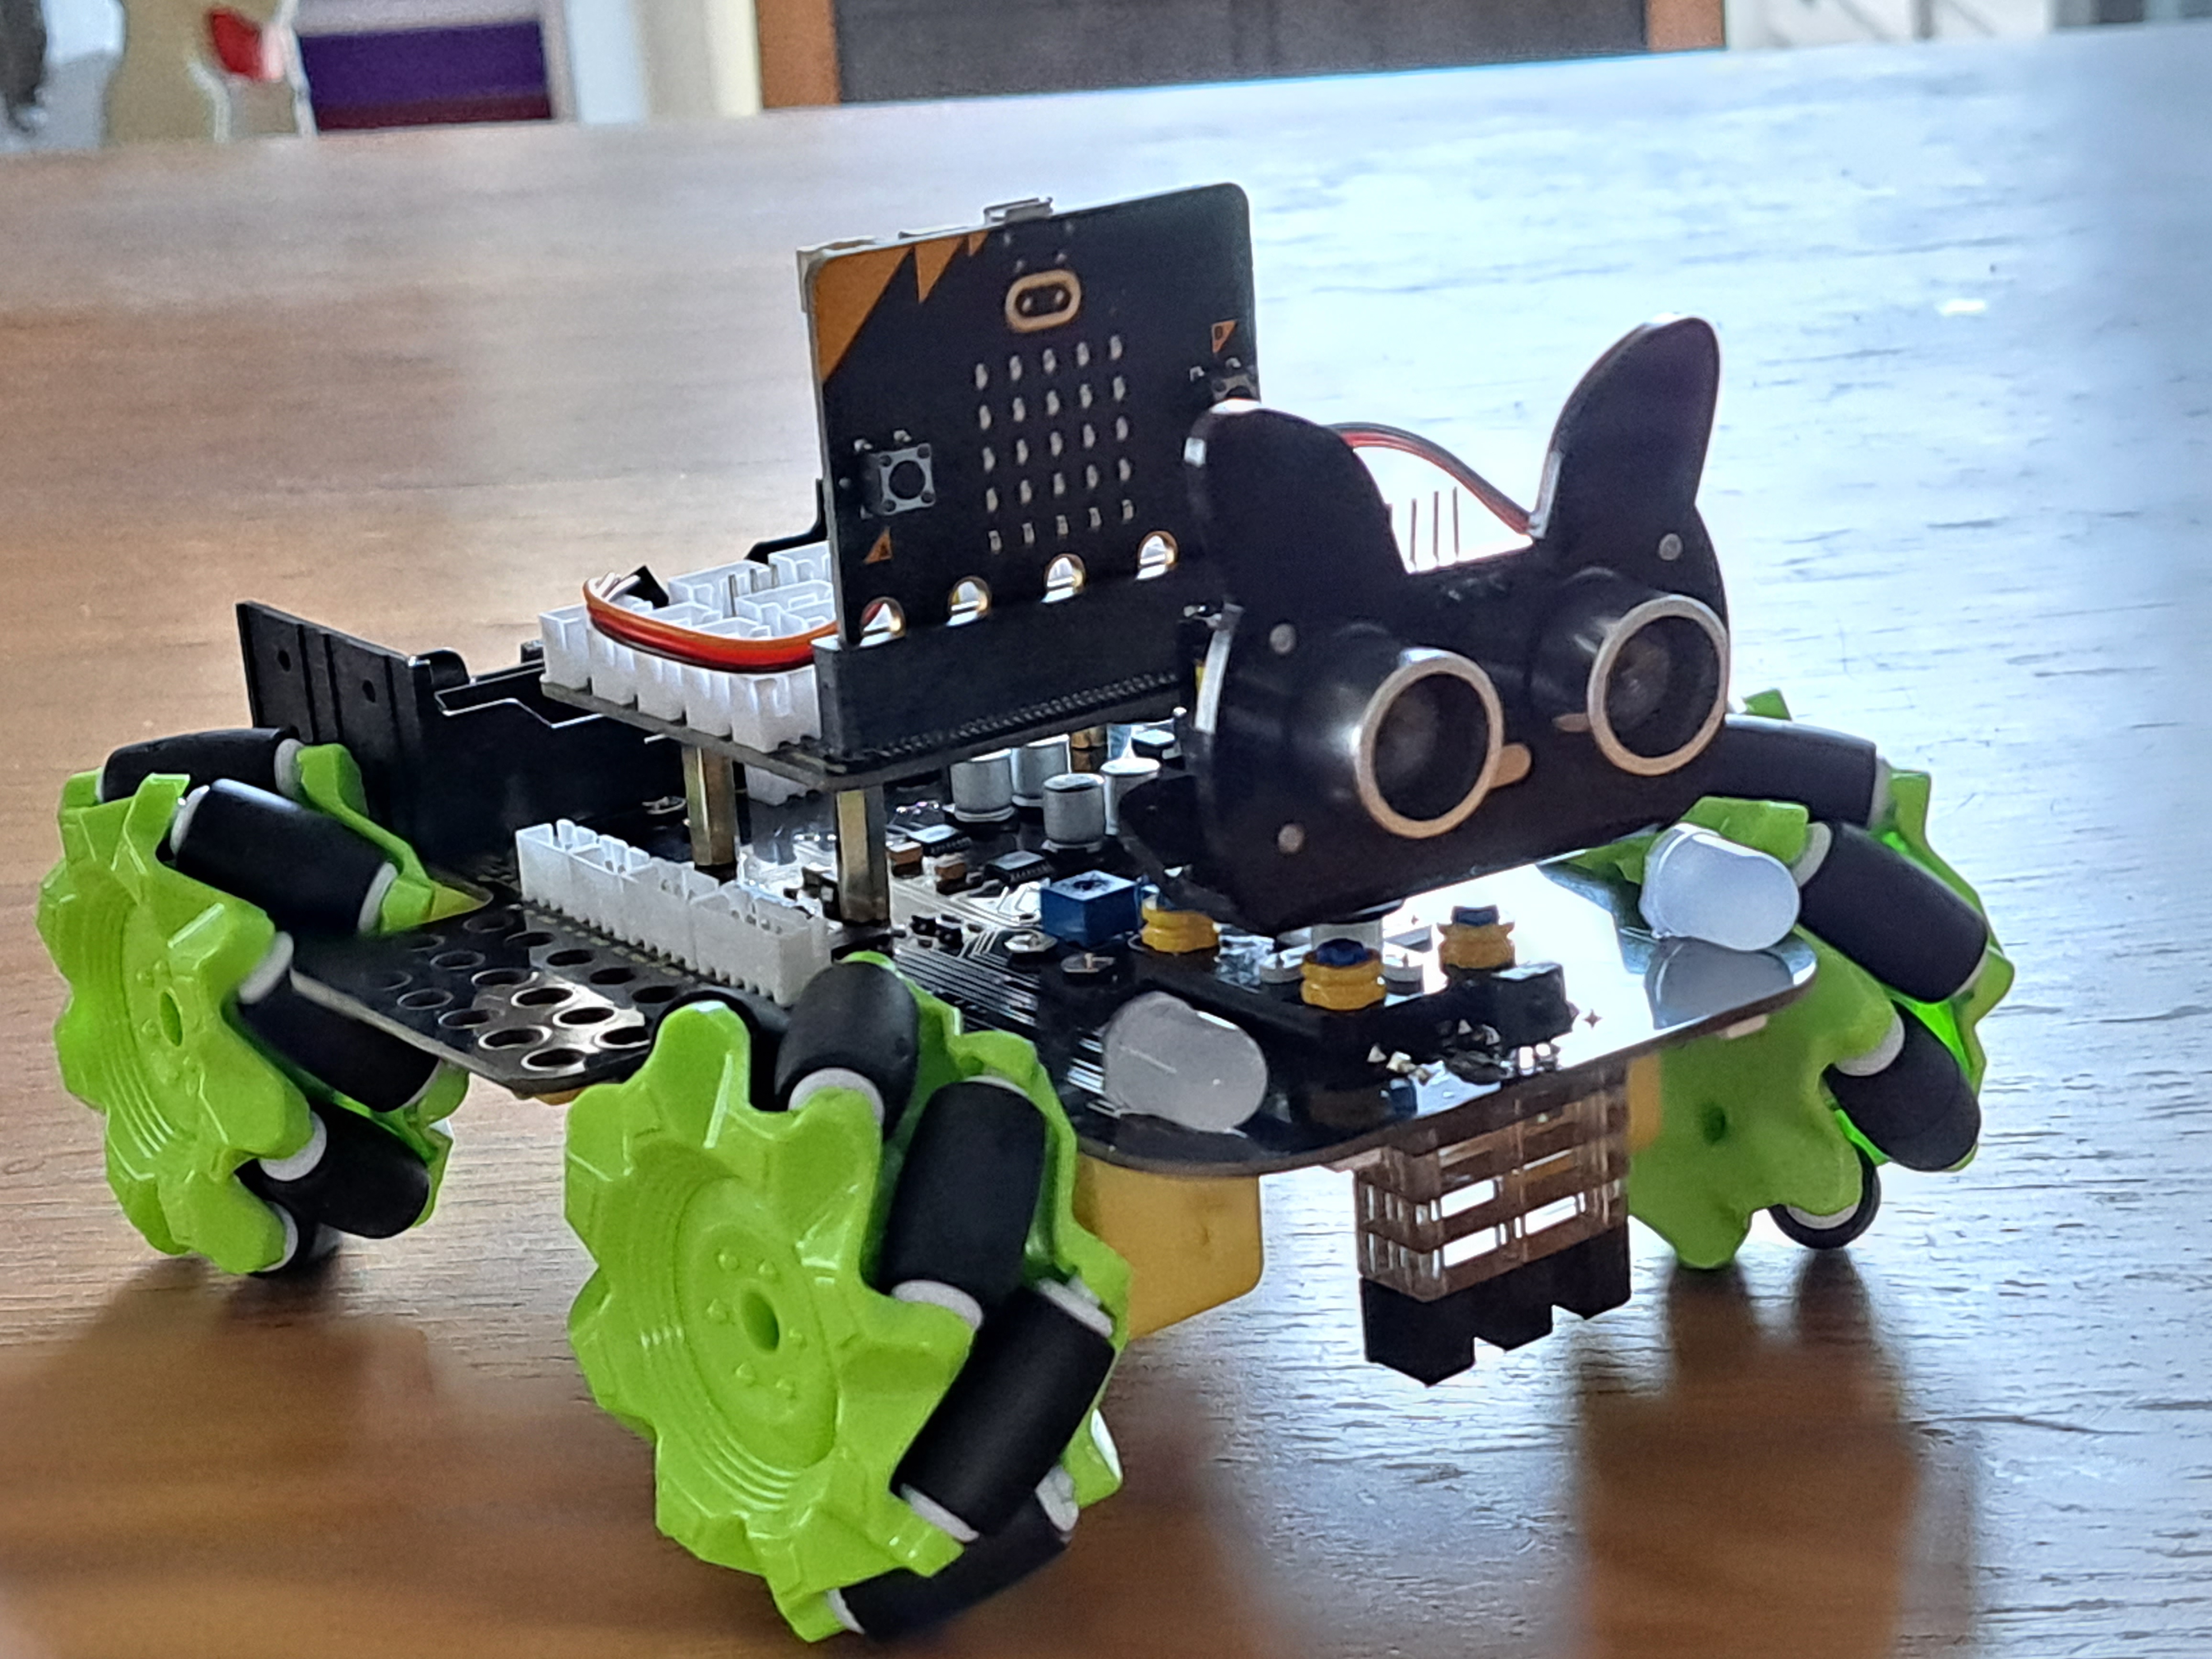
Another highlight of the Micro:bit car are the Mecanum wheels. These wheels allow the car to move in many more directions, and make the car look
like a live animal scampering around on the floor! The Mecanum wheels are my favorite part of this project.
Finally, I am new to both the Micro:bit and MakeCode. The Micro:bit has a lot more functionality than I expected for such a small device.
MakeCode (which involves dragging and dropping command prompts into a code) seems a lot easier than Arduino code for someone new to programming.
This makes it much easier for my kids to understand the coding behind the car, although I find the inability to comment the code frustrating.
Overall, this is a great kit for someone interested in robot cars who might be worried about diving straight into Arduino coding.
For more details, watch the video below and/or keep reading!
First Impressions
As normal, the box is full of components. I am most excited to learn about the Micro:bit device and the Mecanum wheels! I am also pleased to see the Lego pieces, magnetic screwdriver, and clearly-labelled, individually-packed screws/nuts. In addition to what comes in the box, more detailed build and use instructions (including MakeCode and Python code) are provided by Keyestudio here.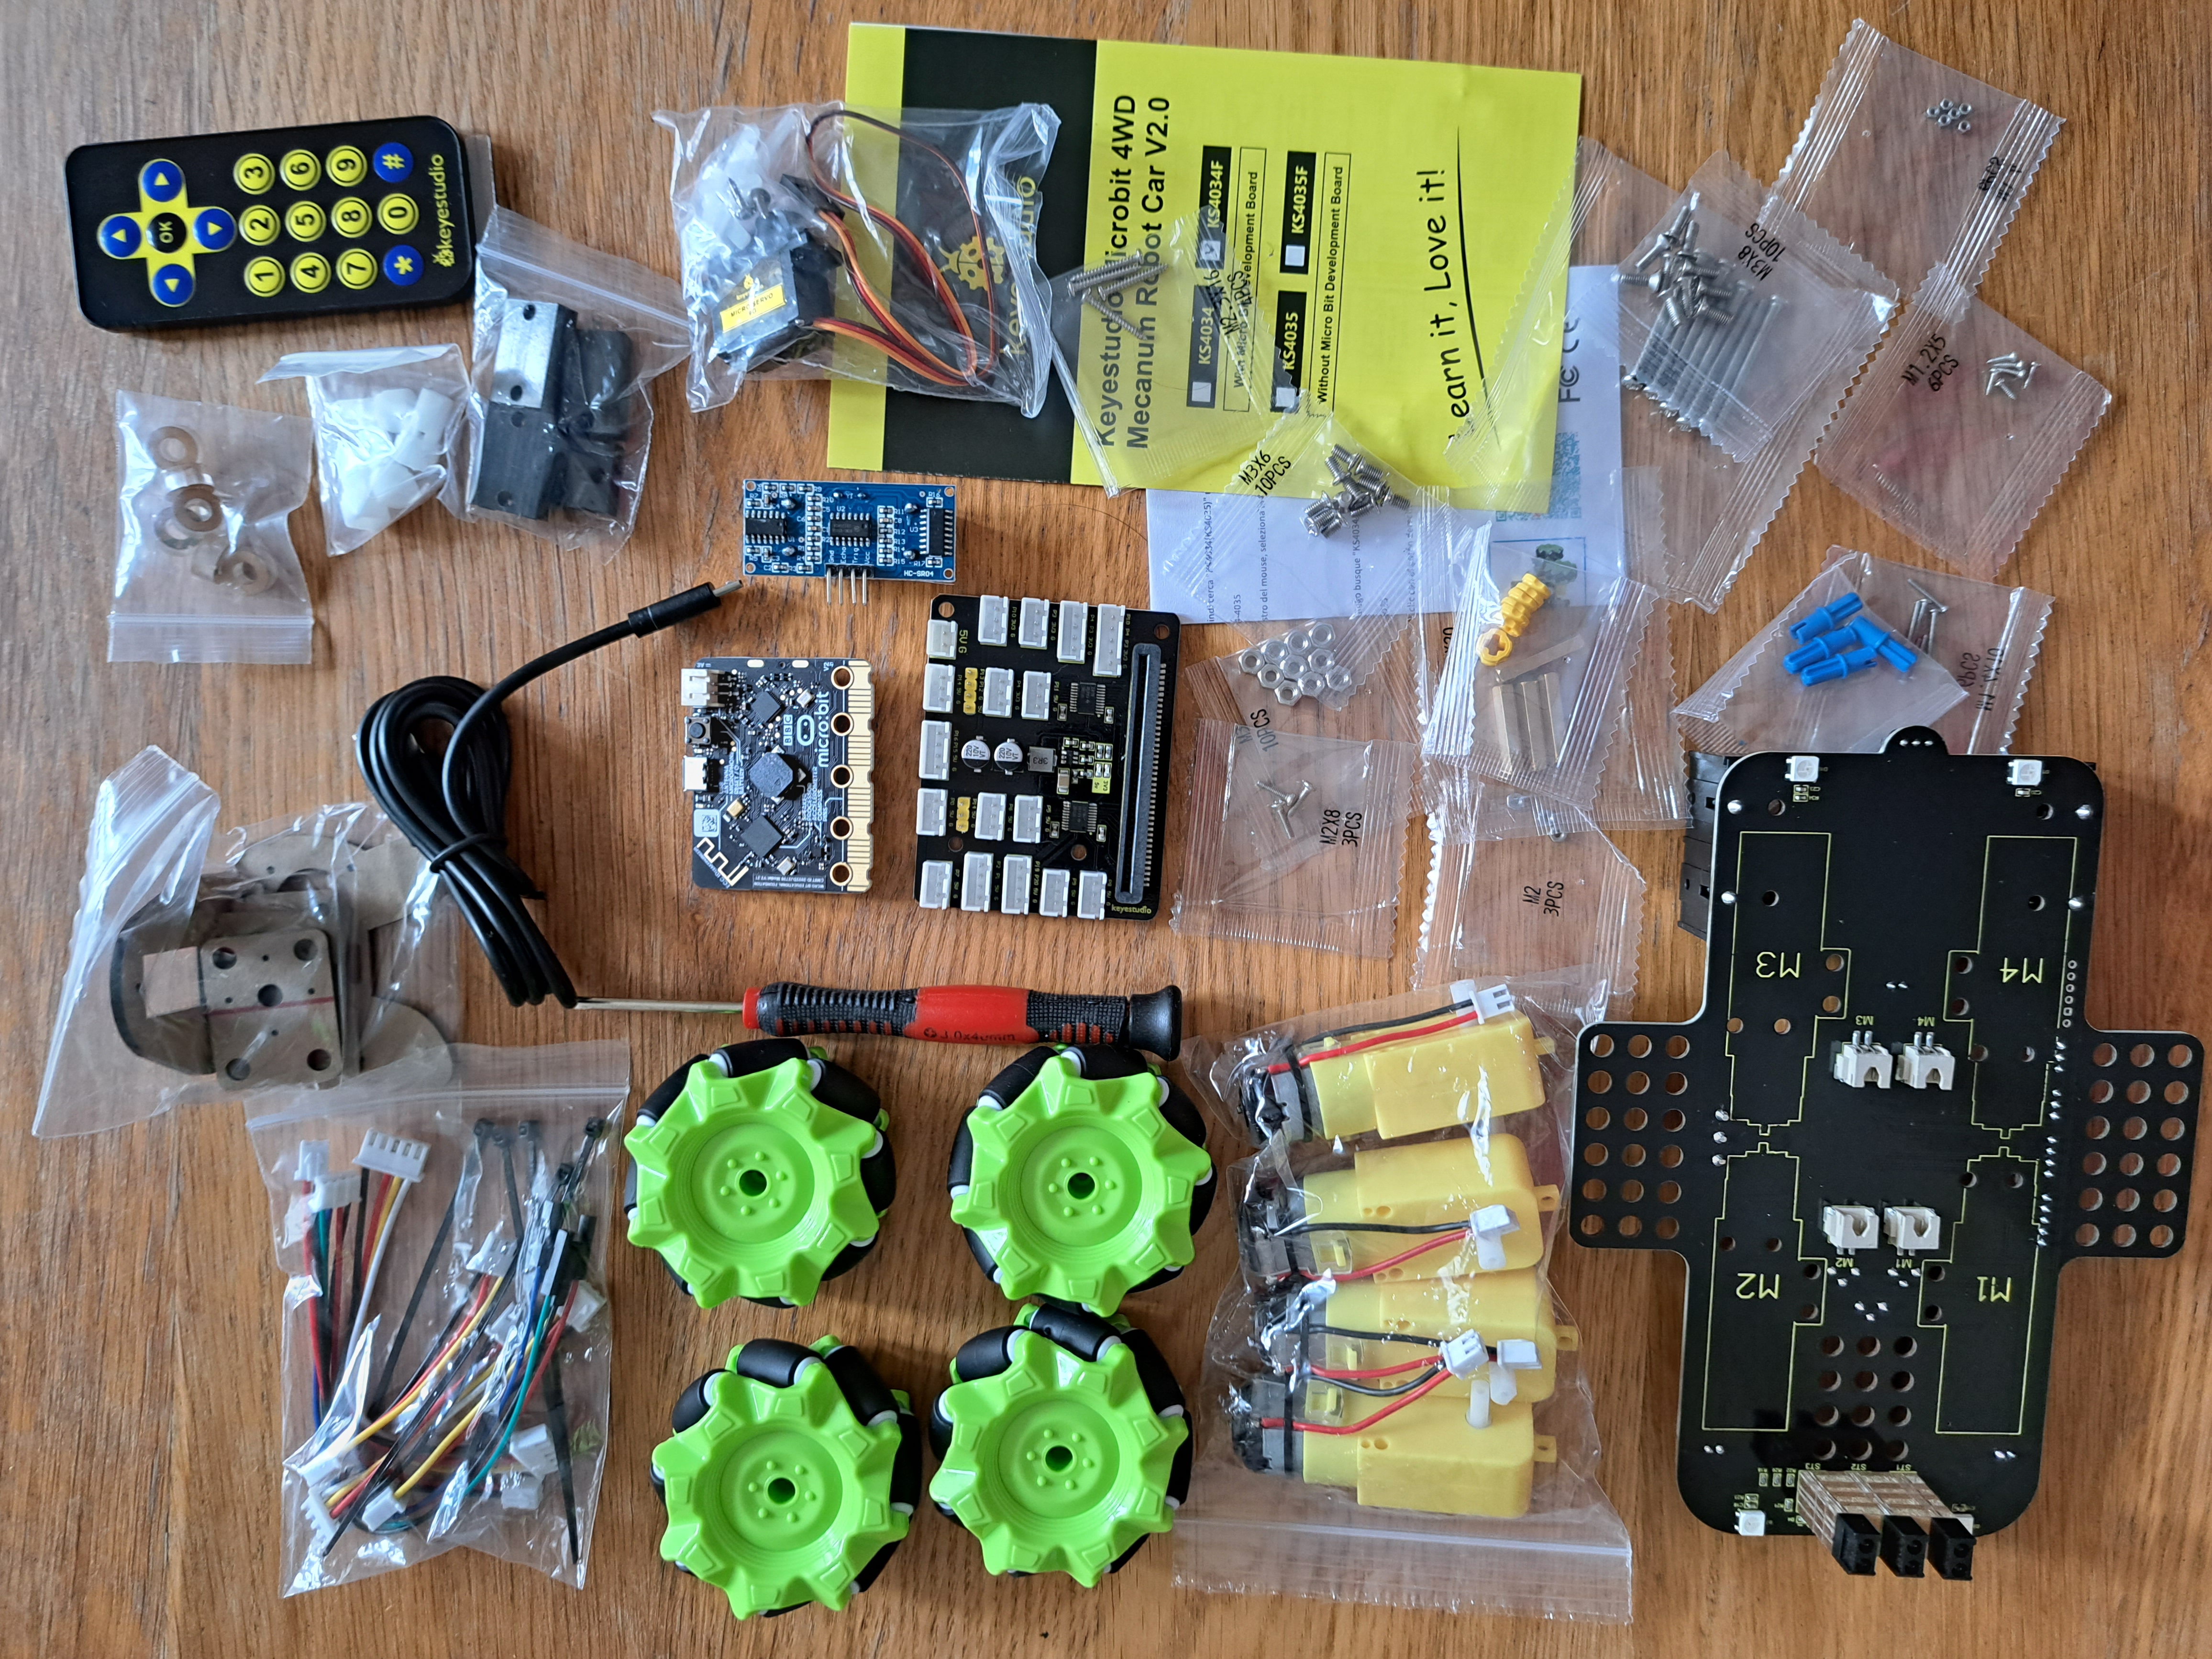
Step 1: Building the Robot Car
The instruction manual guides you step-by-step through the building process, with written instructions and pictures of each step. Some screws/nuts are still tiny, however, and you may need pliers to position some of the Lego pieces.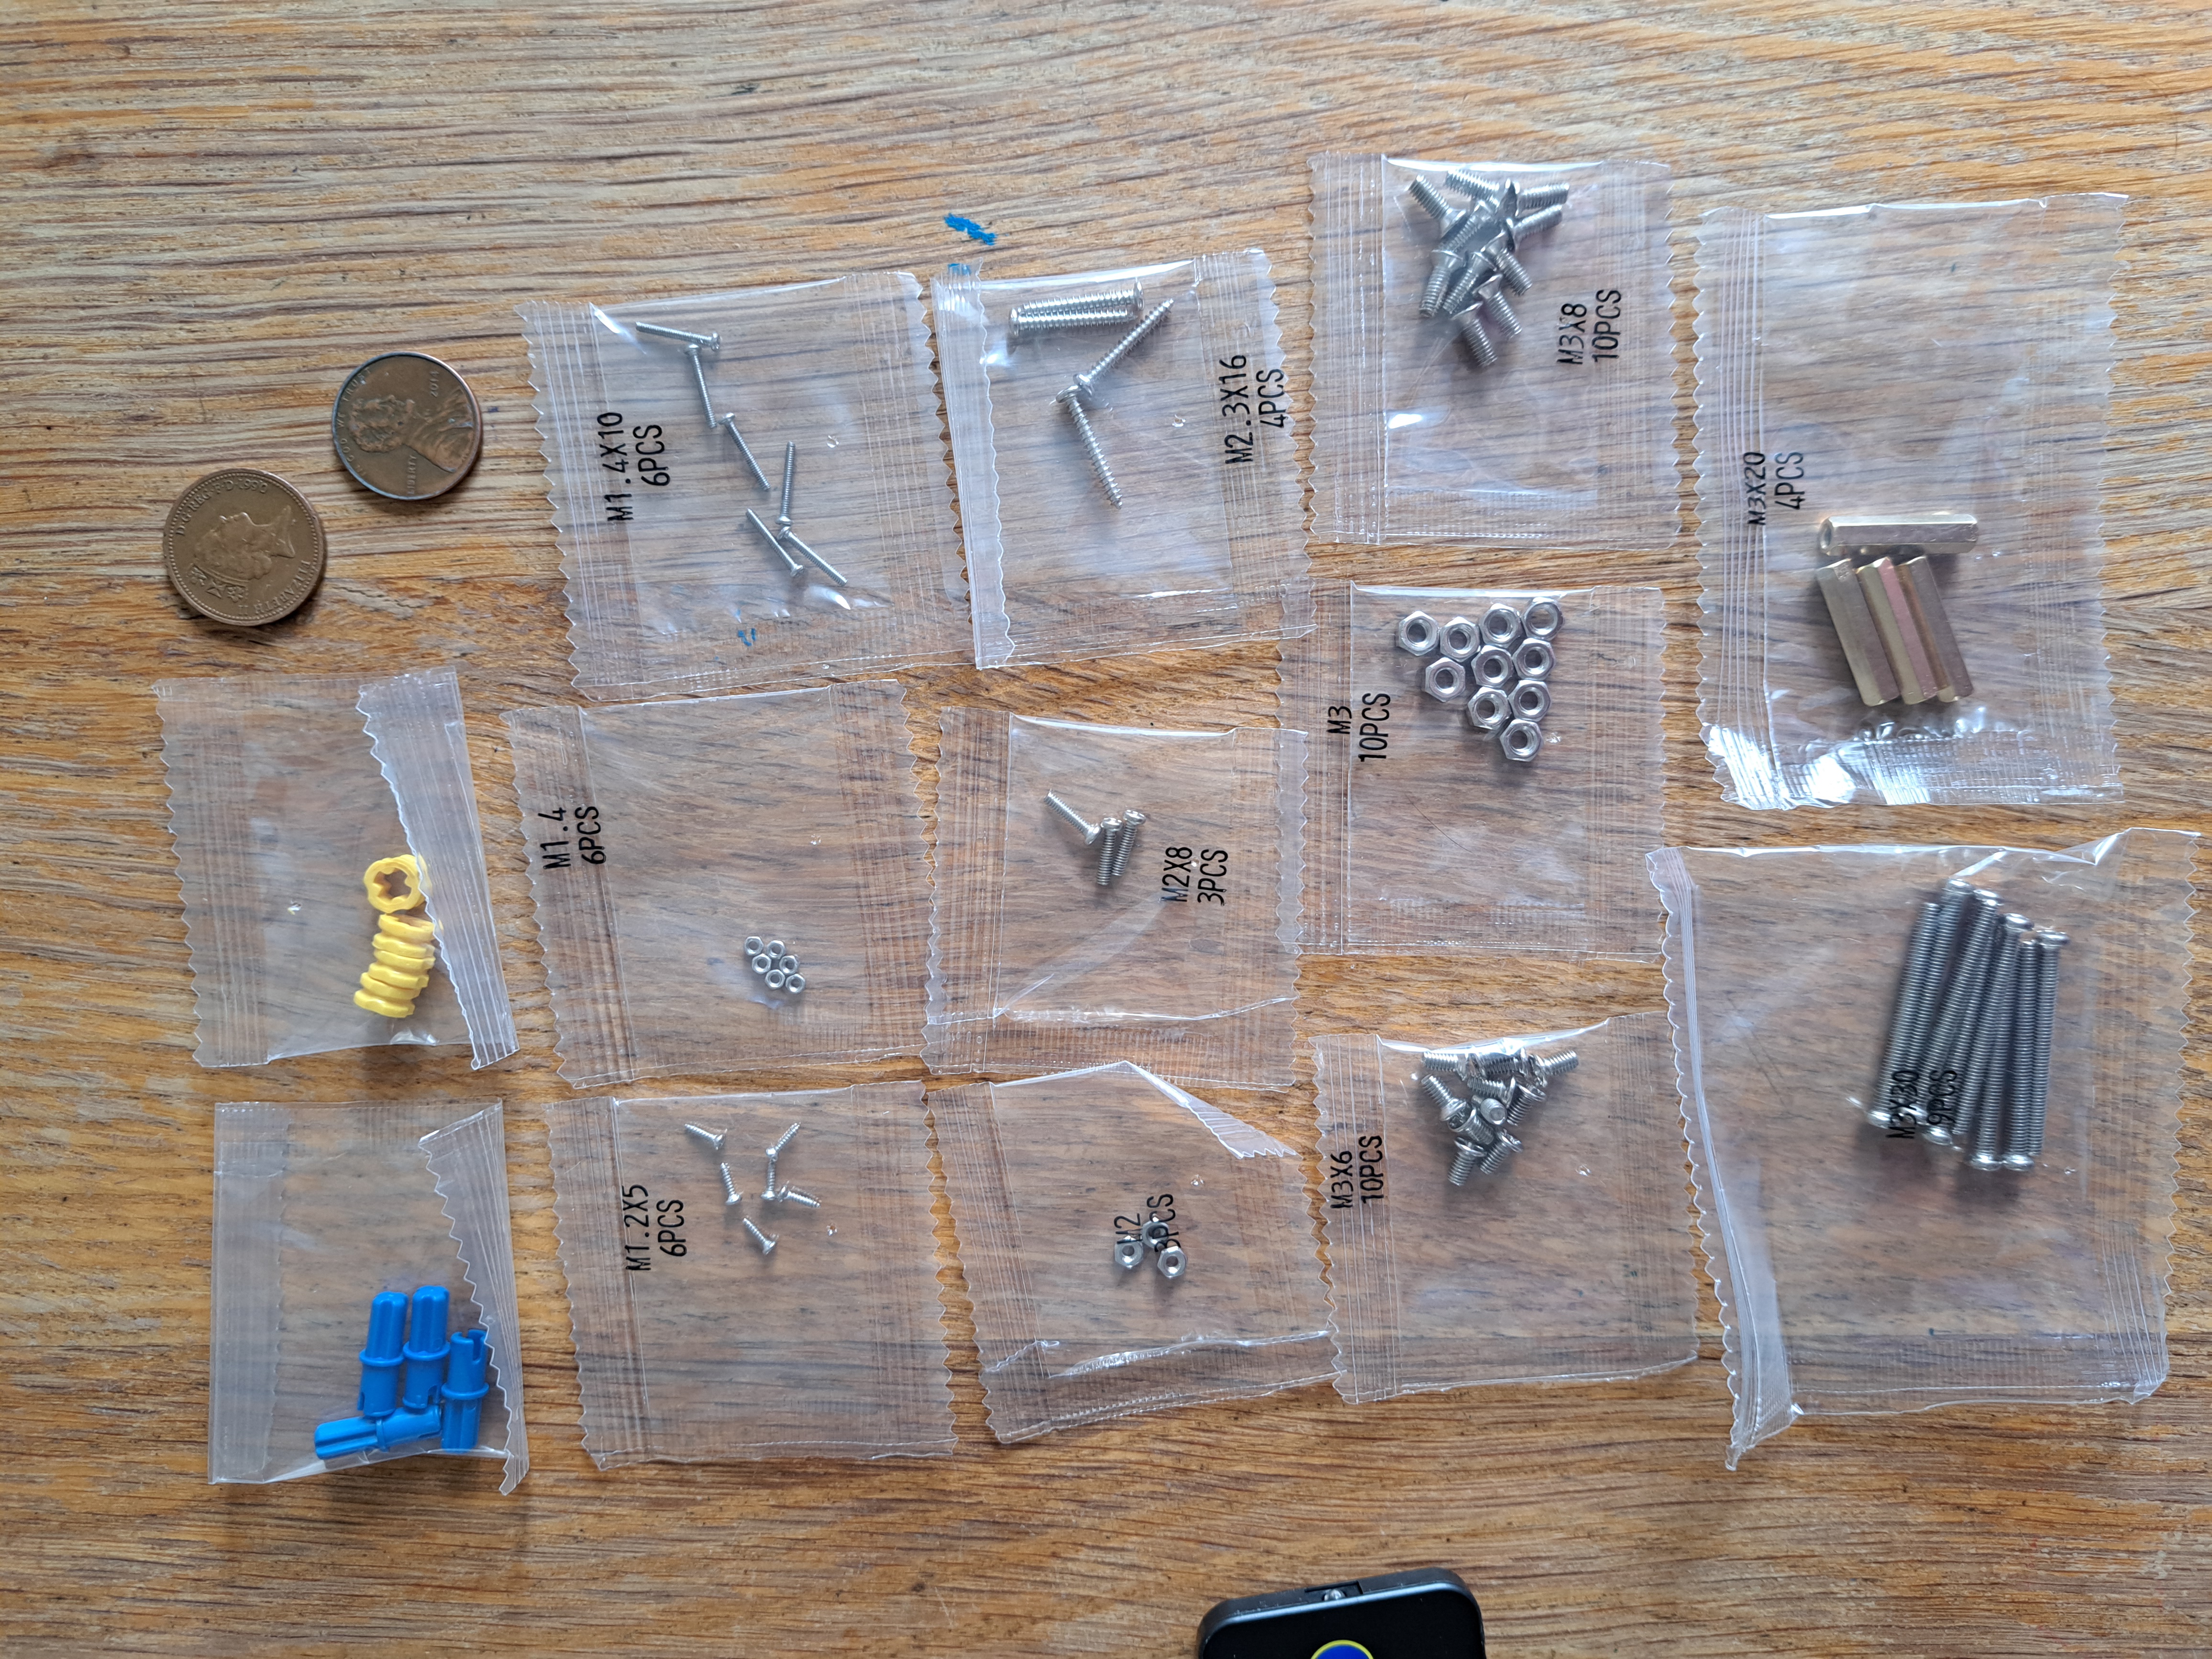
Building the robot car takes approximately 2 hours, probably faster (I was holding a baby at the same time). It is satisfying to see the completed build!
Step 2: Wiring the Robot Car
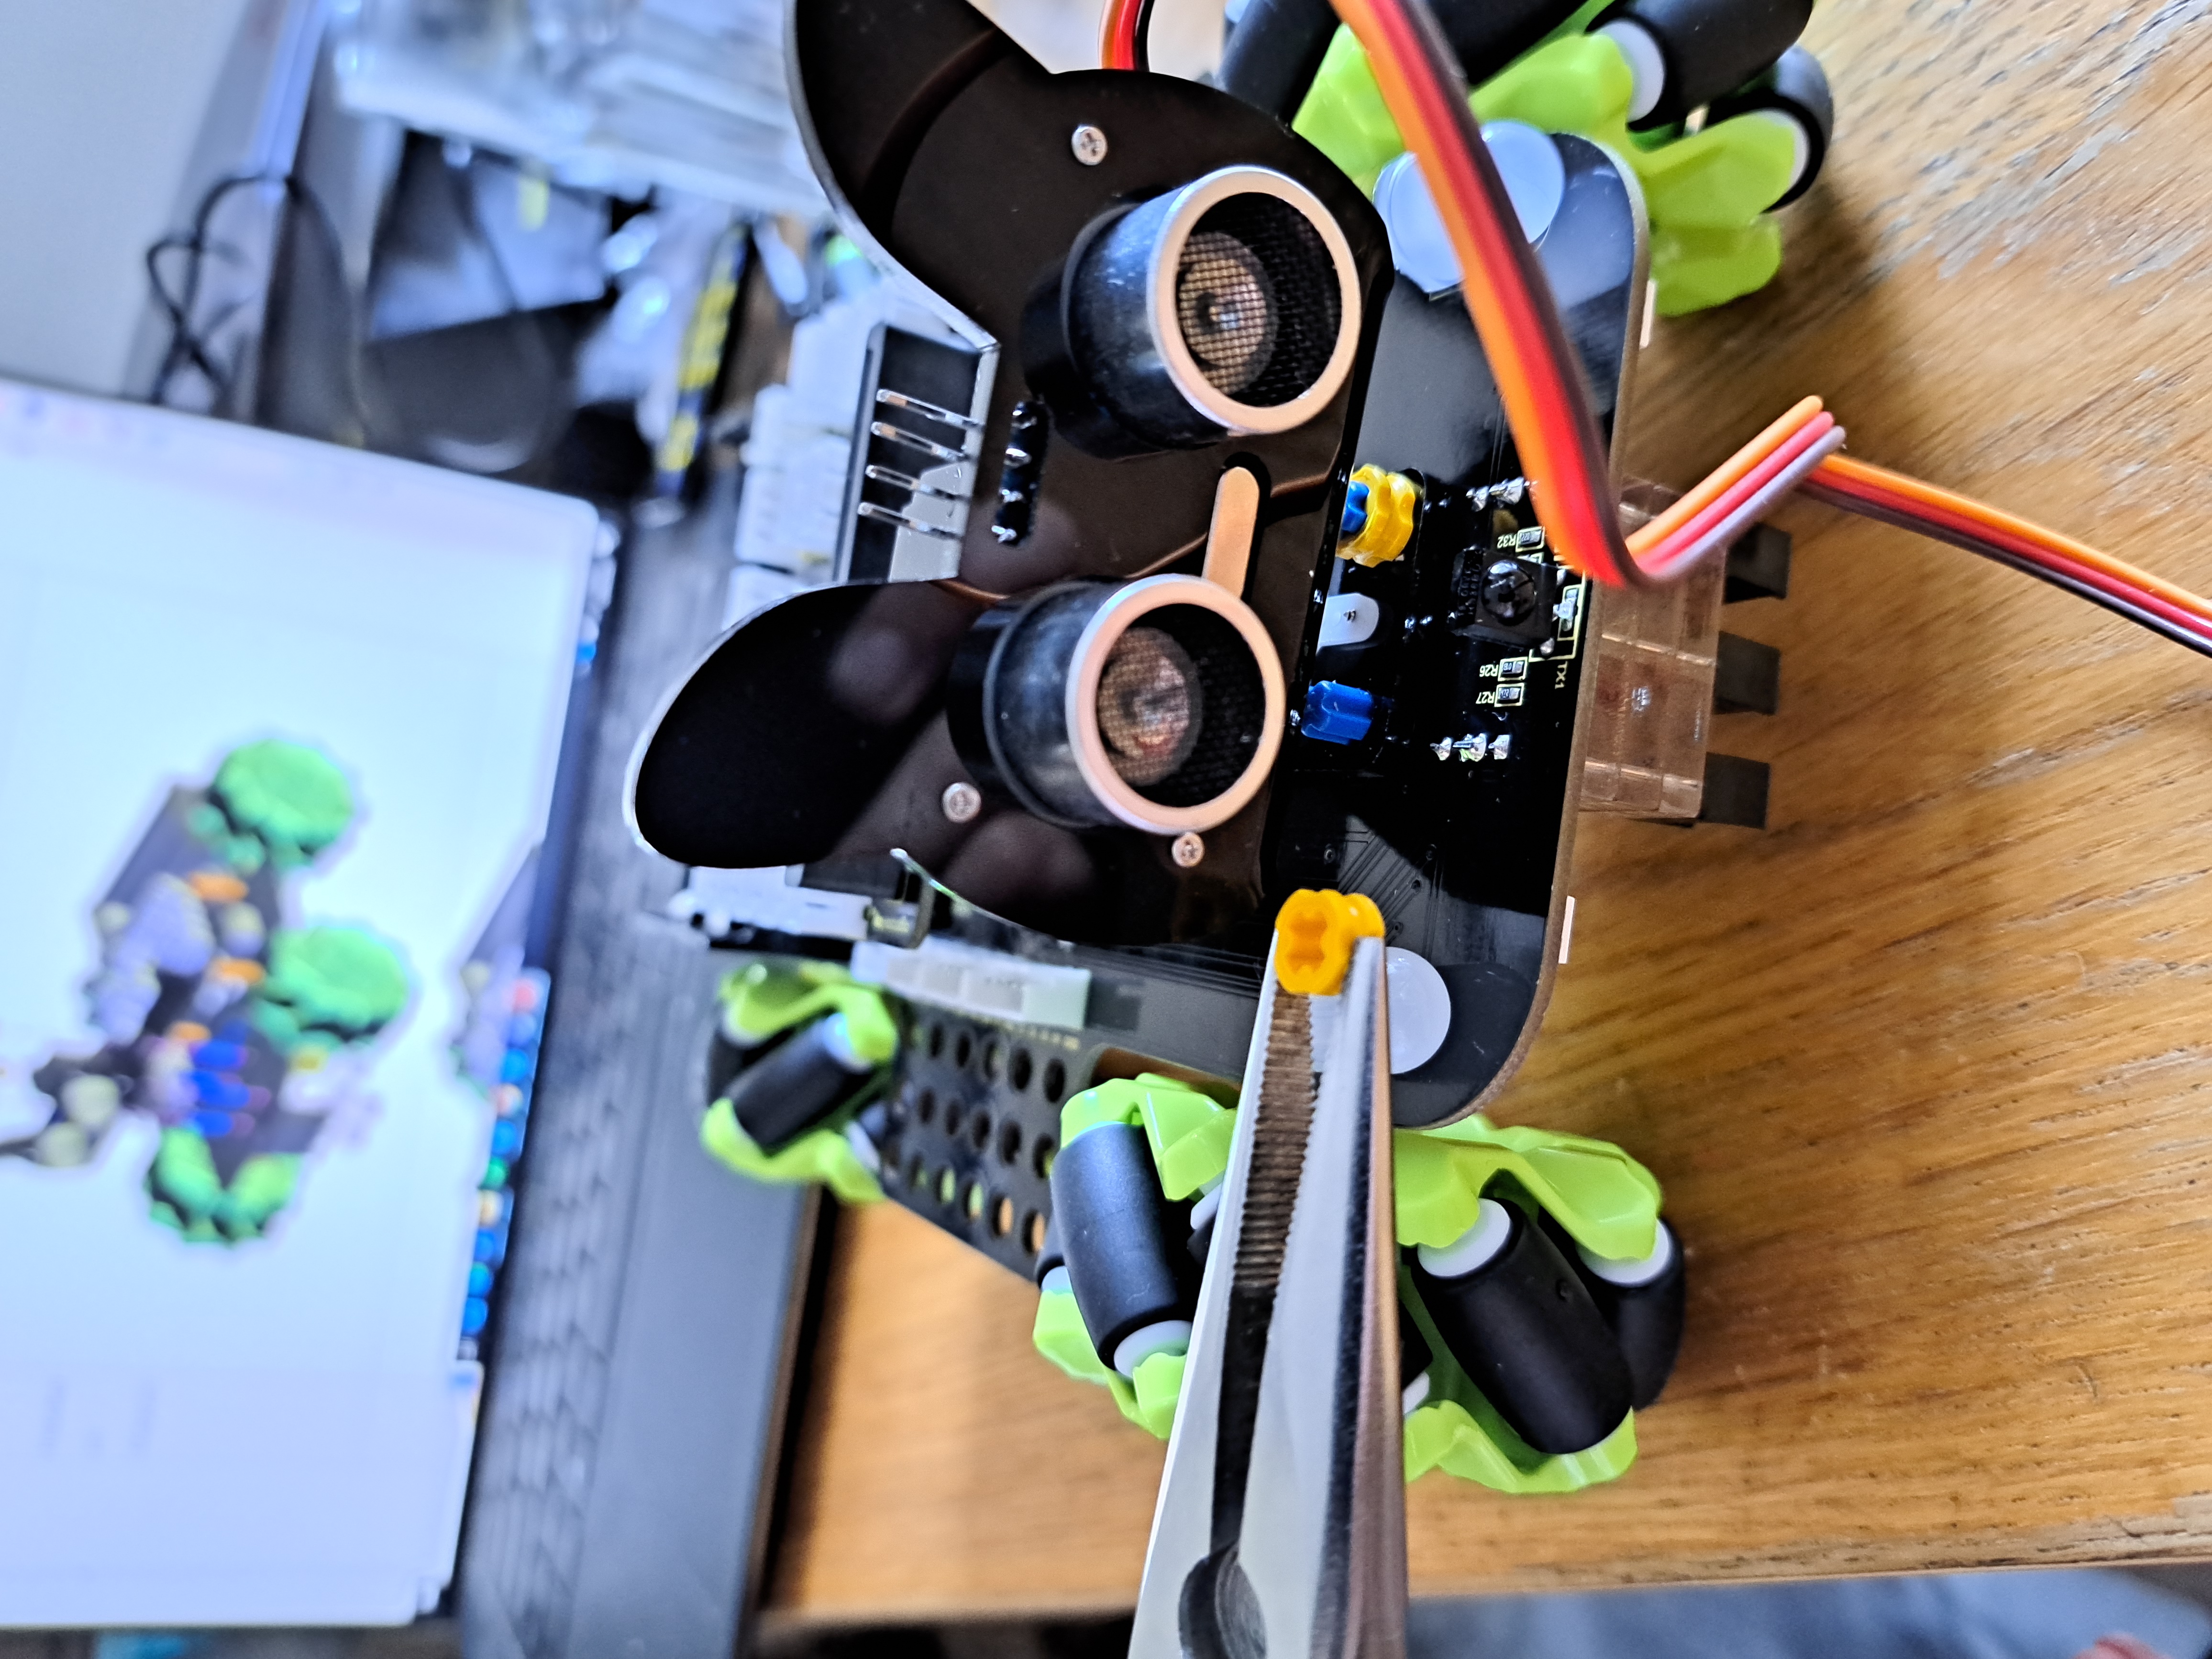
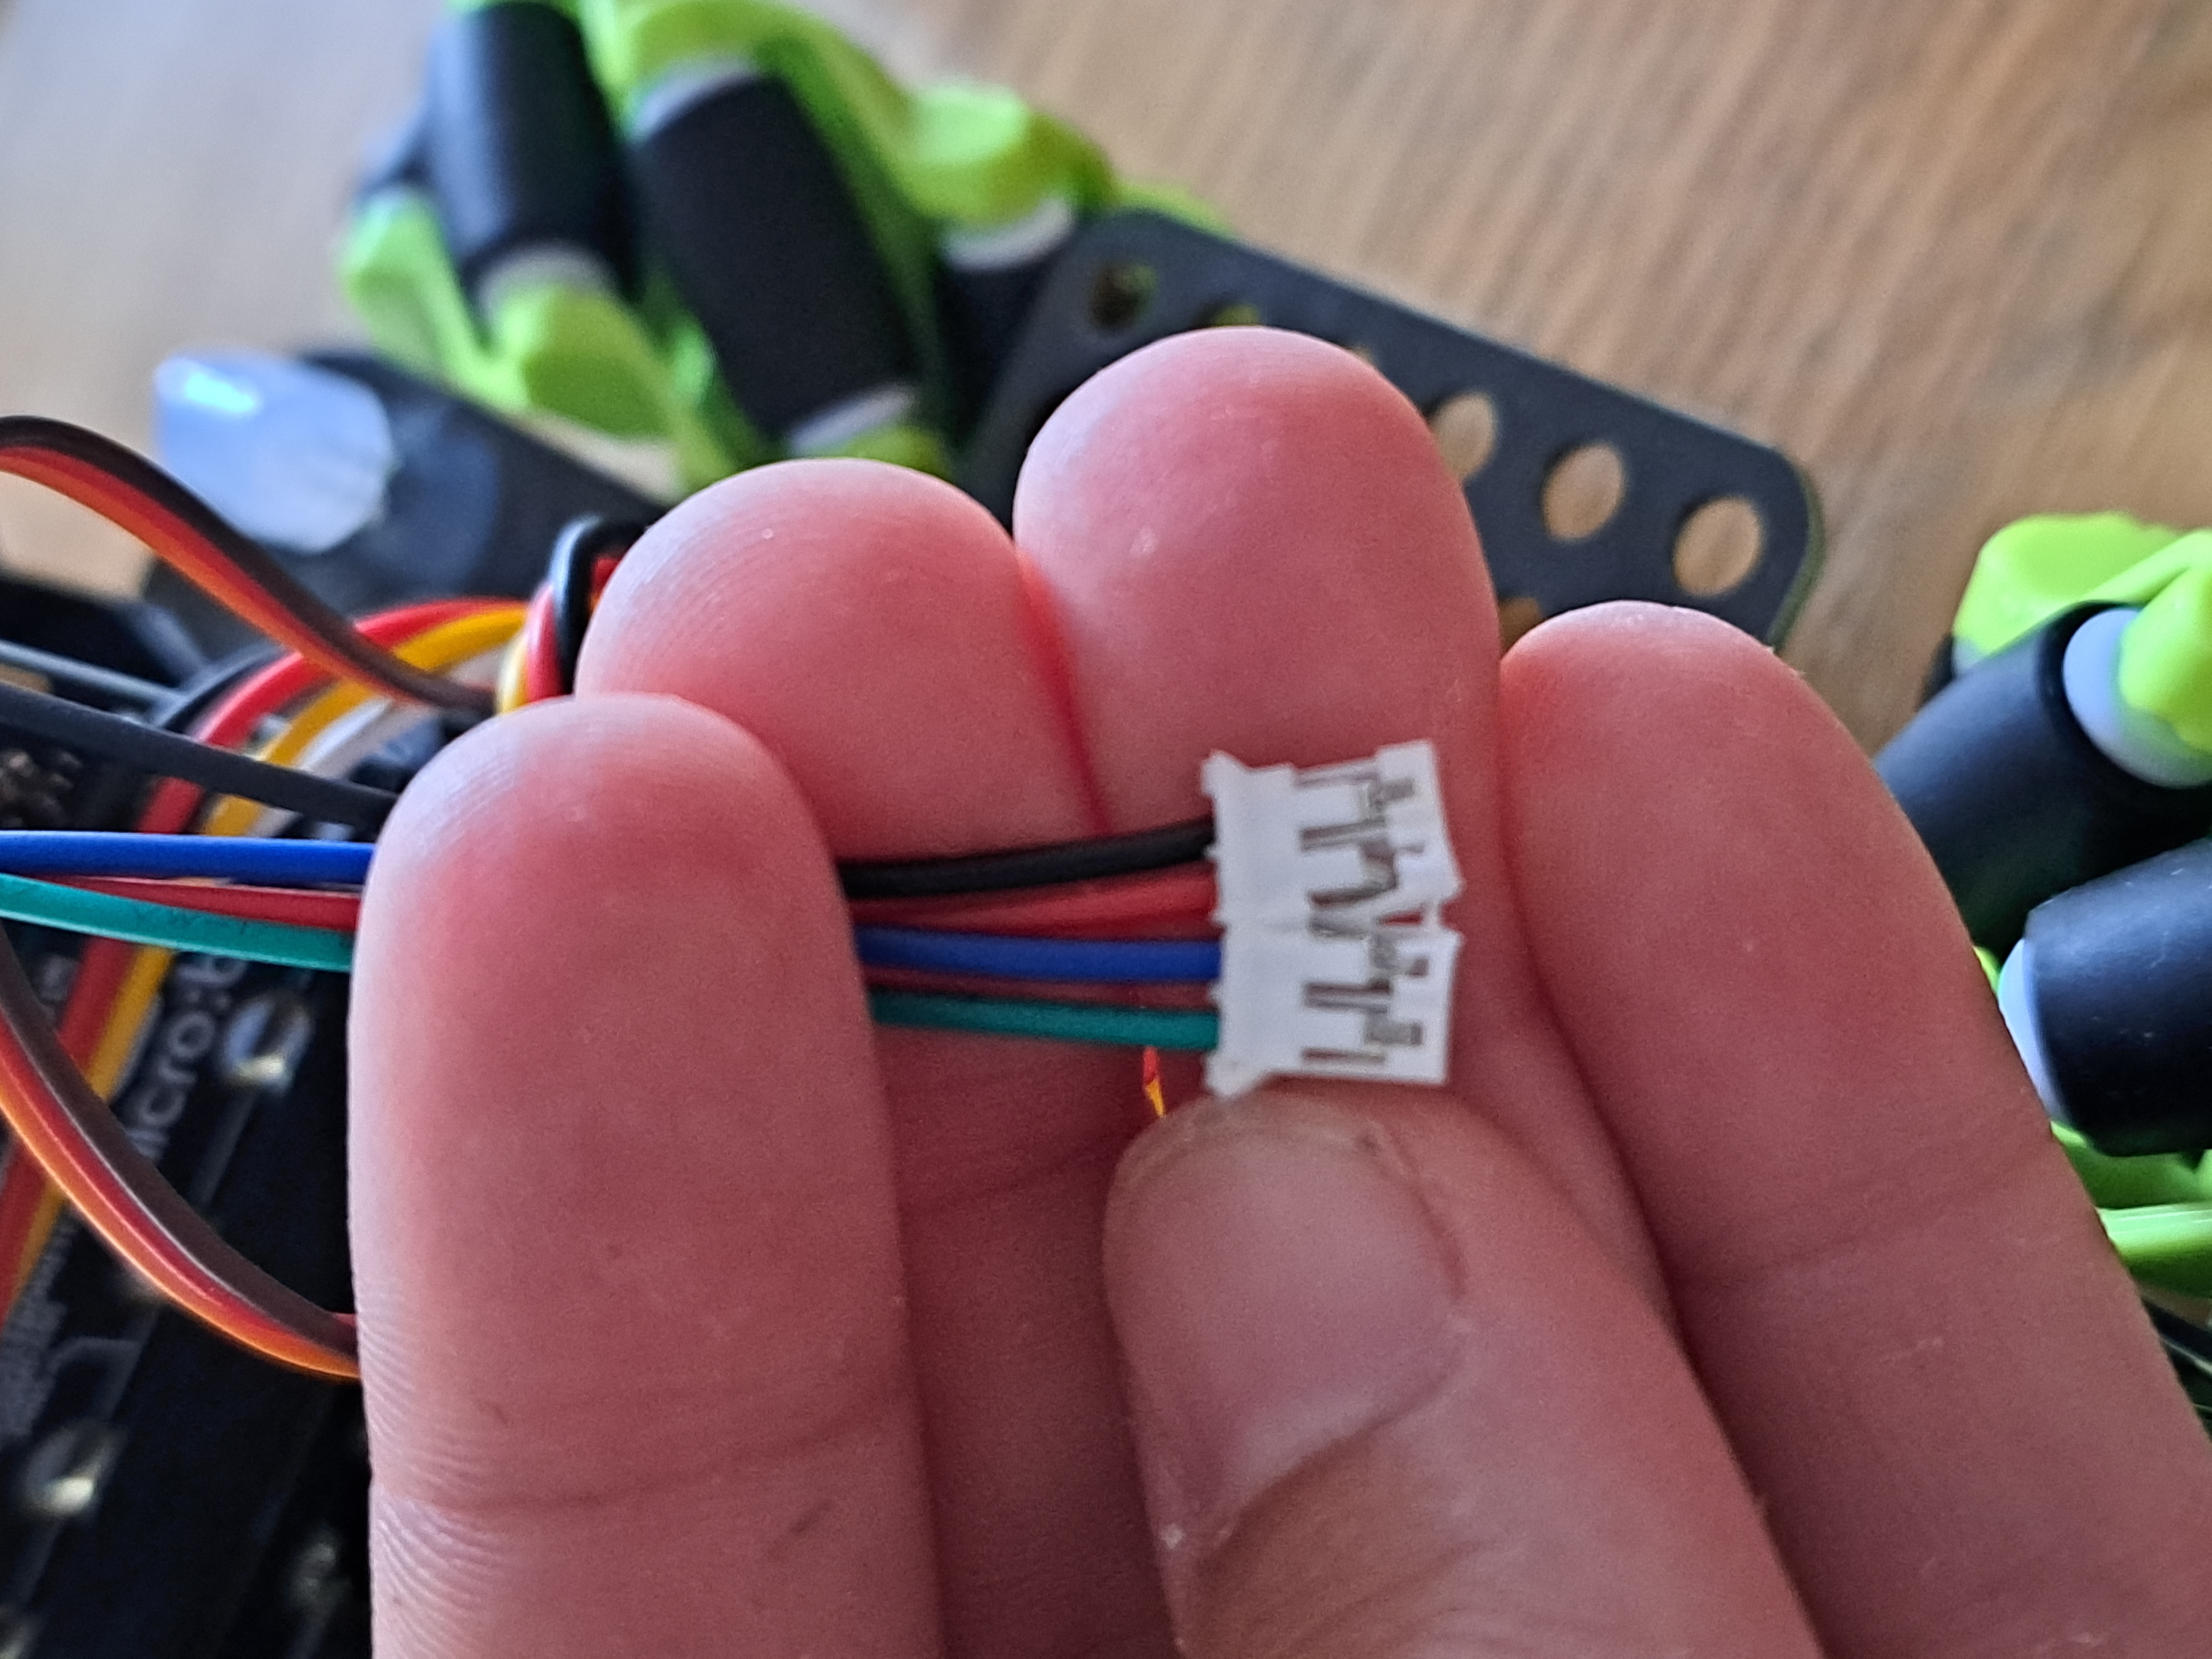
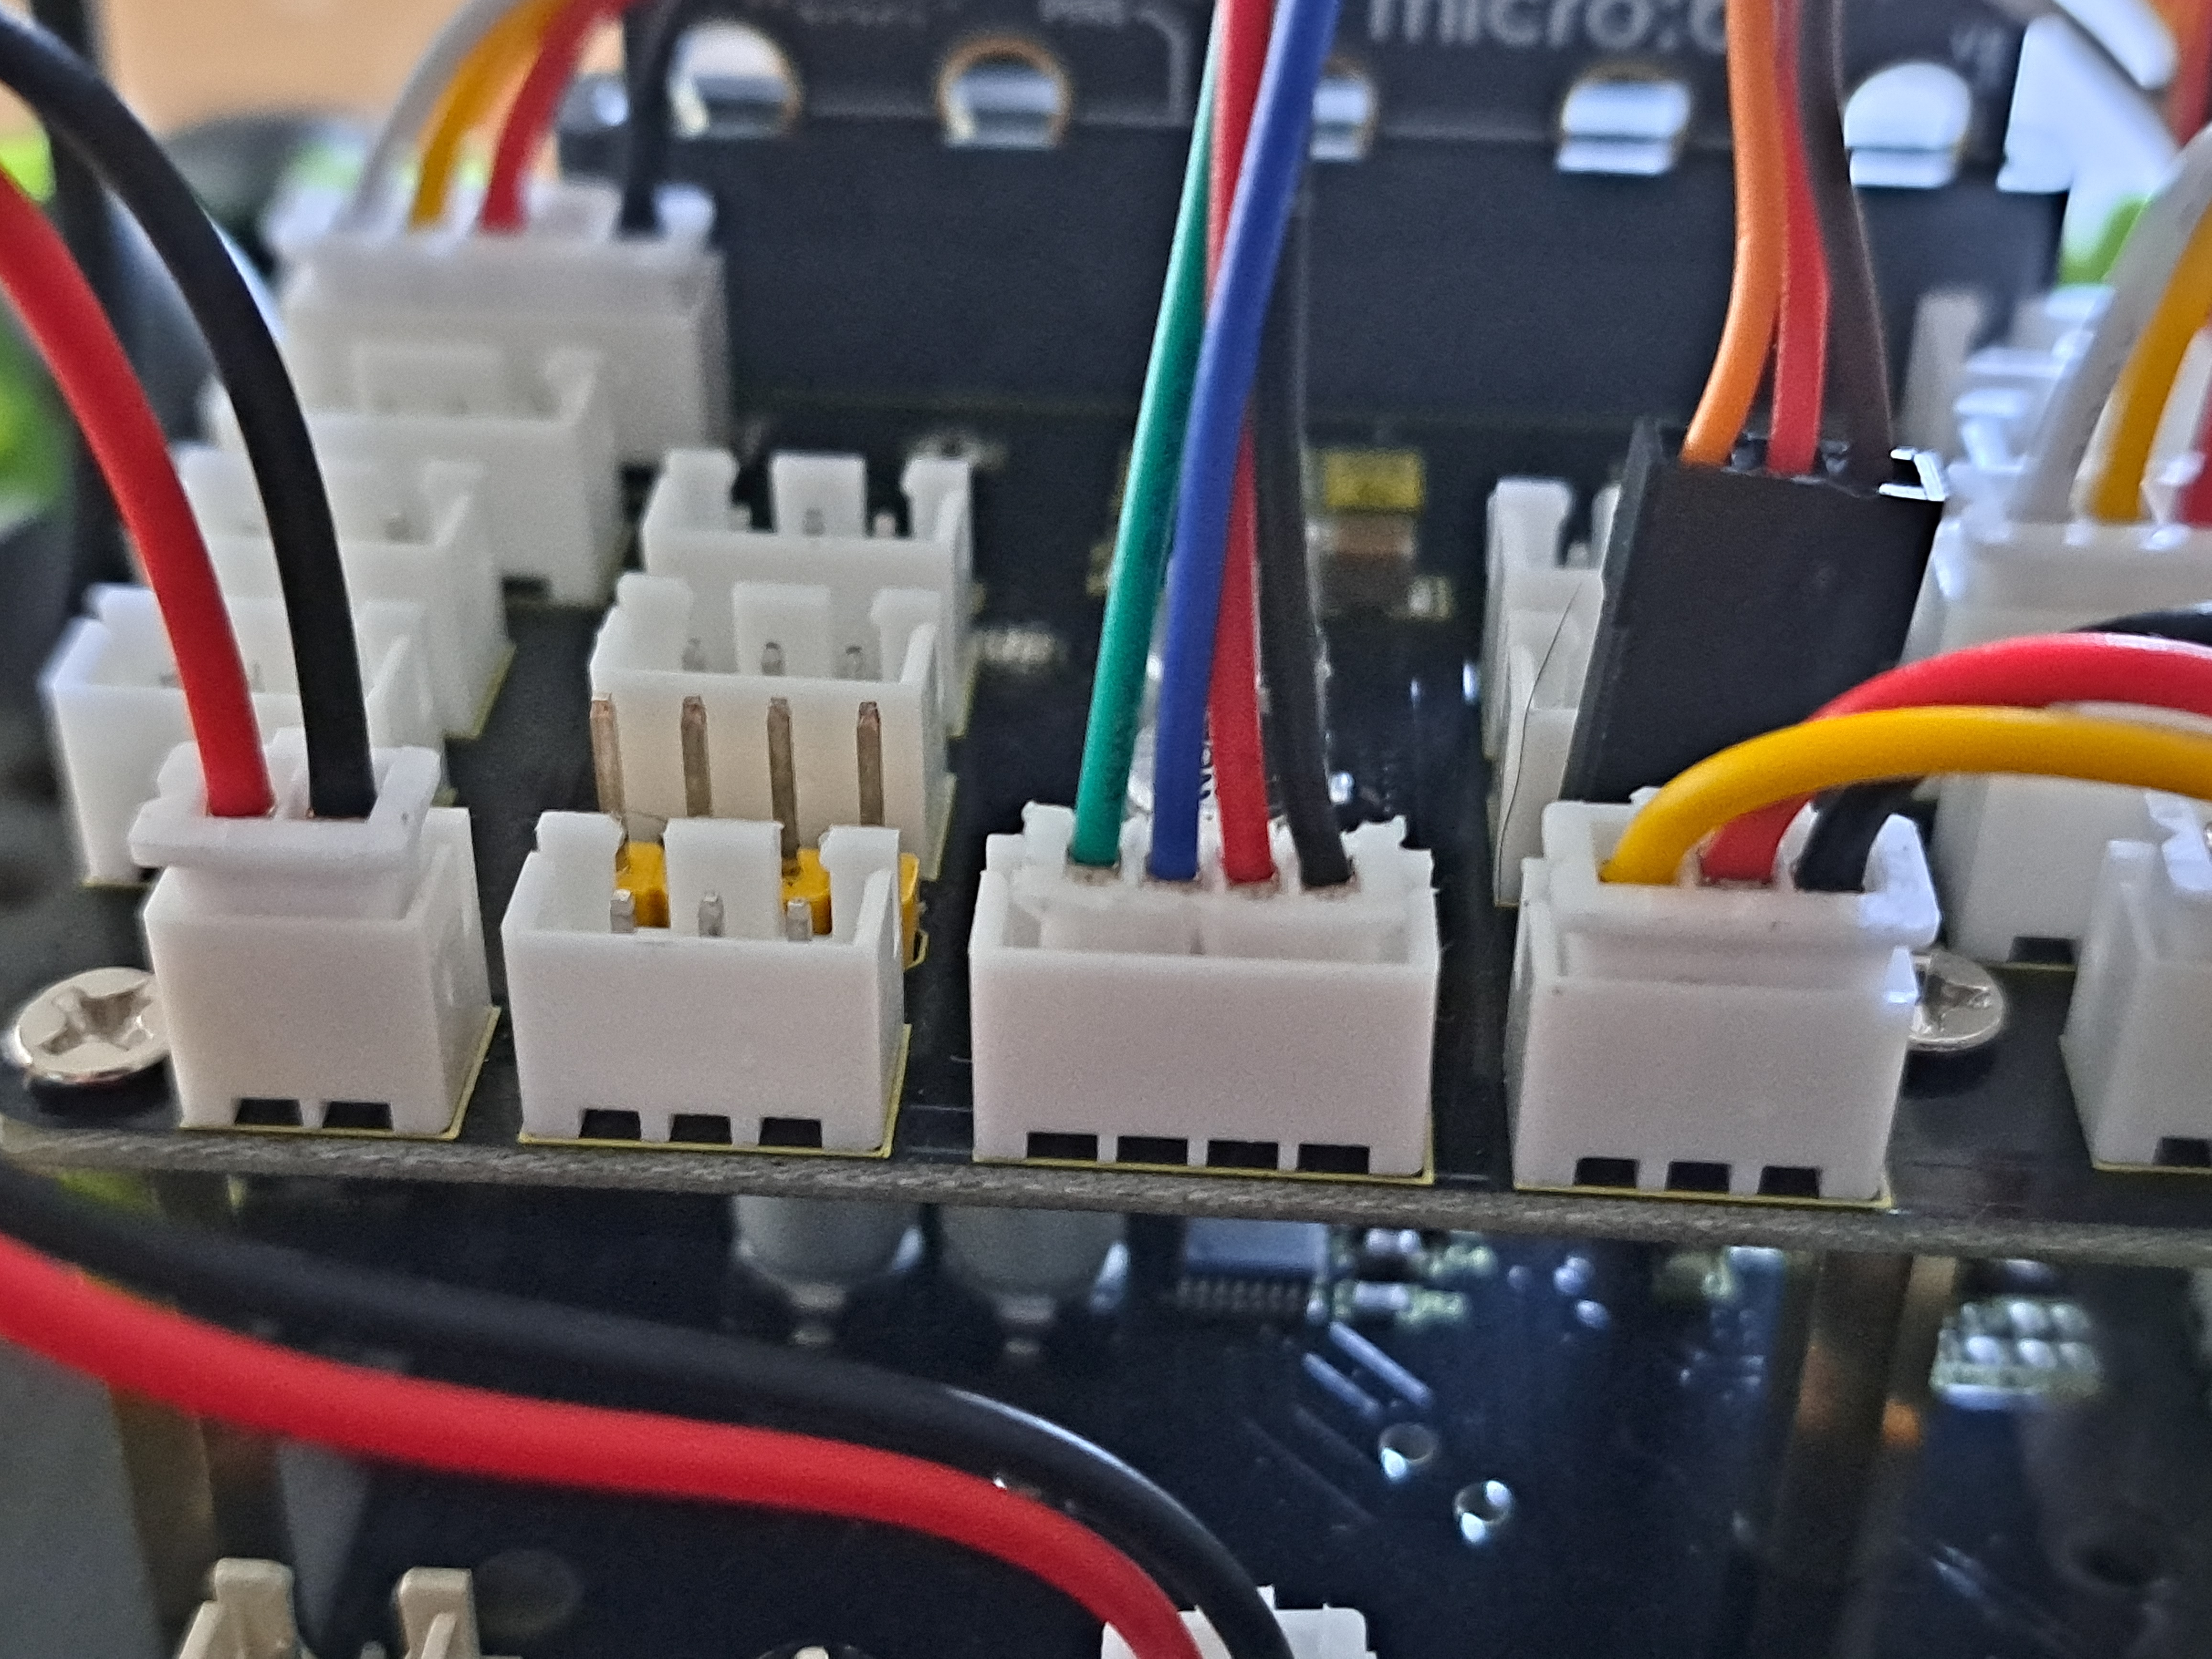
Wiring the robot car is easy. The instruction manual clearly shows how to wire the various components. This kit also has triplet wires which are grouped together in connectors. Therefore, you only have to place one connector, rather than three (or more) individual wires, into the expansion board's very clearly-labelled ports.Some kits may have an error with the ultrasound sensor connector. In my kit, there is a mismatch between the pin spacings in the male and female connectors.

I very carefully cut the connector into 2 sets of 2 pins each. Then the connector(s) fit into the expansion board. Keyestudio is checking to see if this is a one-off issue and changing the connectors if needed.
The completed robot car is shown below. The kit also includes cable ties to tidy the wires, but I did not use them.
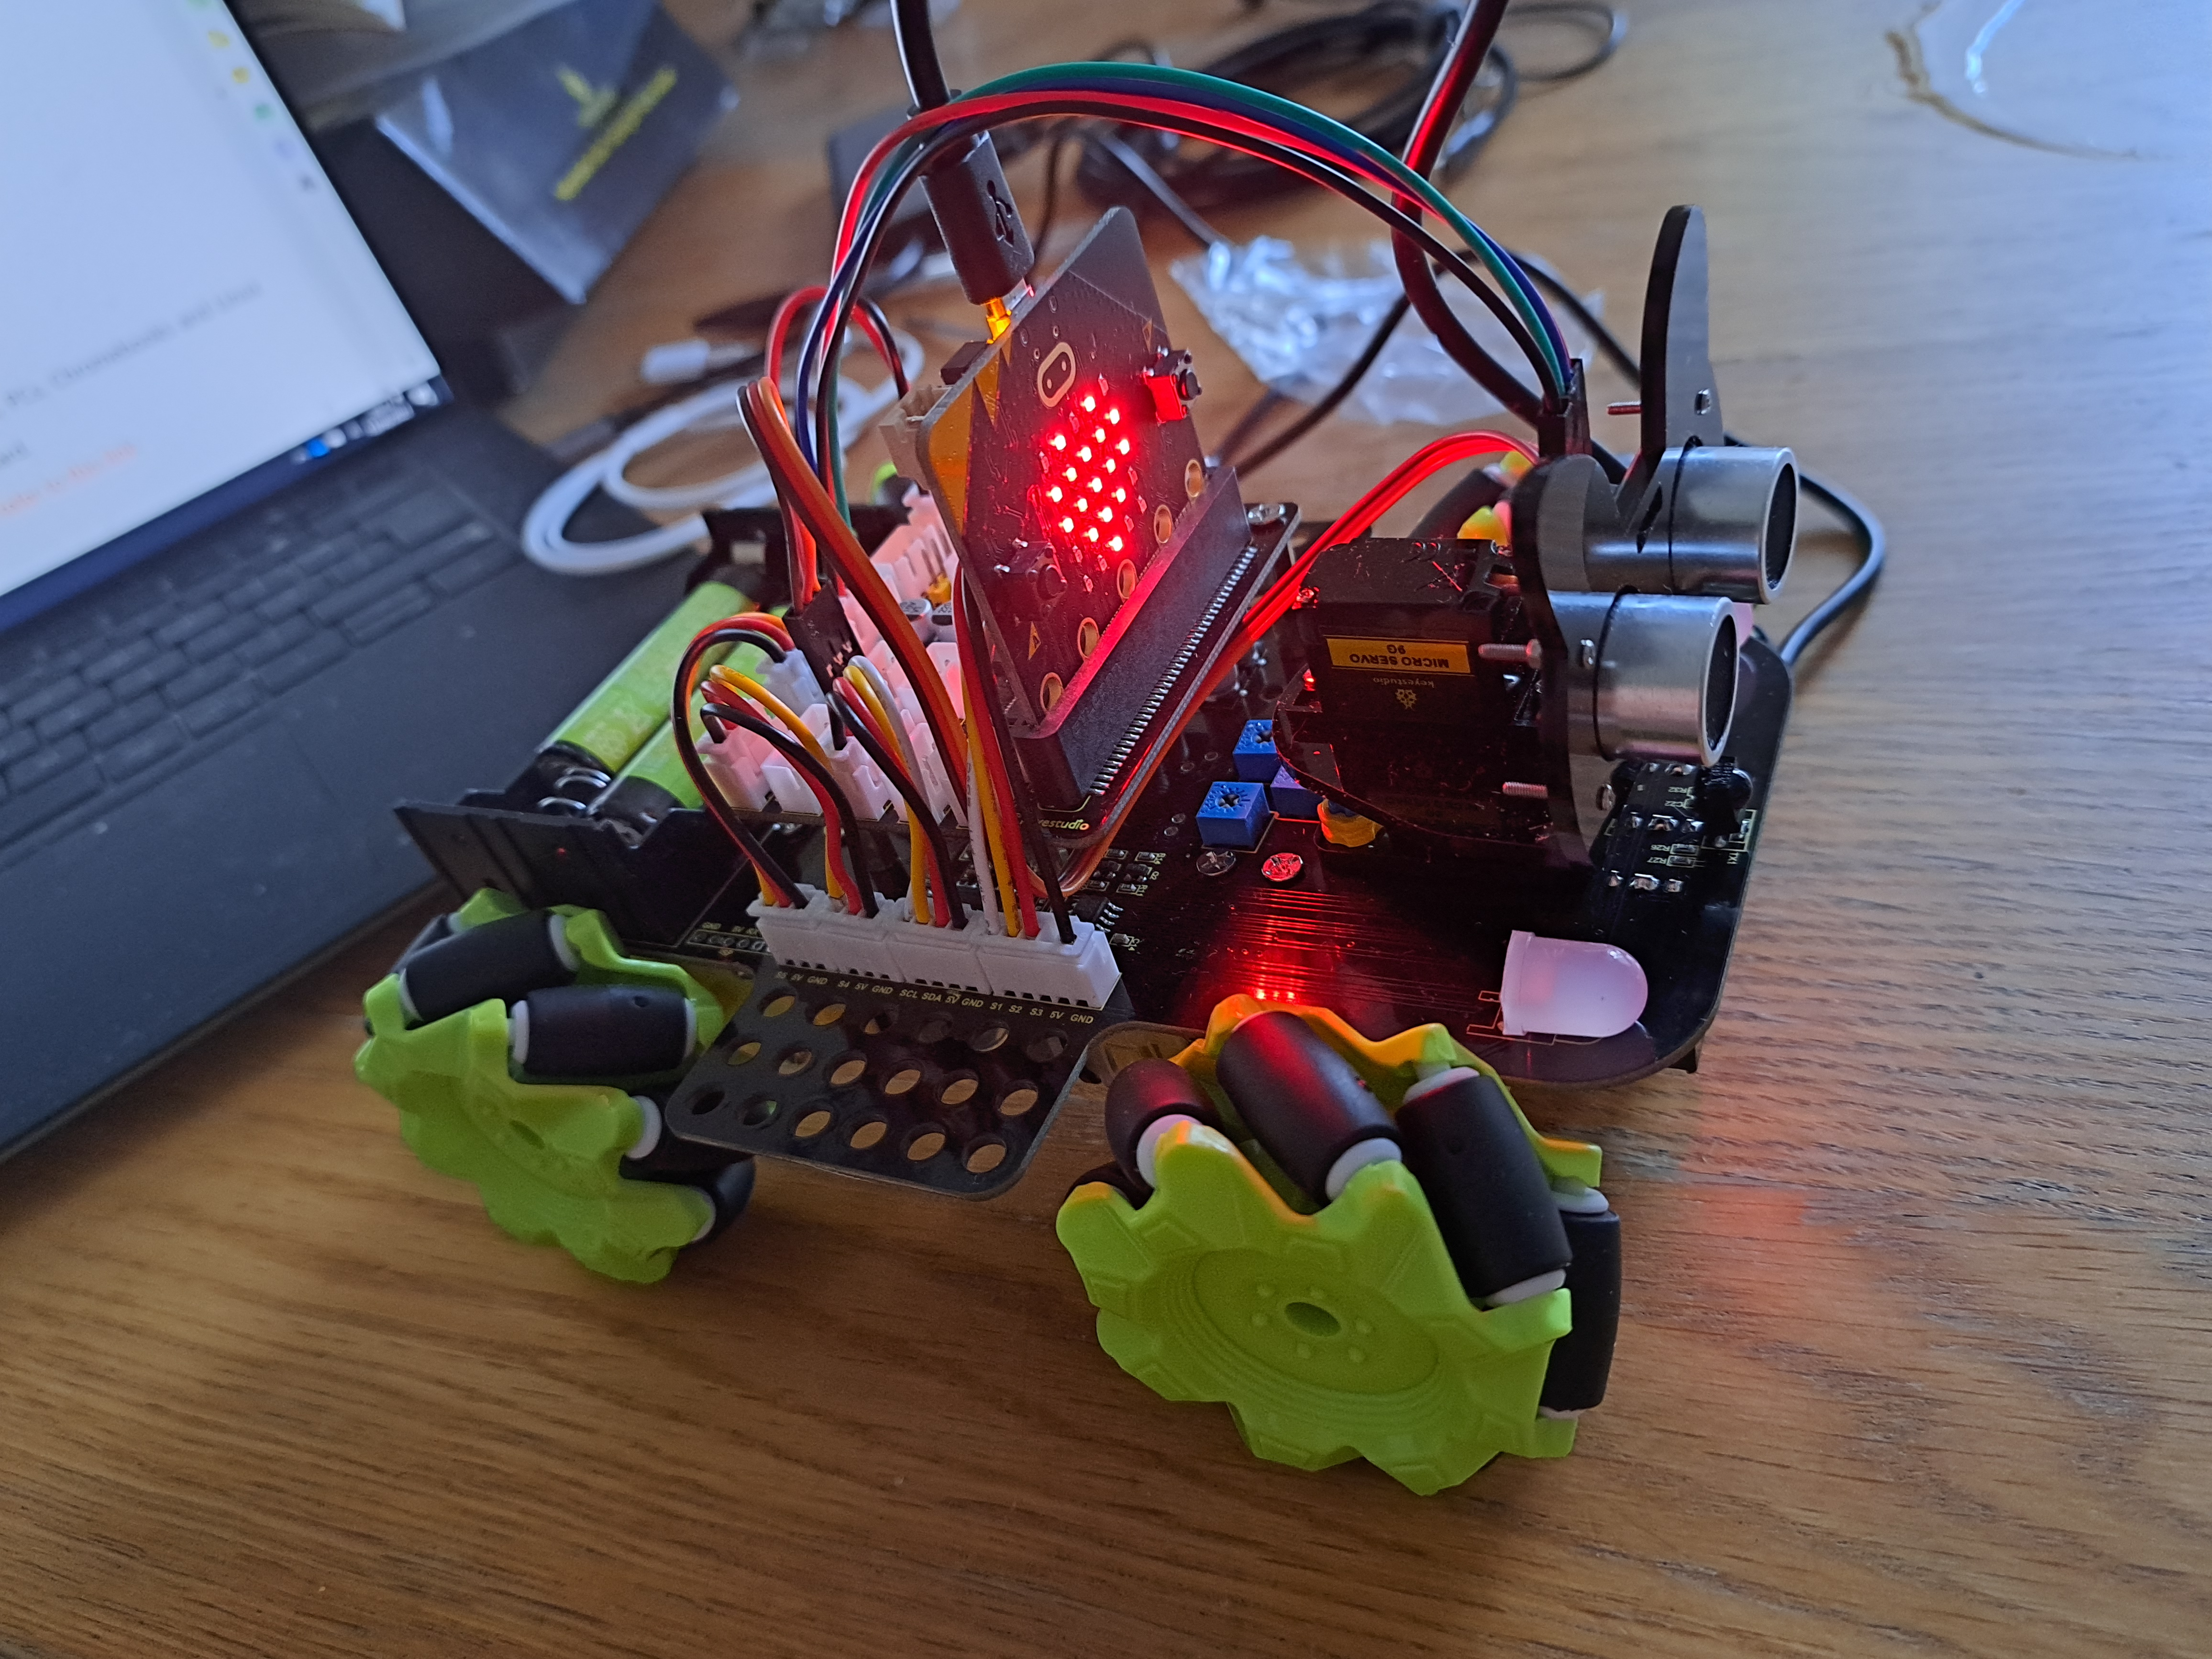
Step 3: Using the Robot Car
The heart of the robot car is the BBC Micro:bit. The Micro:bit has many built-in features: 5x5 LED array, temperature, geomagnetic sensors, accelerometer, light detection, speaker, touch-sensitive logo, microphone, and Bluetooth capabilities. The tutorials explain each feature individually. First, the location of the feature on the Micro:bit is shown. Then code using the feature is both shown in the tutorial and provided in a separate .hex file. I created my own code using MakeCode to learn where the drag and drop buttons are (I didn't try the provided .hex codes). An example of a MakeCode code is shown below.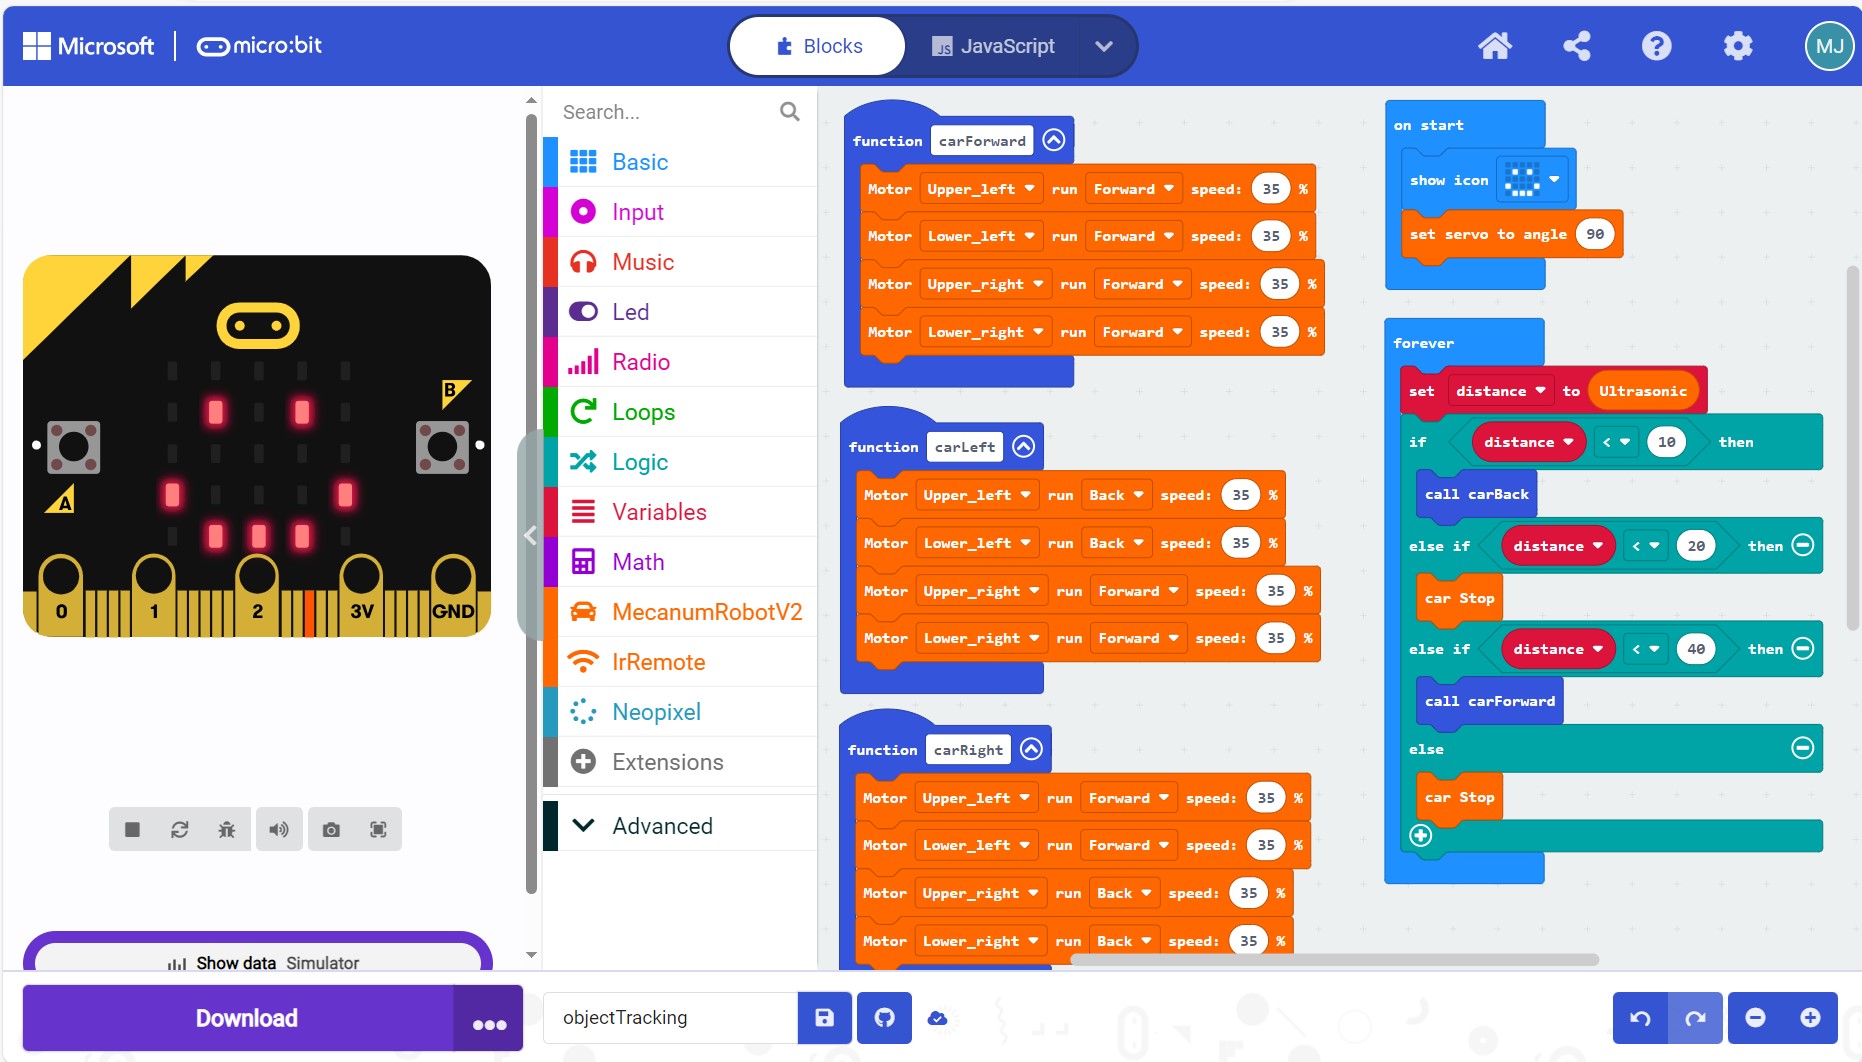
In addition to the Micro:bit's capabilities, this robot car can:
-Control multi-color LEDs under and in front of car,
-Move forward, backward, rotate clockwise, rotate counterclockwise, slide sideways, or use a combination of front/back and sideways,
-Line Tracking, and
-Object Tracking and Object Avoidance.
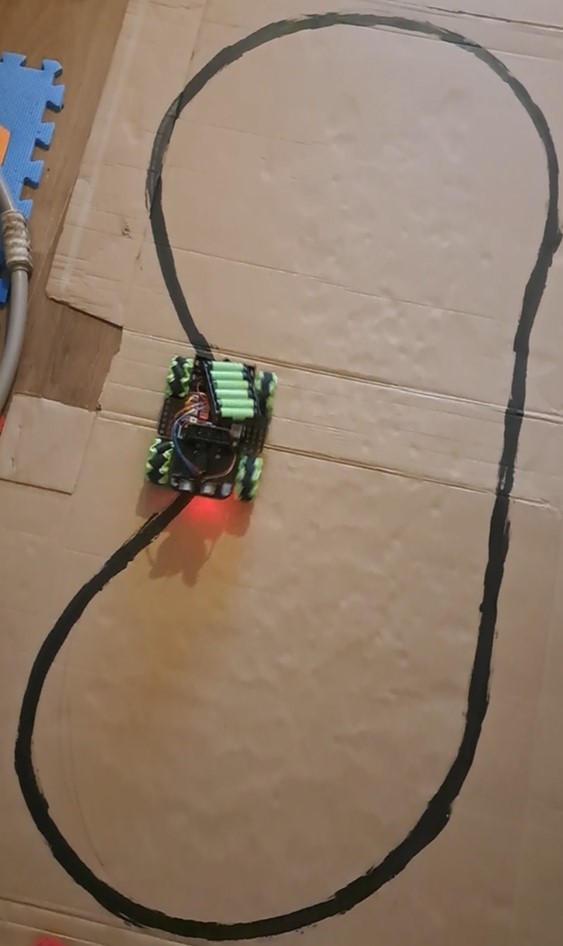
Line Tracking uses 3 infrared sensors on the bottom of the car. Each sensor determines whether it "sees" light or dark. If the middle sensor "sees" dark, the car goes forward. If the right or left sensor "sees" dark, the car rotates in the direction of the sensor which "sees" dark. The sensitivity of the sensors can be adjusted, although Line Tracking works so well that I did not need to change the sensitivity.
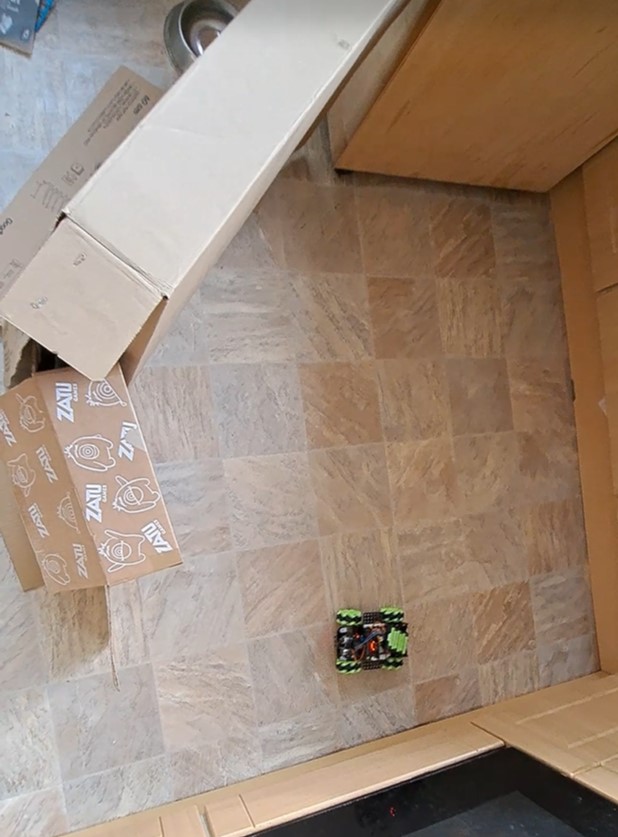
The car uses ultrasound sensors to maintain a certain distance between itself and an object (Object Tracking) or to avoid running into objects (Object Avoidance). For Object Avoidance, when the car comes within a certain, specifiable distance of an object, the servo rotates the ultrasound sensors 90° to the left and to the right, and the ultrasound sensors measure how far the nearest object is in both directions. The car then moves towards the further away object. I created a maze of boxes and let the car "run" around until it found its way out of the maze opening (see below). Both Object Tracking and Object Avoidance work well.
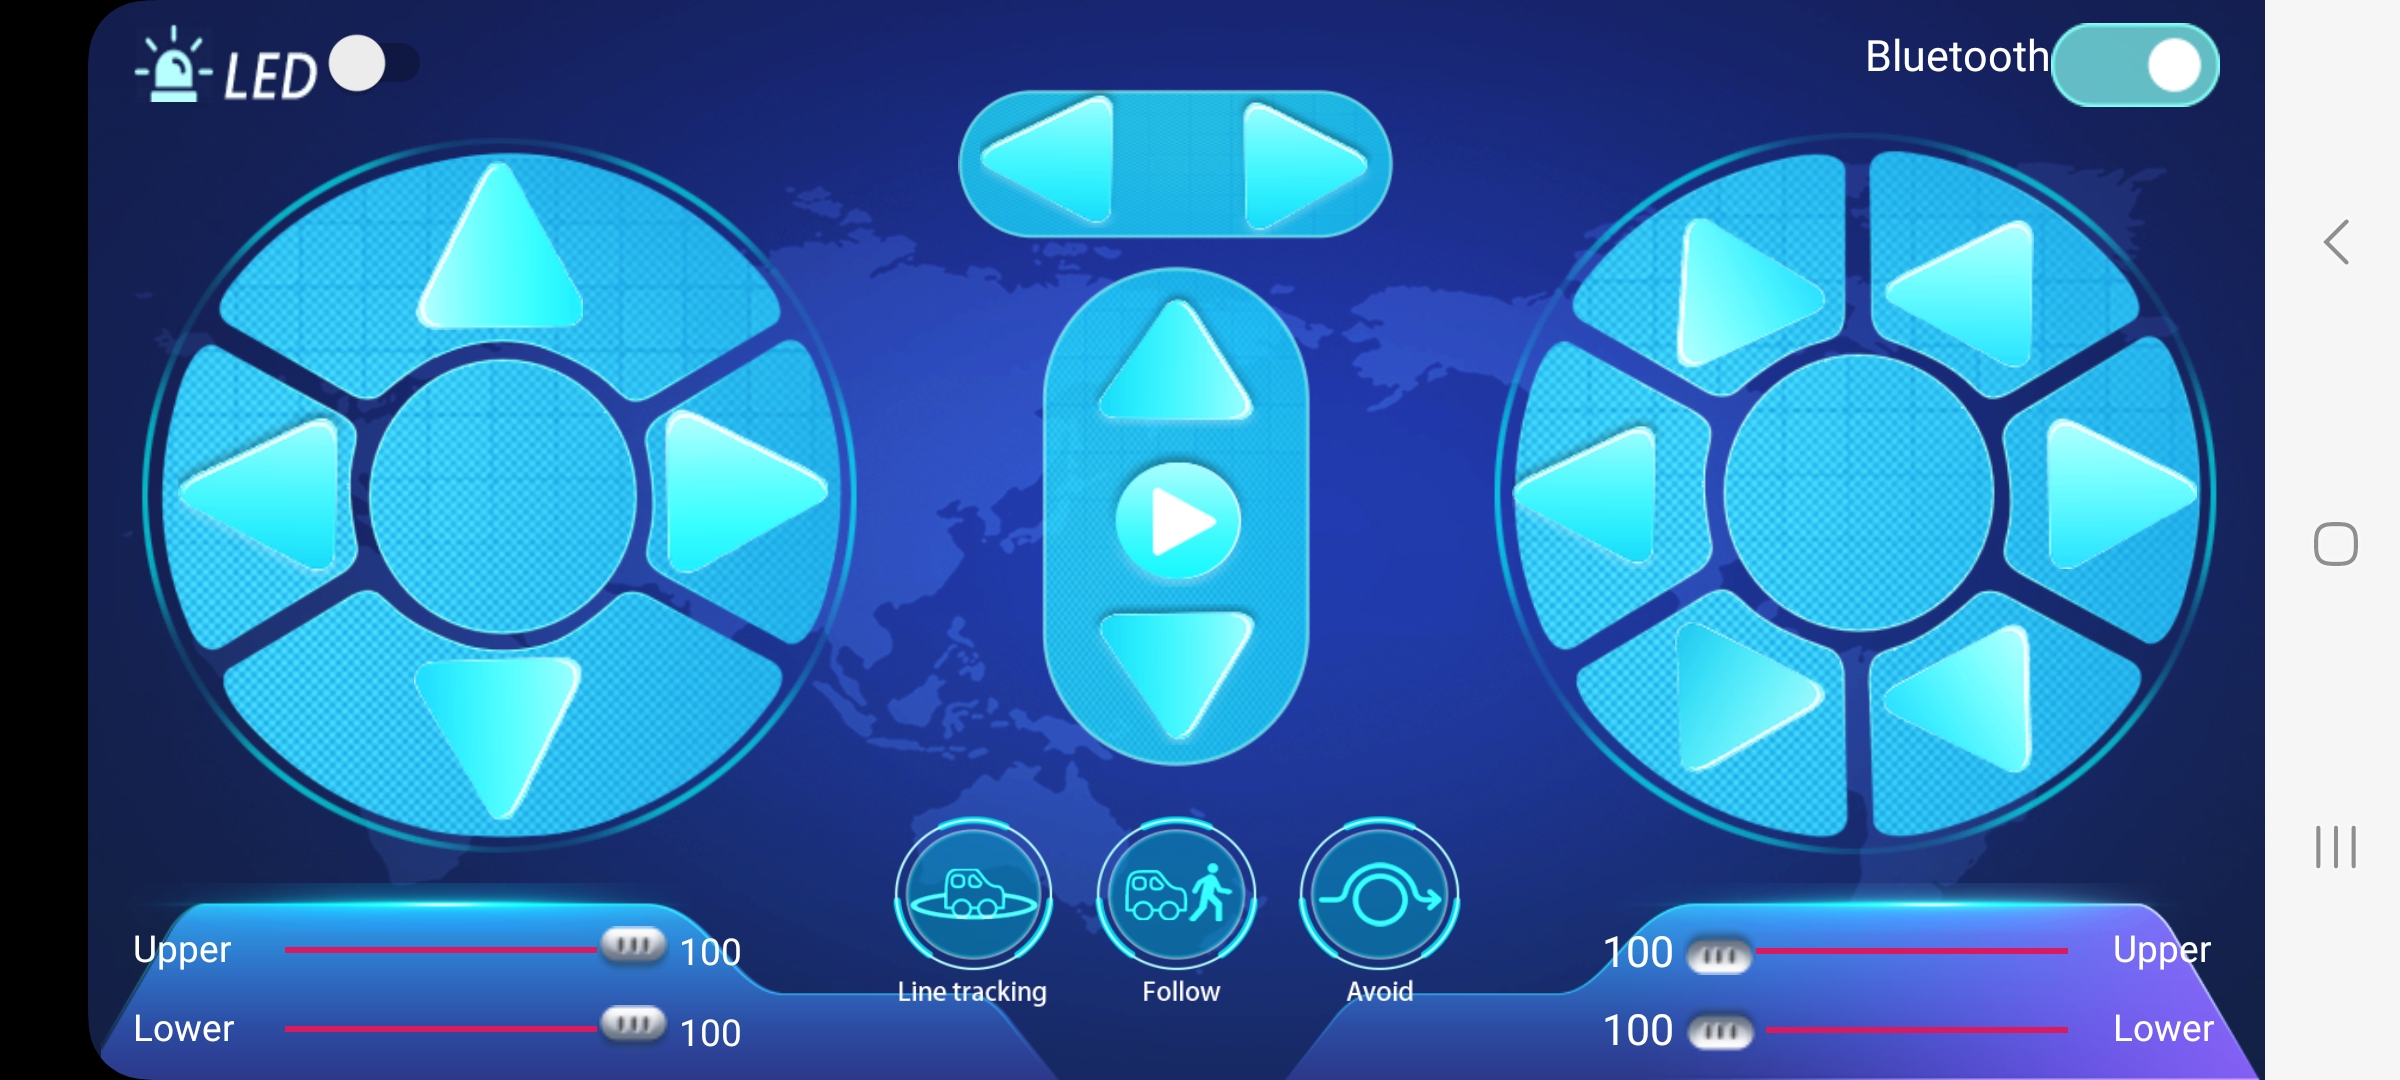
The car can be controlled using an infrared remote control or an App downloaded onto a phone. To use the infrared remote control (Project 19), change the code to "call" Pin 0 (P0) rather than Pin 9 (P9). To download the App, use the APK link provided in the manual. The App is easy to download and install. The App is also intuitive to use and allows you to control the various features of the robot car. (Project 12 says the car can also be controlled using Bluetooth without the App but this never worked on my Android phone.)
There are 2 keys to successfully using the Micro:bit robot car.
1. Extensions to MakeCode. The extensions available on this website need to be downloaded into almost every MakeCode program. The extensions provide commands and variables specific to the robot car, for example, controlling the speed of the wheel motors and saving the distances measured by the ultrasound sensors. Bookmark this website now as you will need it a lot!
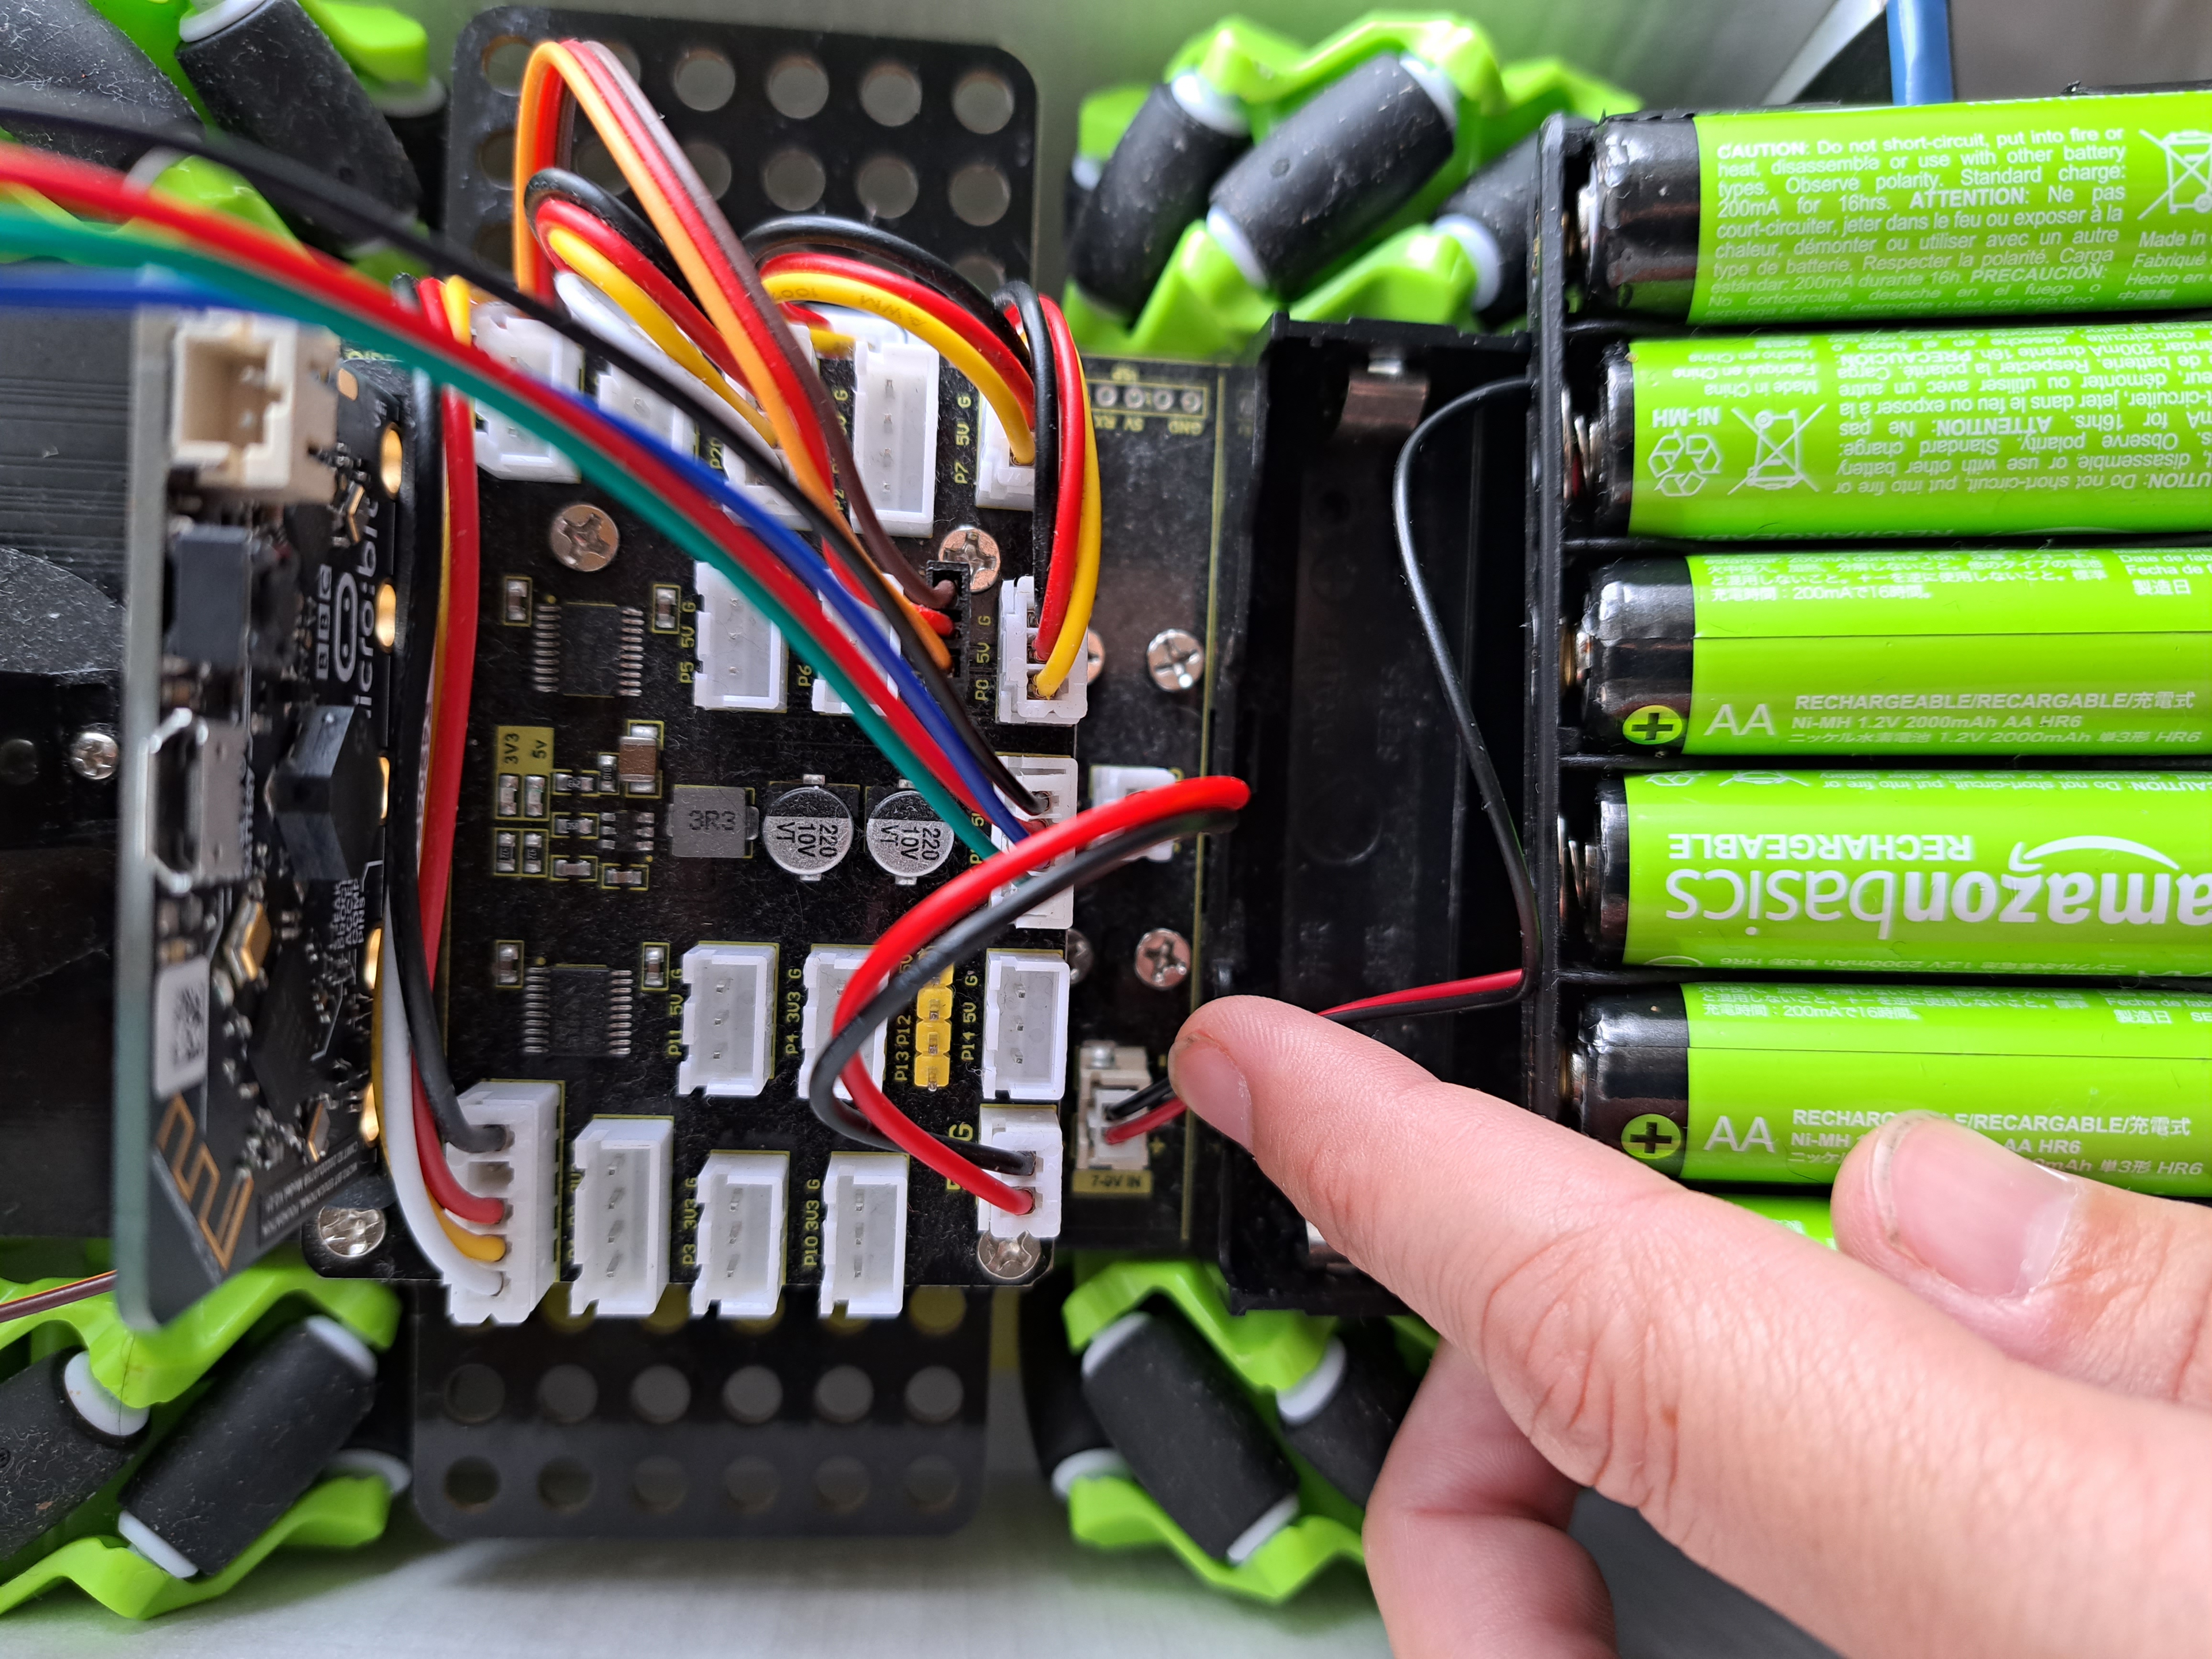
2. External batteries. The kit comes with a battery pack for 2x18650 lithium batteries (batteries not included in kit). I wanted to use rechargeable AA batteries instead. The battery pack in the kit does not seem to connect to the rest of the car, however, so never provides power. I used a 6xAA battery pack from another kit, connected into the 7-9V port shown below.
A Final Overview!
Things I really liked:-Driving the car, especially using the App and especially in the combination directions!
-Learning principles behind (one approach to) Line Tracking, Object Tracking, and Object Avoidance.
-Learning about the Micro:bit and MakeCode.
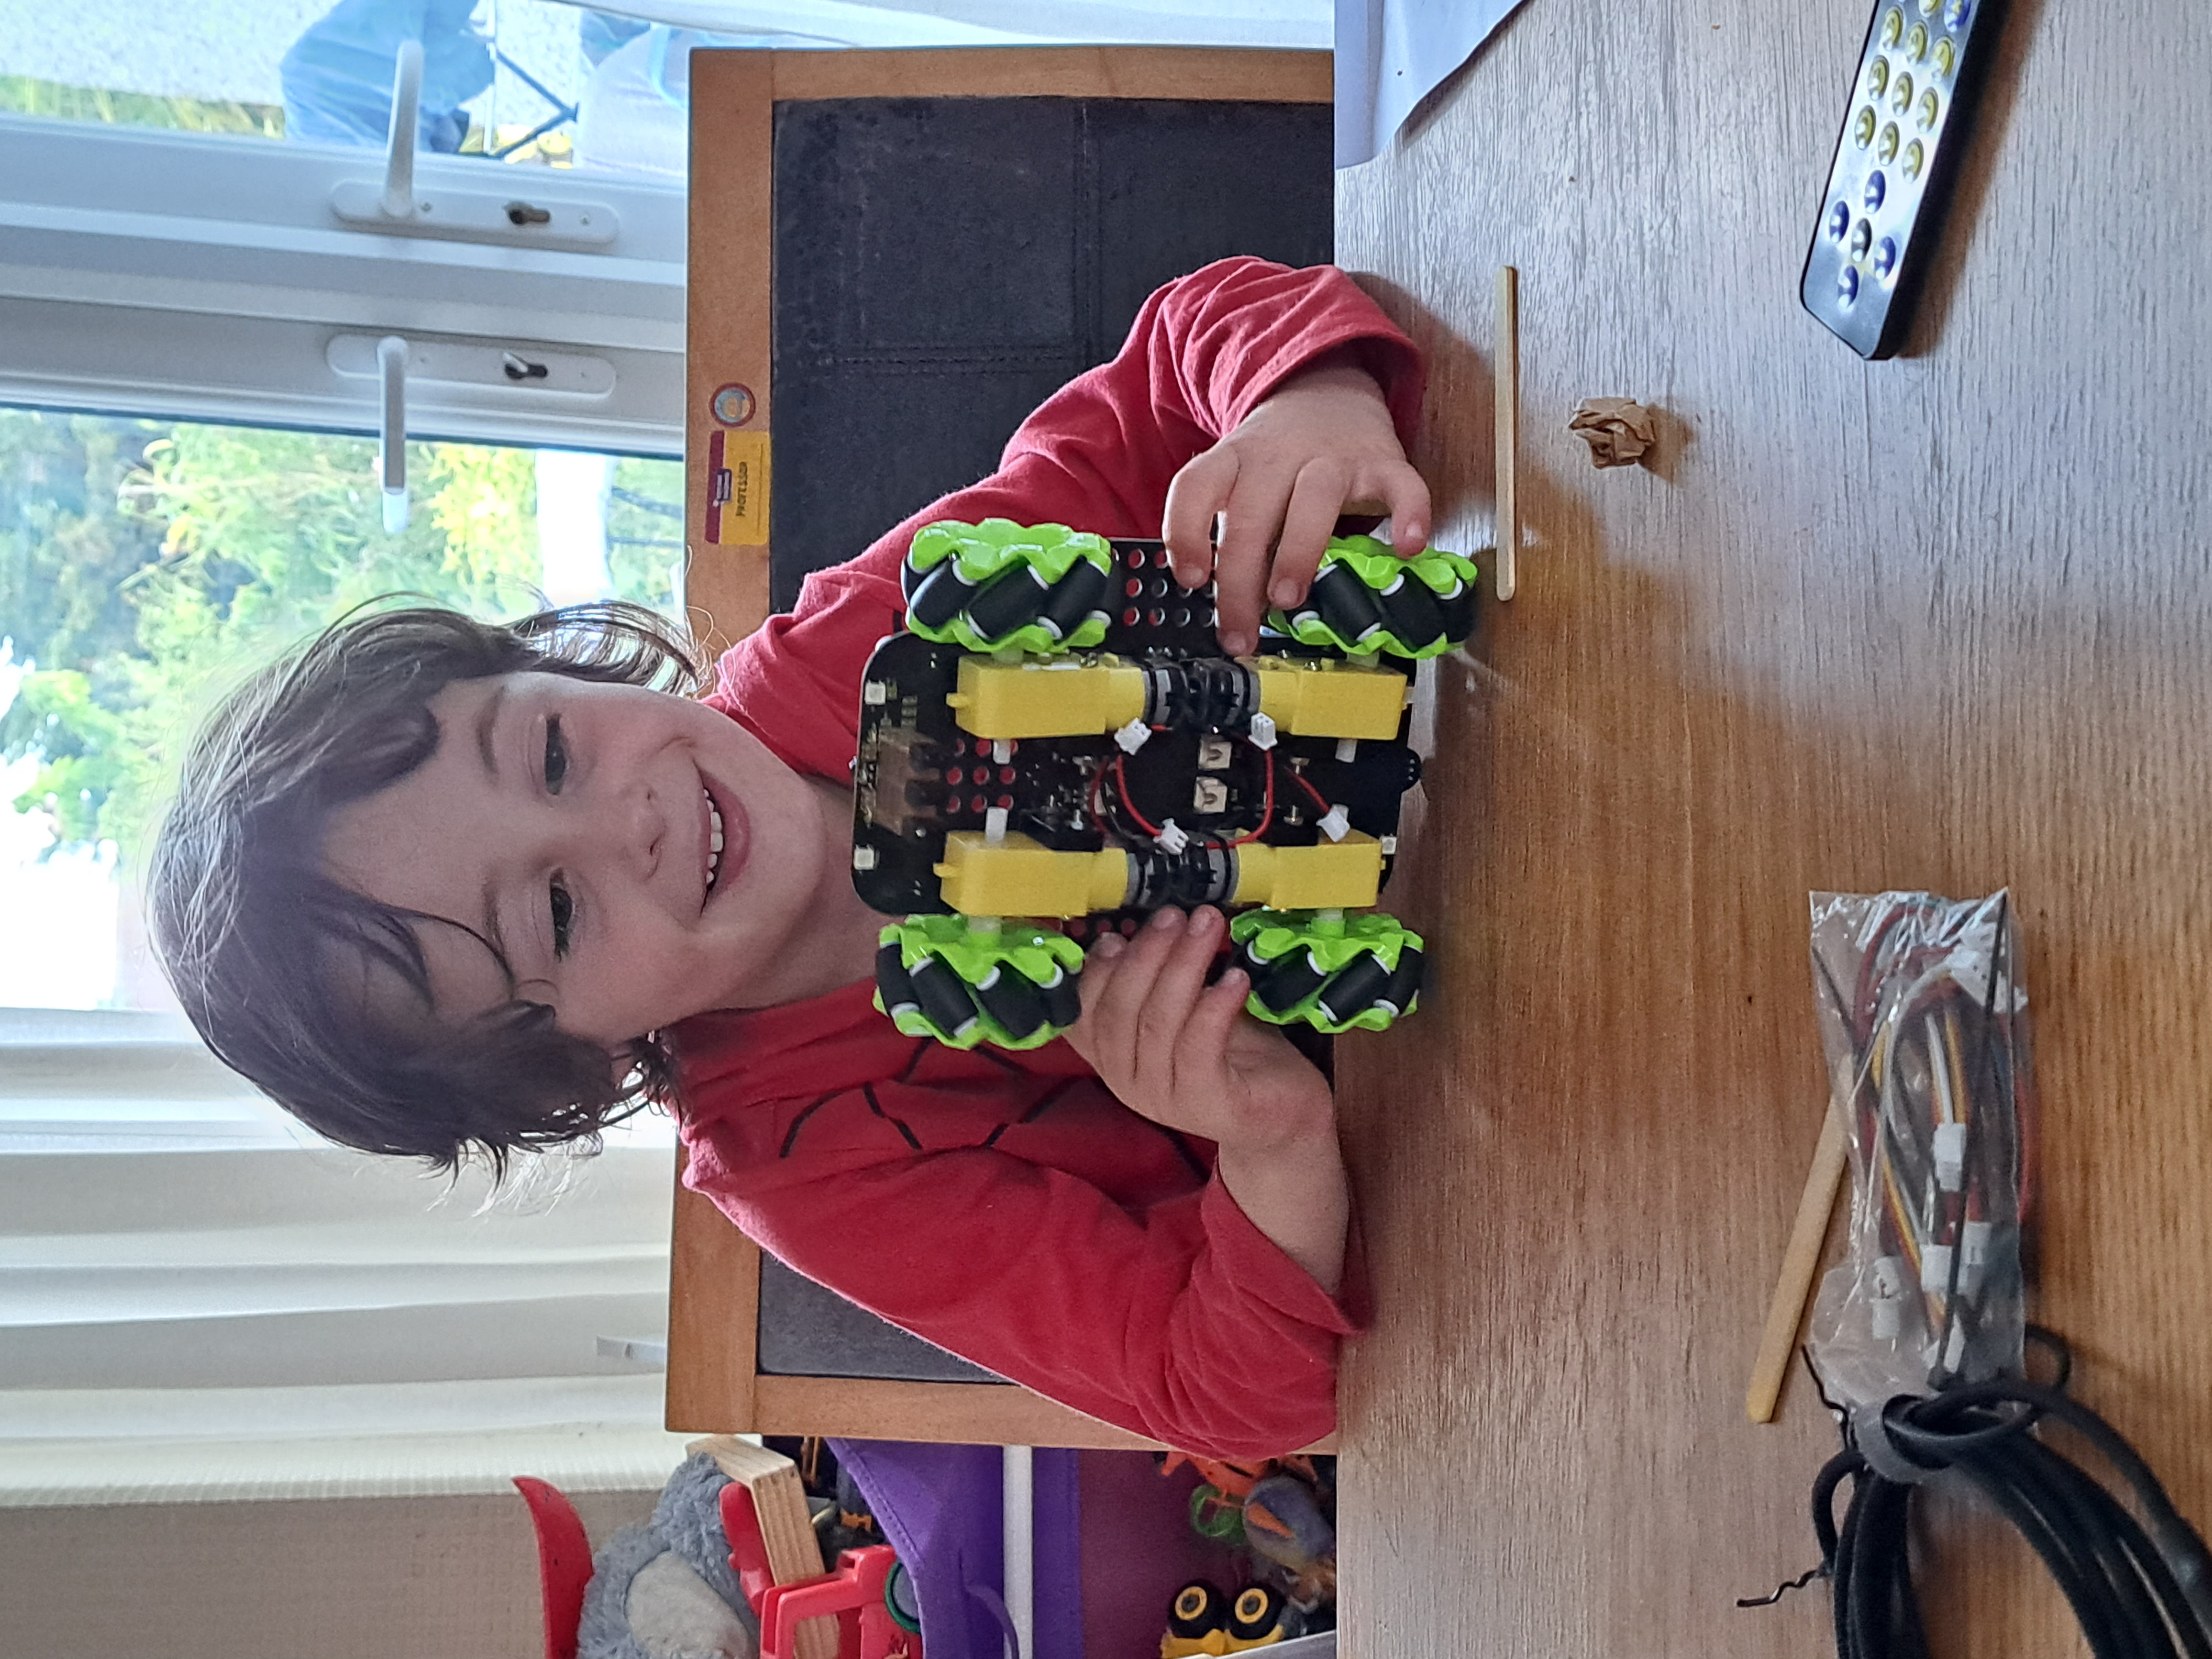
-Involving my kids in the project - letting them drive the car and teaching them how the car works.
Things I suggest improving:
-Rearranging the instruction manual to introduce some topics in a different order.
-Ensuring any mismatches between male and female connectors are fixed.
-Including the 6xAA battery pack as in the Arduino car KS0470, rather than the 2x18650 lithium pack (and ensure pack powers the car).
-Explain in Project 12 how to use Bluetooth with Android phones, not just with Apple phones.
This is great kit for anyone who wants to build and use a robot car without the hassle of understanding Arduino code! It is also a nice kit for anyone interested in learning about the Micro:bit.
Other Articles:
|
Moon FormationA Kotlin N-Body code, and lots of animations of the collision between Earth and a hypothetical Theia that people think created the moon. |
|
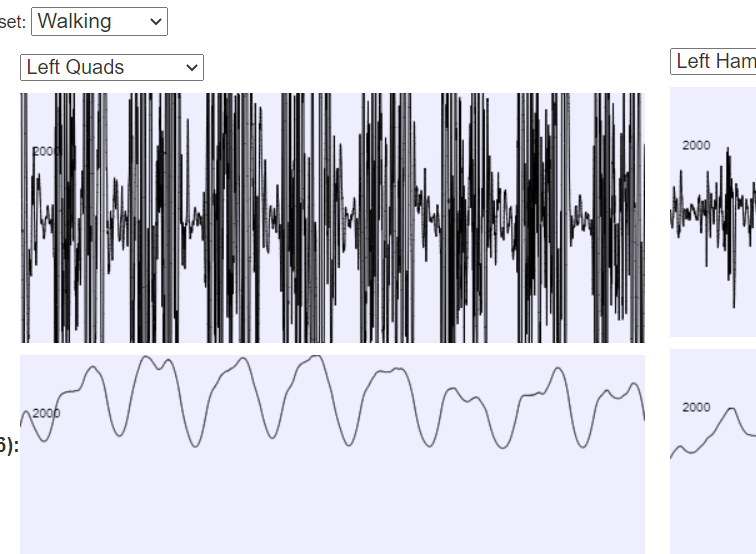
BodyWorks: EMG AnalysisA page with a javascript application where you can interact with EMG data using various filters. |