Review of Keyestudio's Smaller Micro:bit Smart Robot Car KS4036F
By Dr Jennifer Martay PE, Course Leader for Medical Engineering at Anglia Ruskin University
Kit received for free in exchange for feedback. This review contains my independent opinions, with no influence from Keyestudio.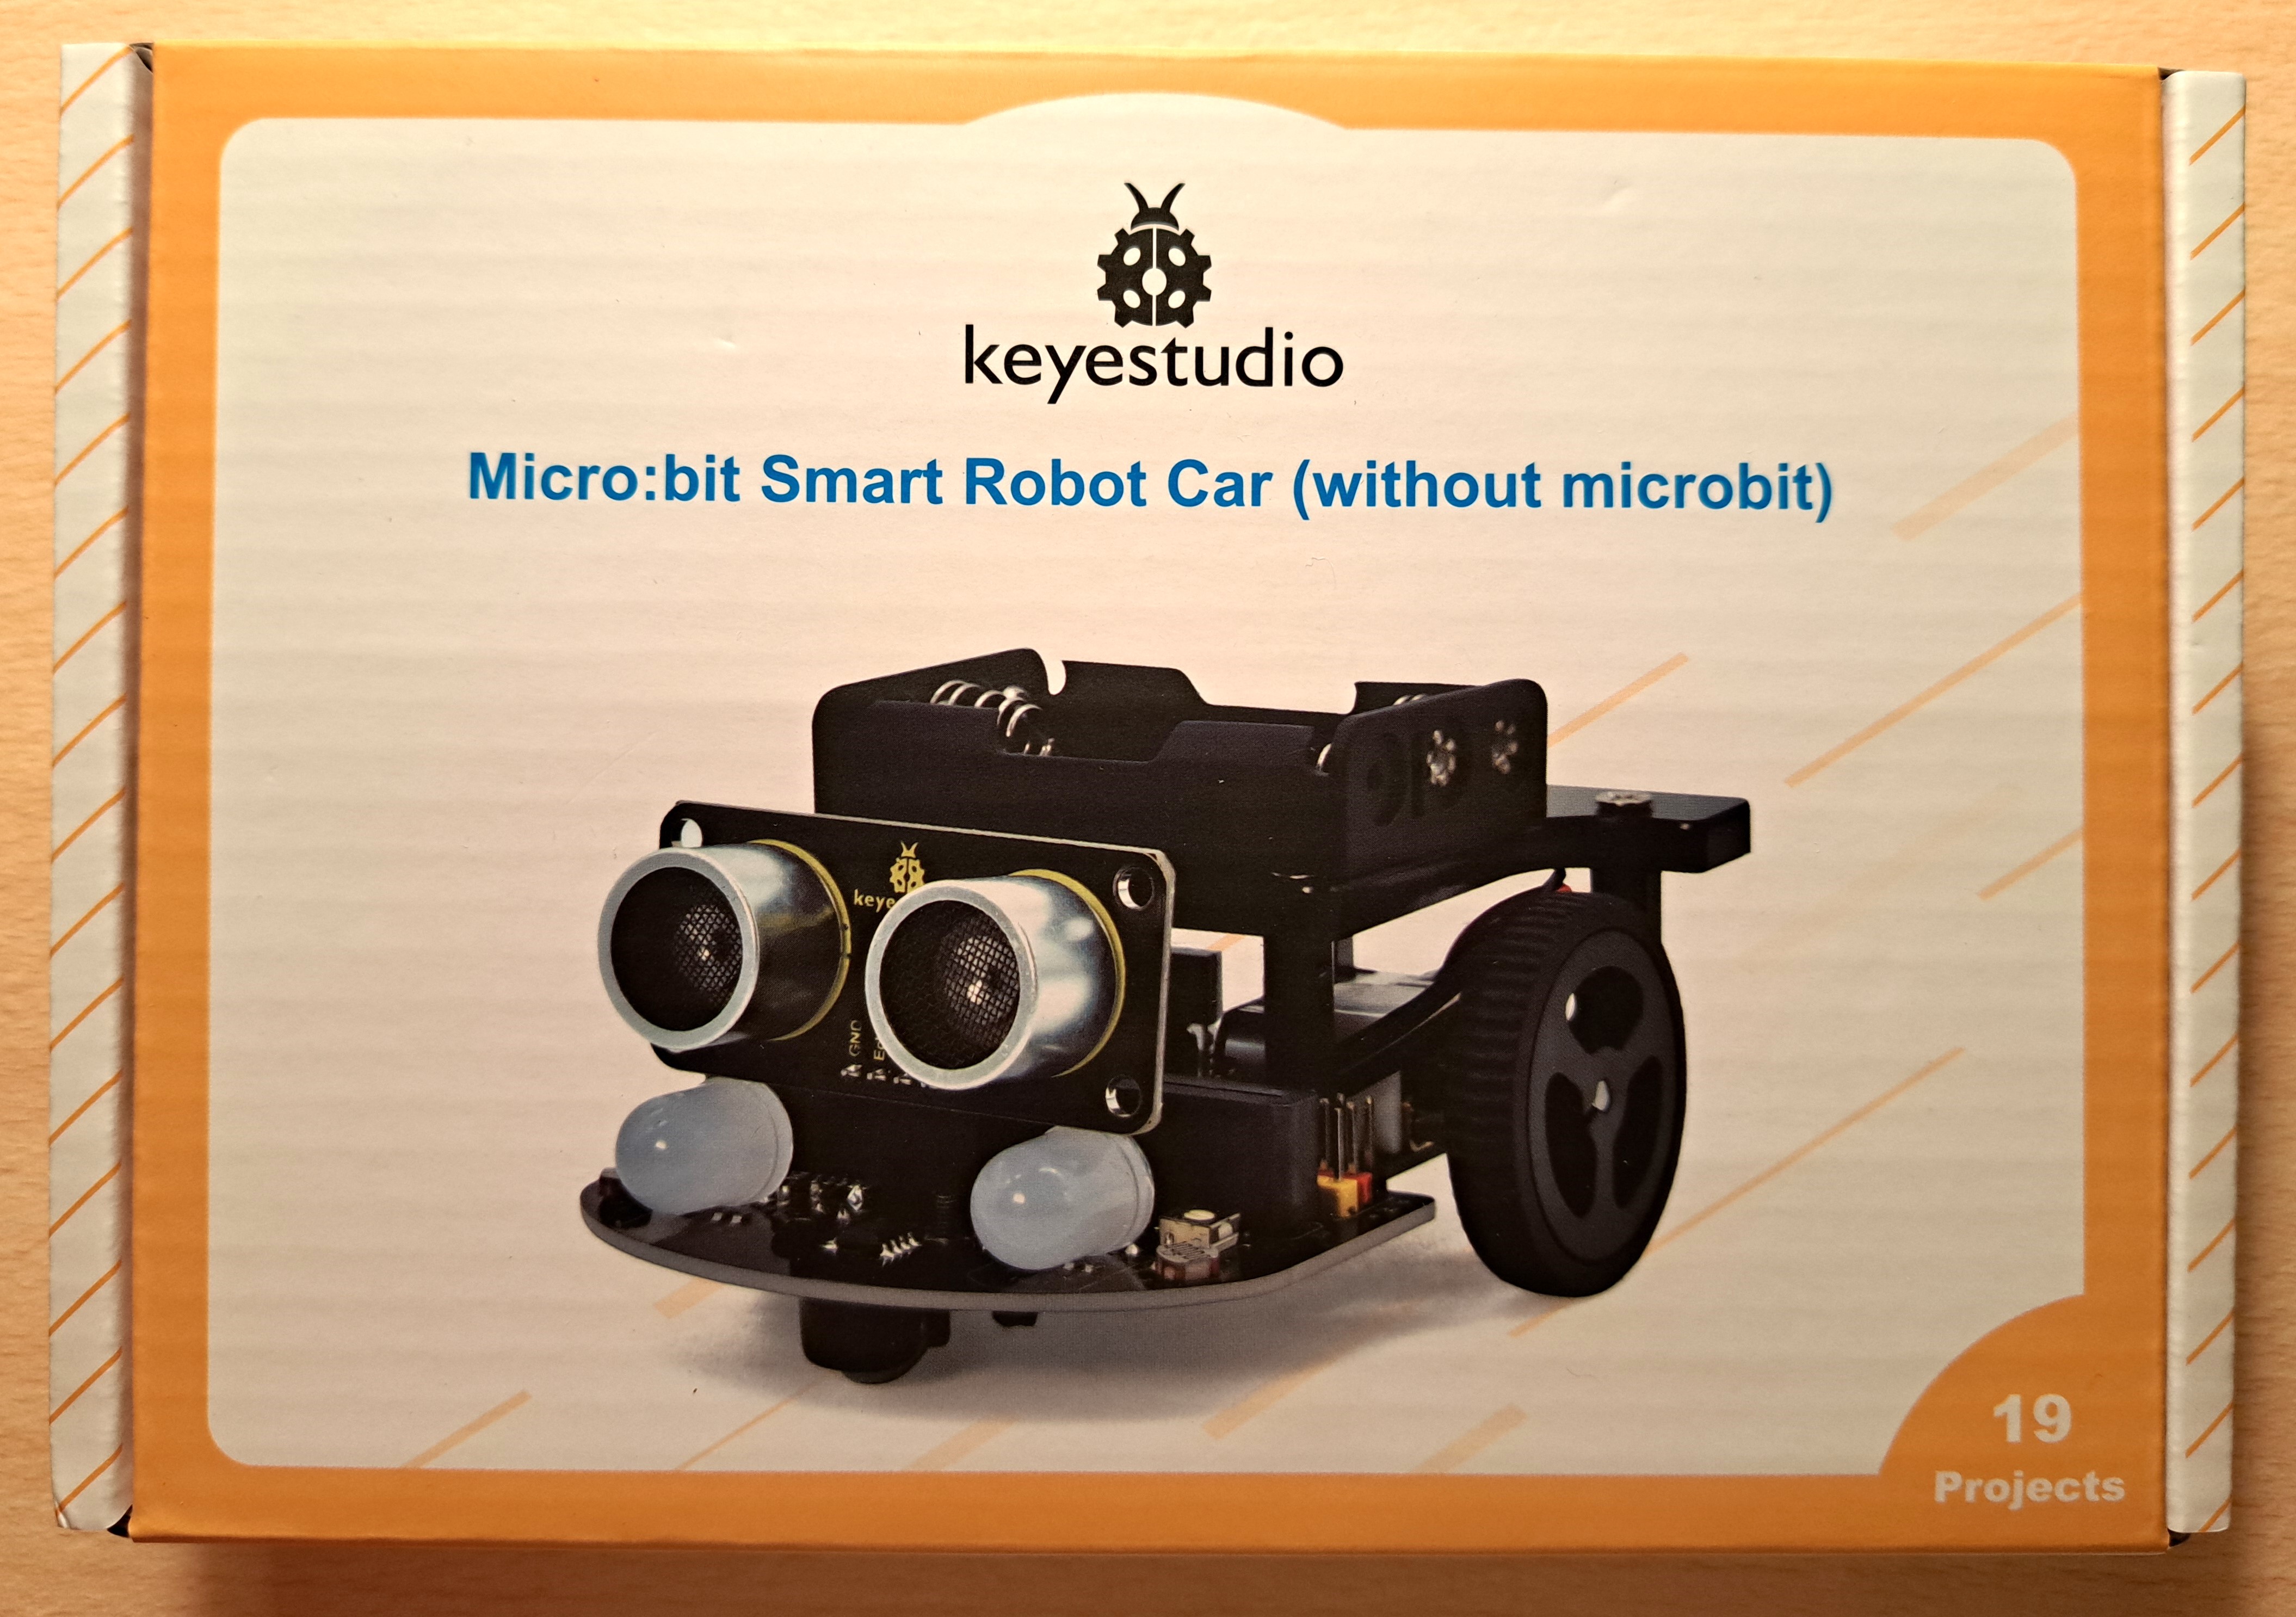
I am a Biomedical Engineer, interested in all things engineering and building up my electronics skills. This is my fifth Keyestudio
kit I've put together, and my third robot car. Here is my review of
the Arduino Robot Car, and here is my review of the bigger Micro:bit
Robot Car.
What did I think about this kit?
This kit creates a relatively small robot car, which suggests to me that the kit is aimed
at people who are mostly interested in learning about the Micro:bit, with the robot car being a nice addition rather than
the focus. Strangely, however, the kit does NOT come with a Micro:bit! Therefore, the kit feels like it's aimed at people
who are mostly interested in learning about the Micro:bit - and also already have a Micro:bit. It doesn't seem like many
people would fit this category. Perhaps, schools would enjoy these kits: each student group could build their own car - and
share a single Micro:bit between the class?
Moving on, though! This kit says it has many of the same features of Keyestudio's other robot cars, although half
would not work for me:
-use LEDs to create colors: Worked well
-use ultrasound sensors to Object Track and Object Avoid: Worked well as long as object is close to the floor/sensors
-use infrared sensors for Line Tracking: Did not work at all
-use Micro:bit for Light Tracking: Worked well
-be controlled by infrared remote control (move forward or backward, turn left or right, stop): Worked well
-be controlled by Bluetooth from mobile phones: Did not work at all (for Android phone)
-be controlled by downloaded Keyes app (move forward or backward, turn left or right, stop, control LEDs in front of
car, Line Track, Light Track, Object Avoid, Object Track): Did not work at all, installed fine but then did nothing
Due to the relatively small car and many of the features not working, I'd suggest not buying this kit and instead
buying and building the bigger Micro:bit
robot car.
For more details, watch the video below and/or keep reading!
First Impressions
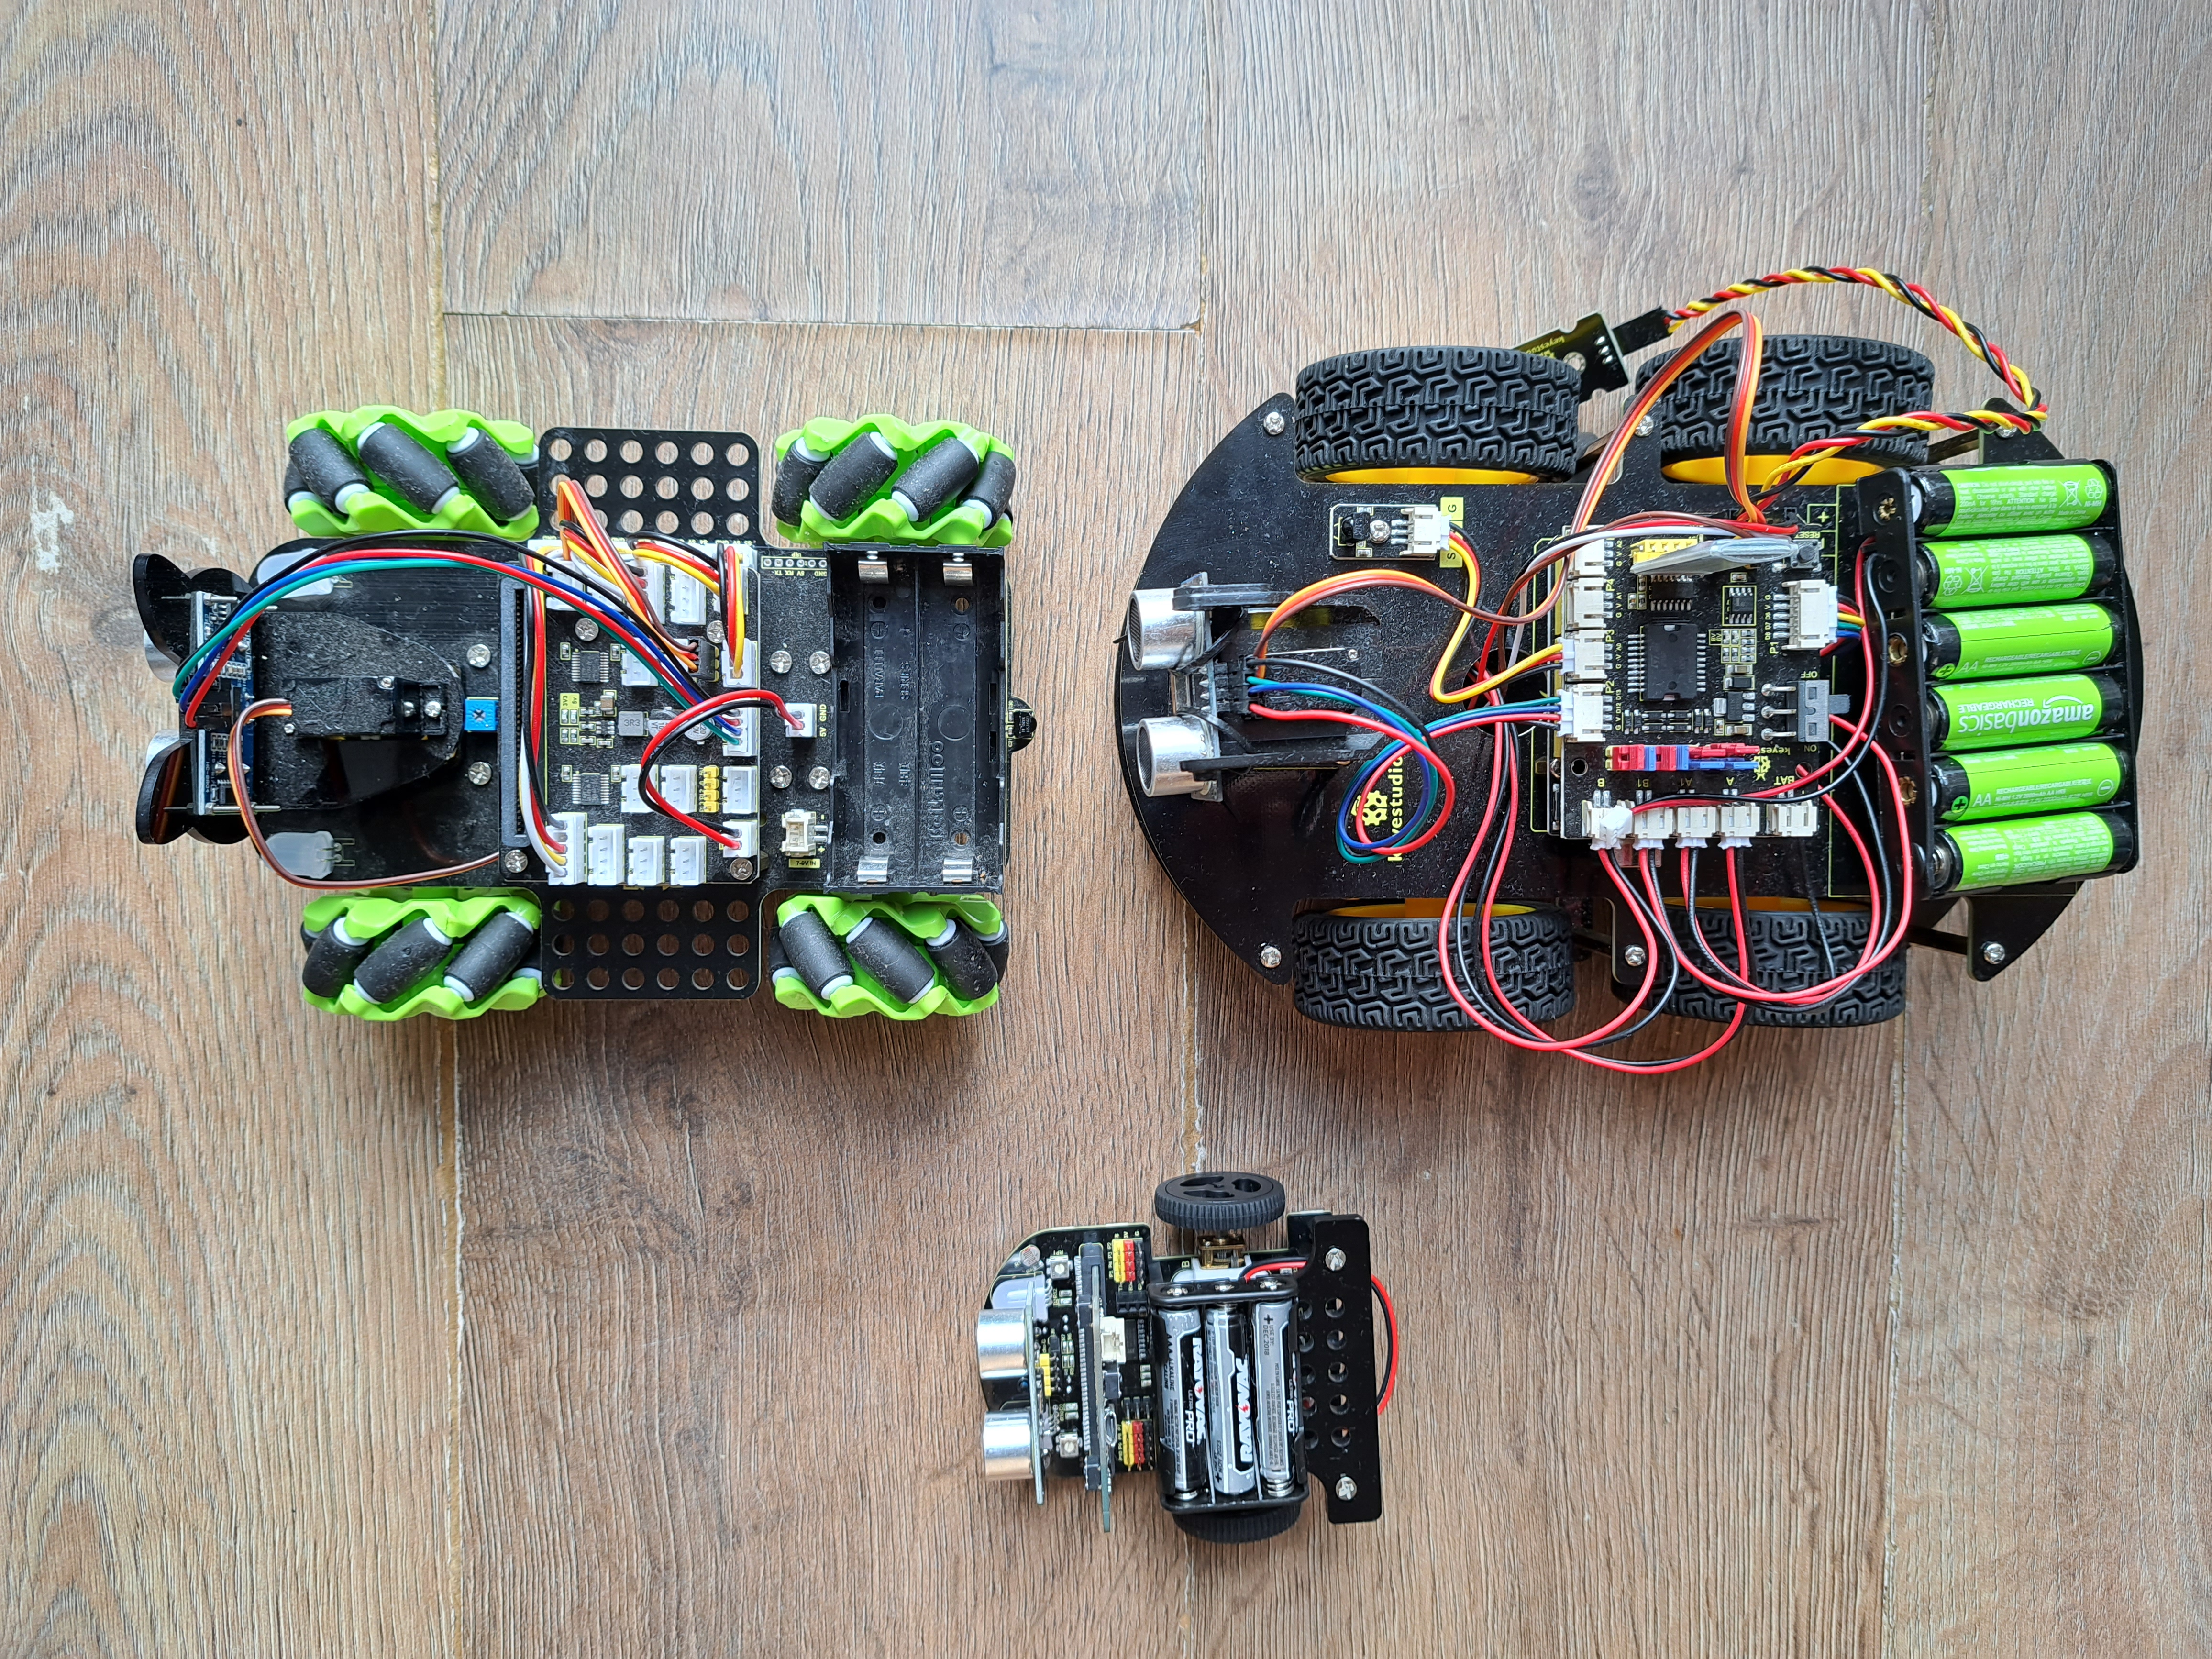
Be aware: This kit is noticeably smaller than other Keyestudio kits. This kit has comparitively fewer sensors, and the final car is also smaller. The biggest car is the Arduino-based KS0470. The medium car is the Micro:bit Mecanum KS4034F. The smallest car is this Micro:bit KS4036F.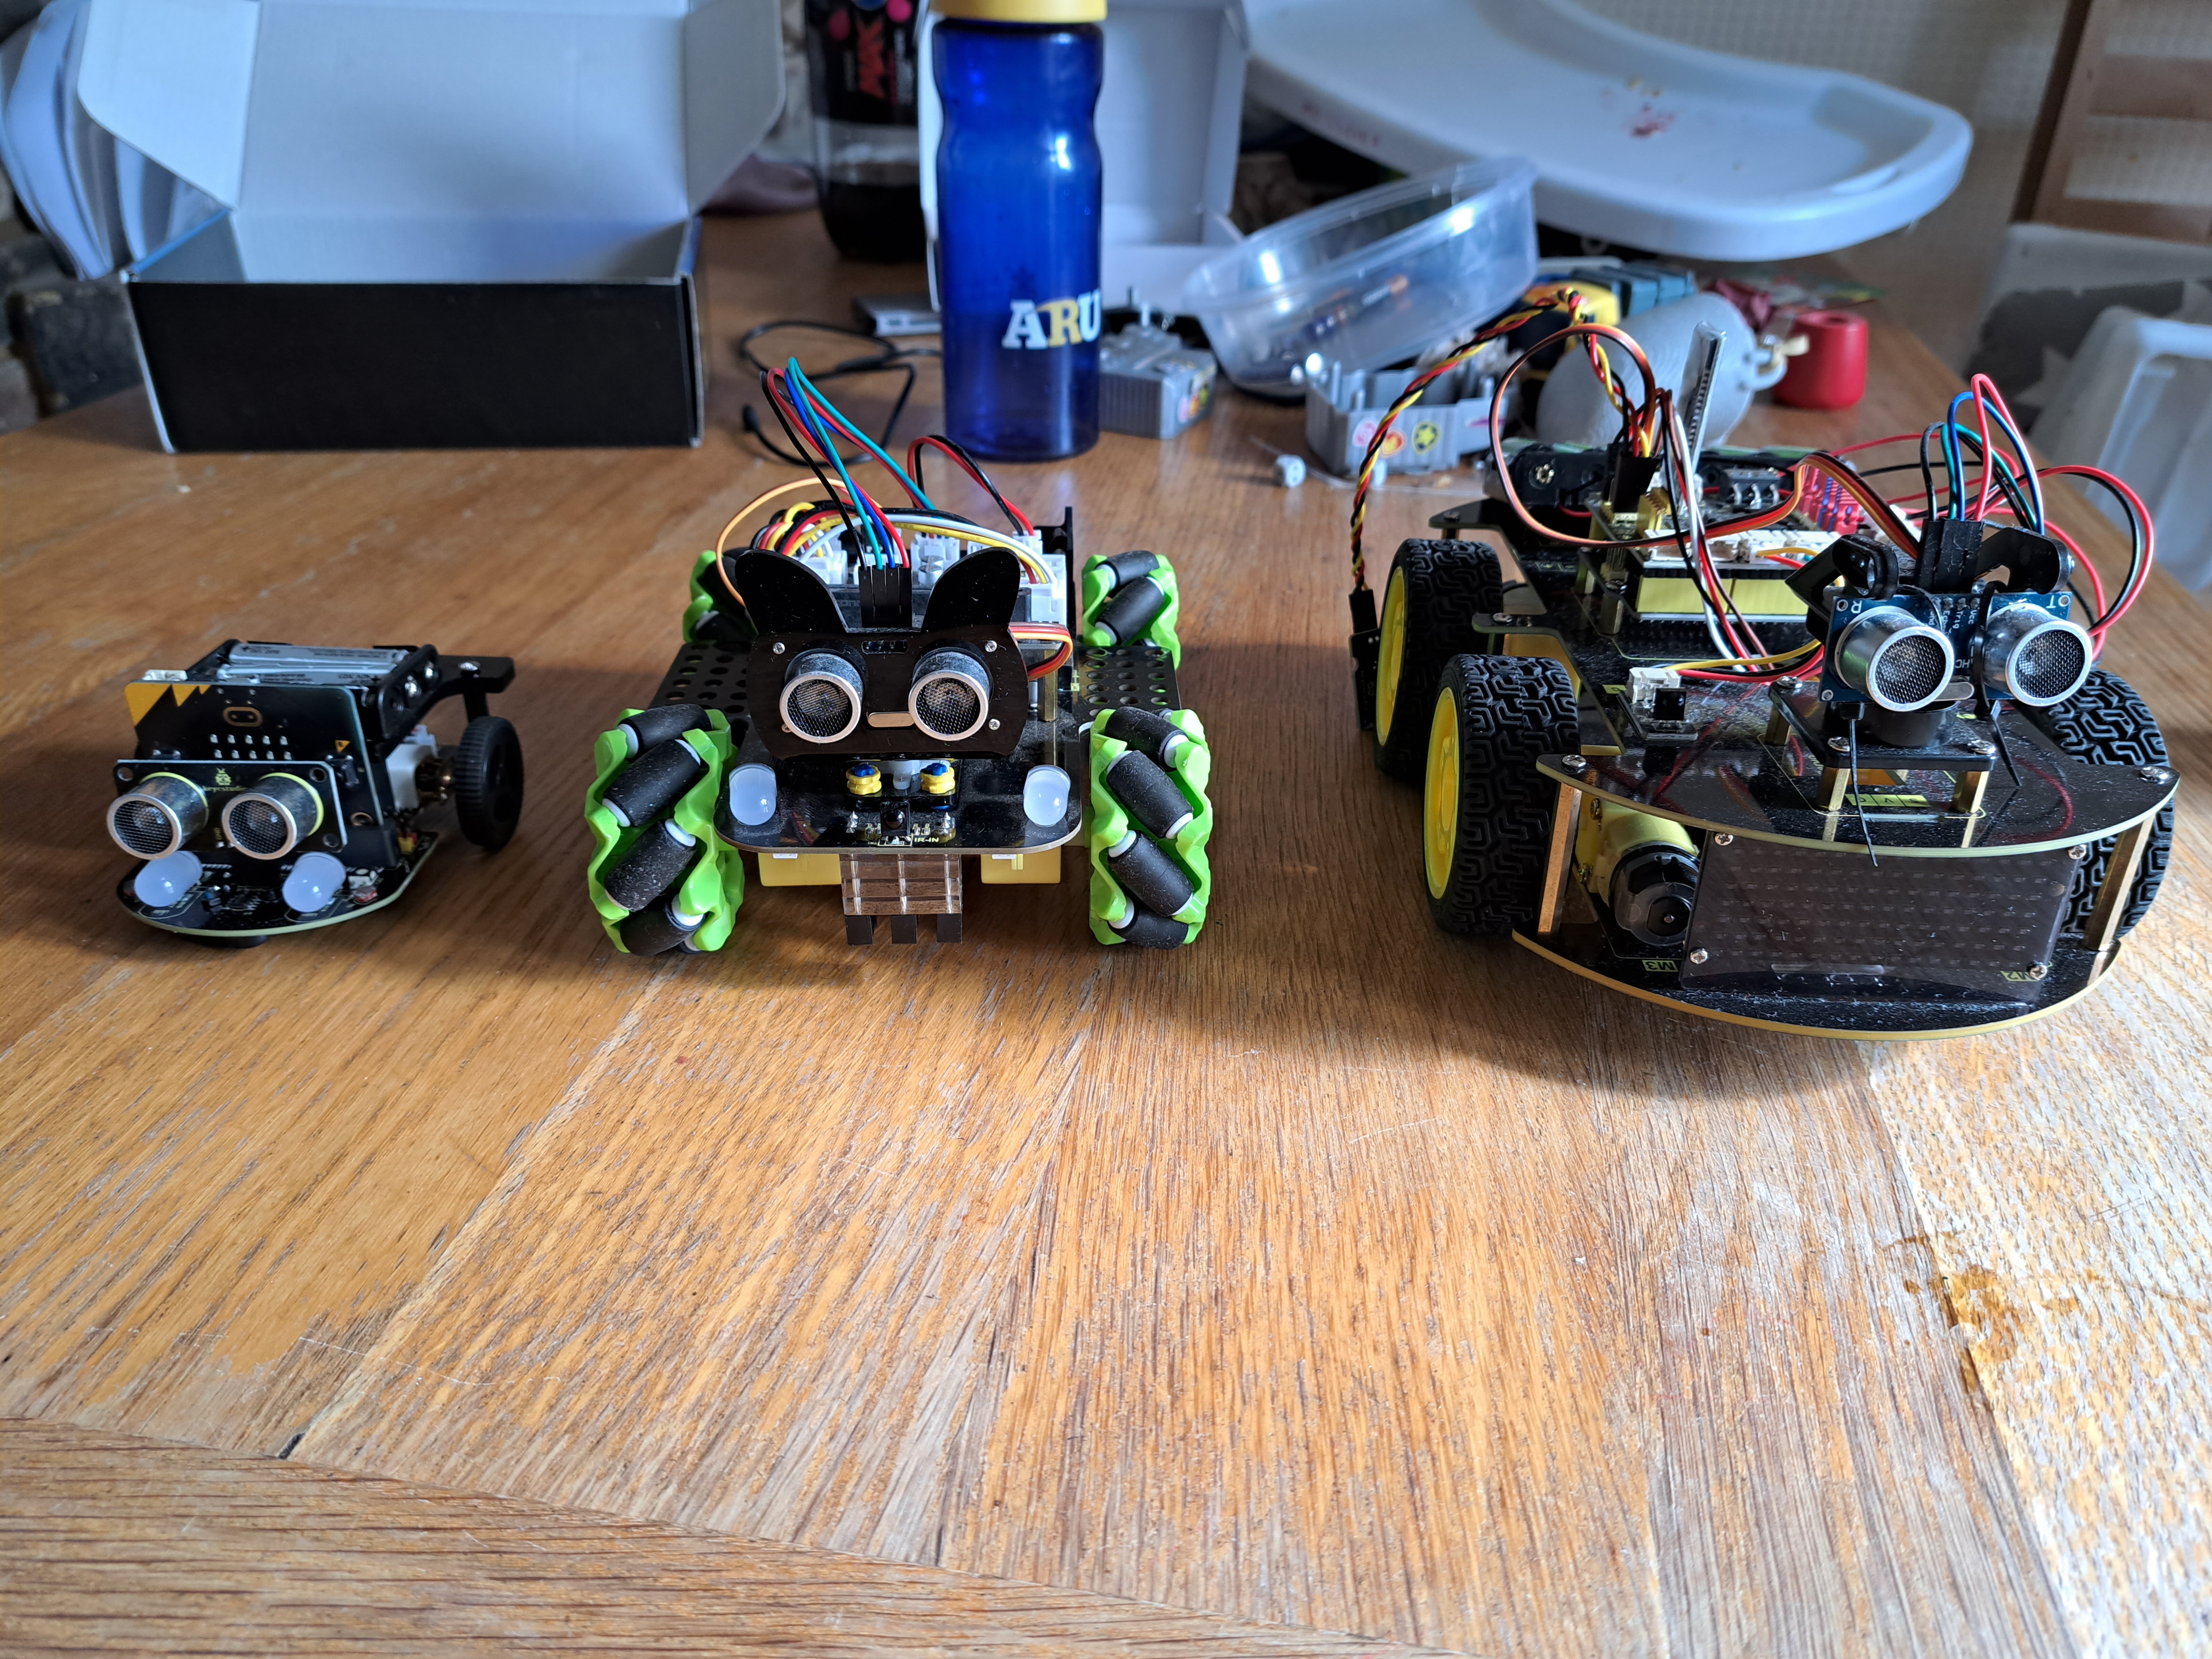
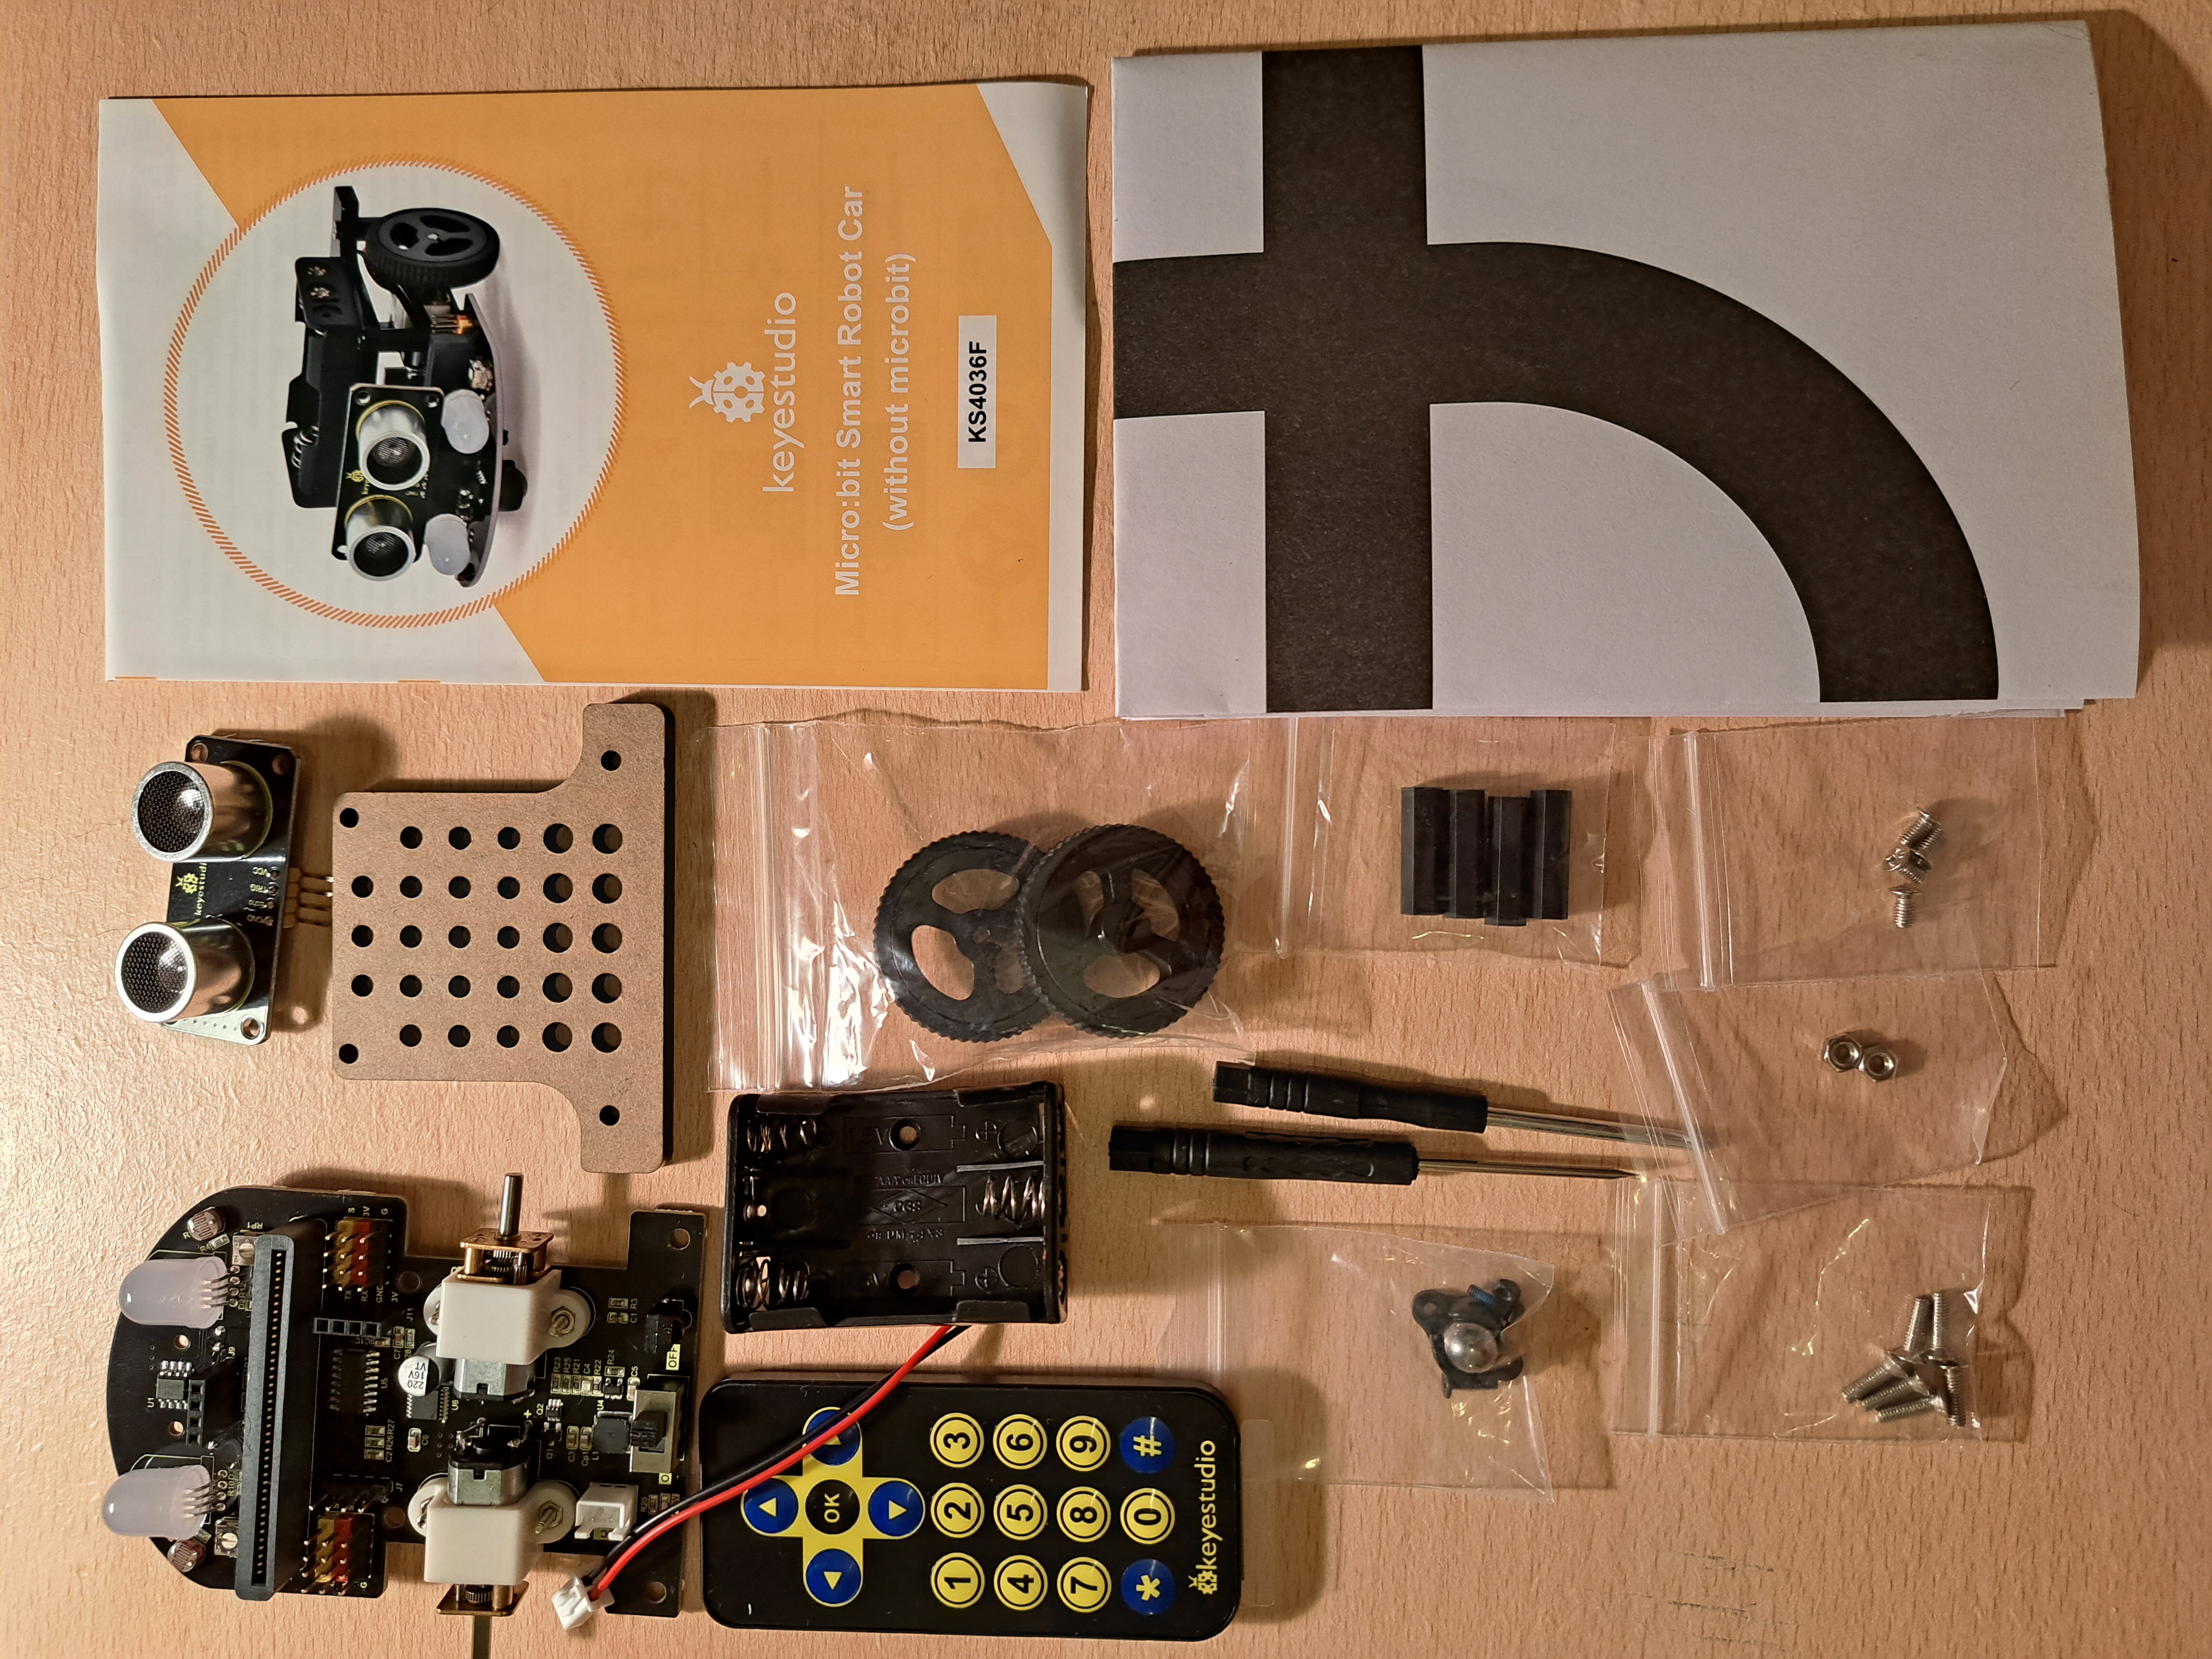
That said, many of the familiar sensors are included in this robot car: ultrasound, infrared remote control, and already-mounted multi-color LEDs. Two short screwdrivers are also included. I was pleased to see a line provided for Line Tracking (I struggled to create an appropriate line in previous kits). I am probably most excited to see this car is based on AAA batteries, which are easy for me to find! Links to instructions for building and codes for using the car are also provided.
Step 1: Building the Robot Car
It only takes about 20 minutes to build this car. The instruction manual guides you step-by-step through the building process. Occasionally, the parts in the manual look slightly different to the parts provided in the kit, however. For example, the bottom board does not have an on/off switch, LED lights, or an infrared sensor in the manual - even though the provided parts do. It is still possible to successfully build the car, although it would be better to show the actual parts provided.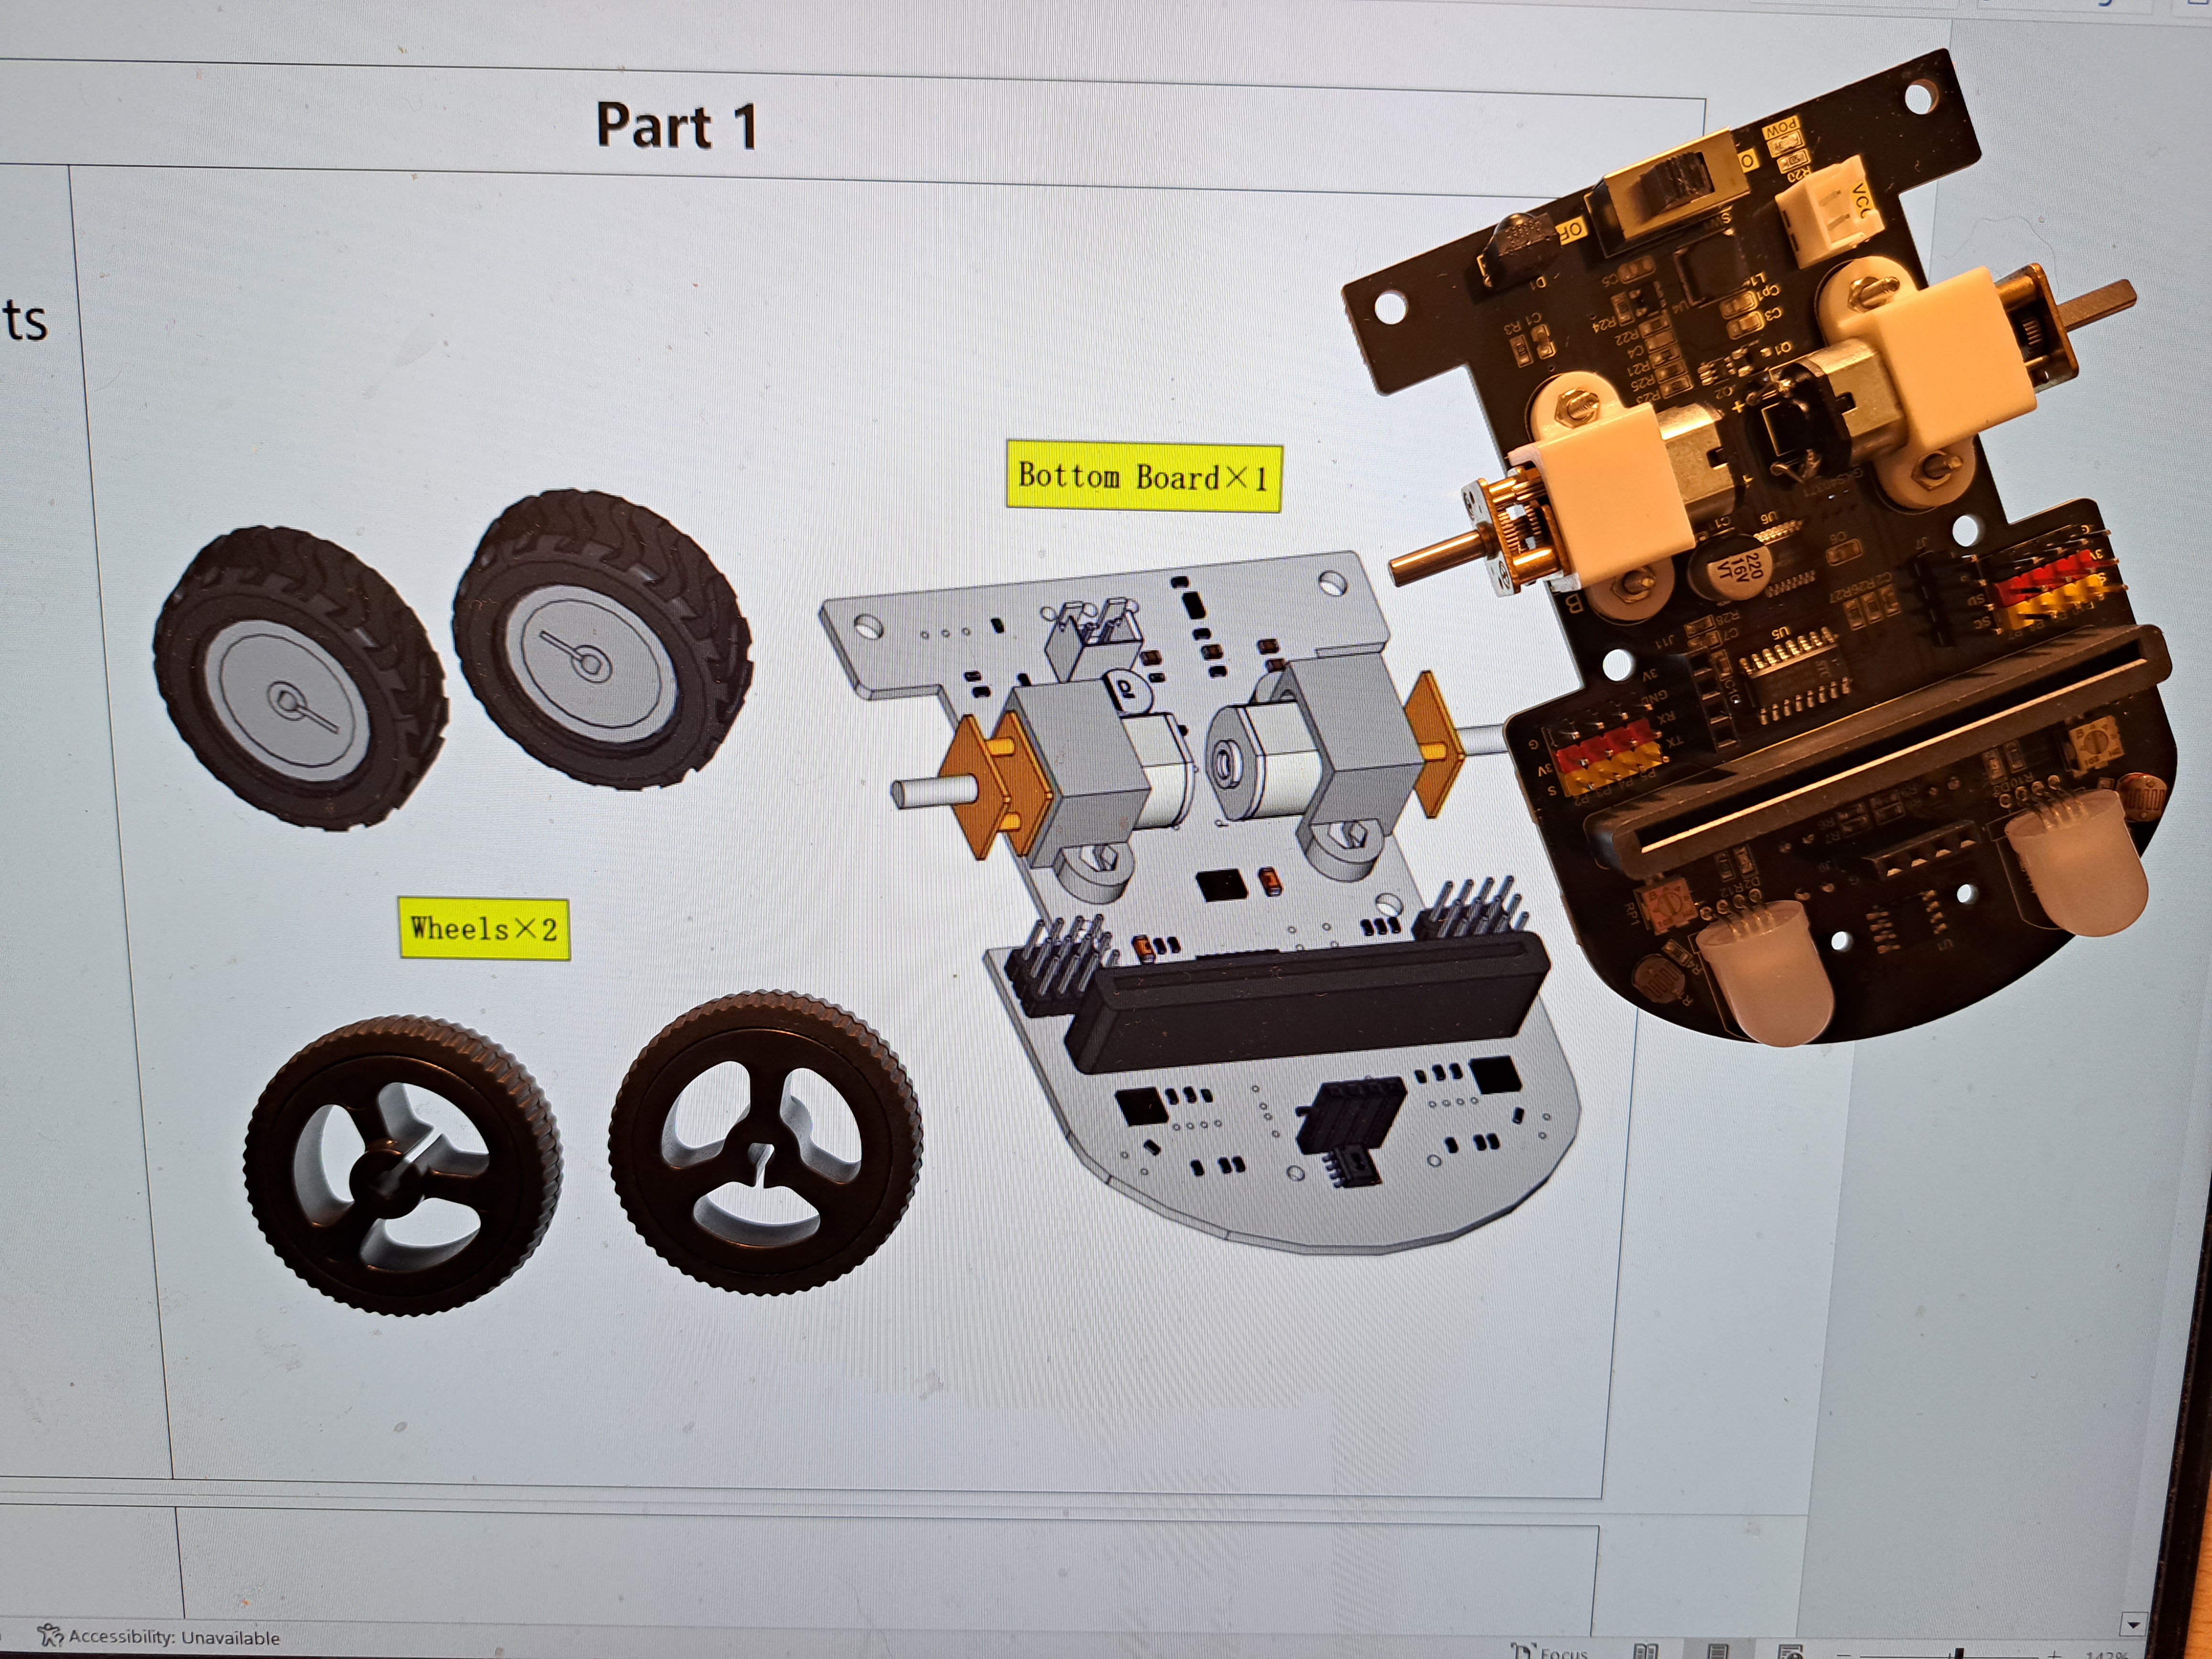
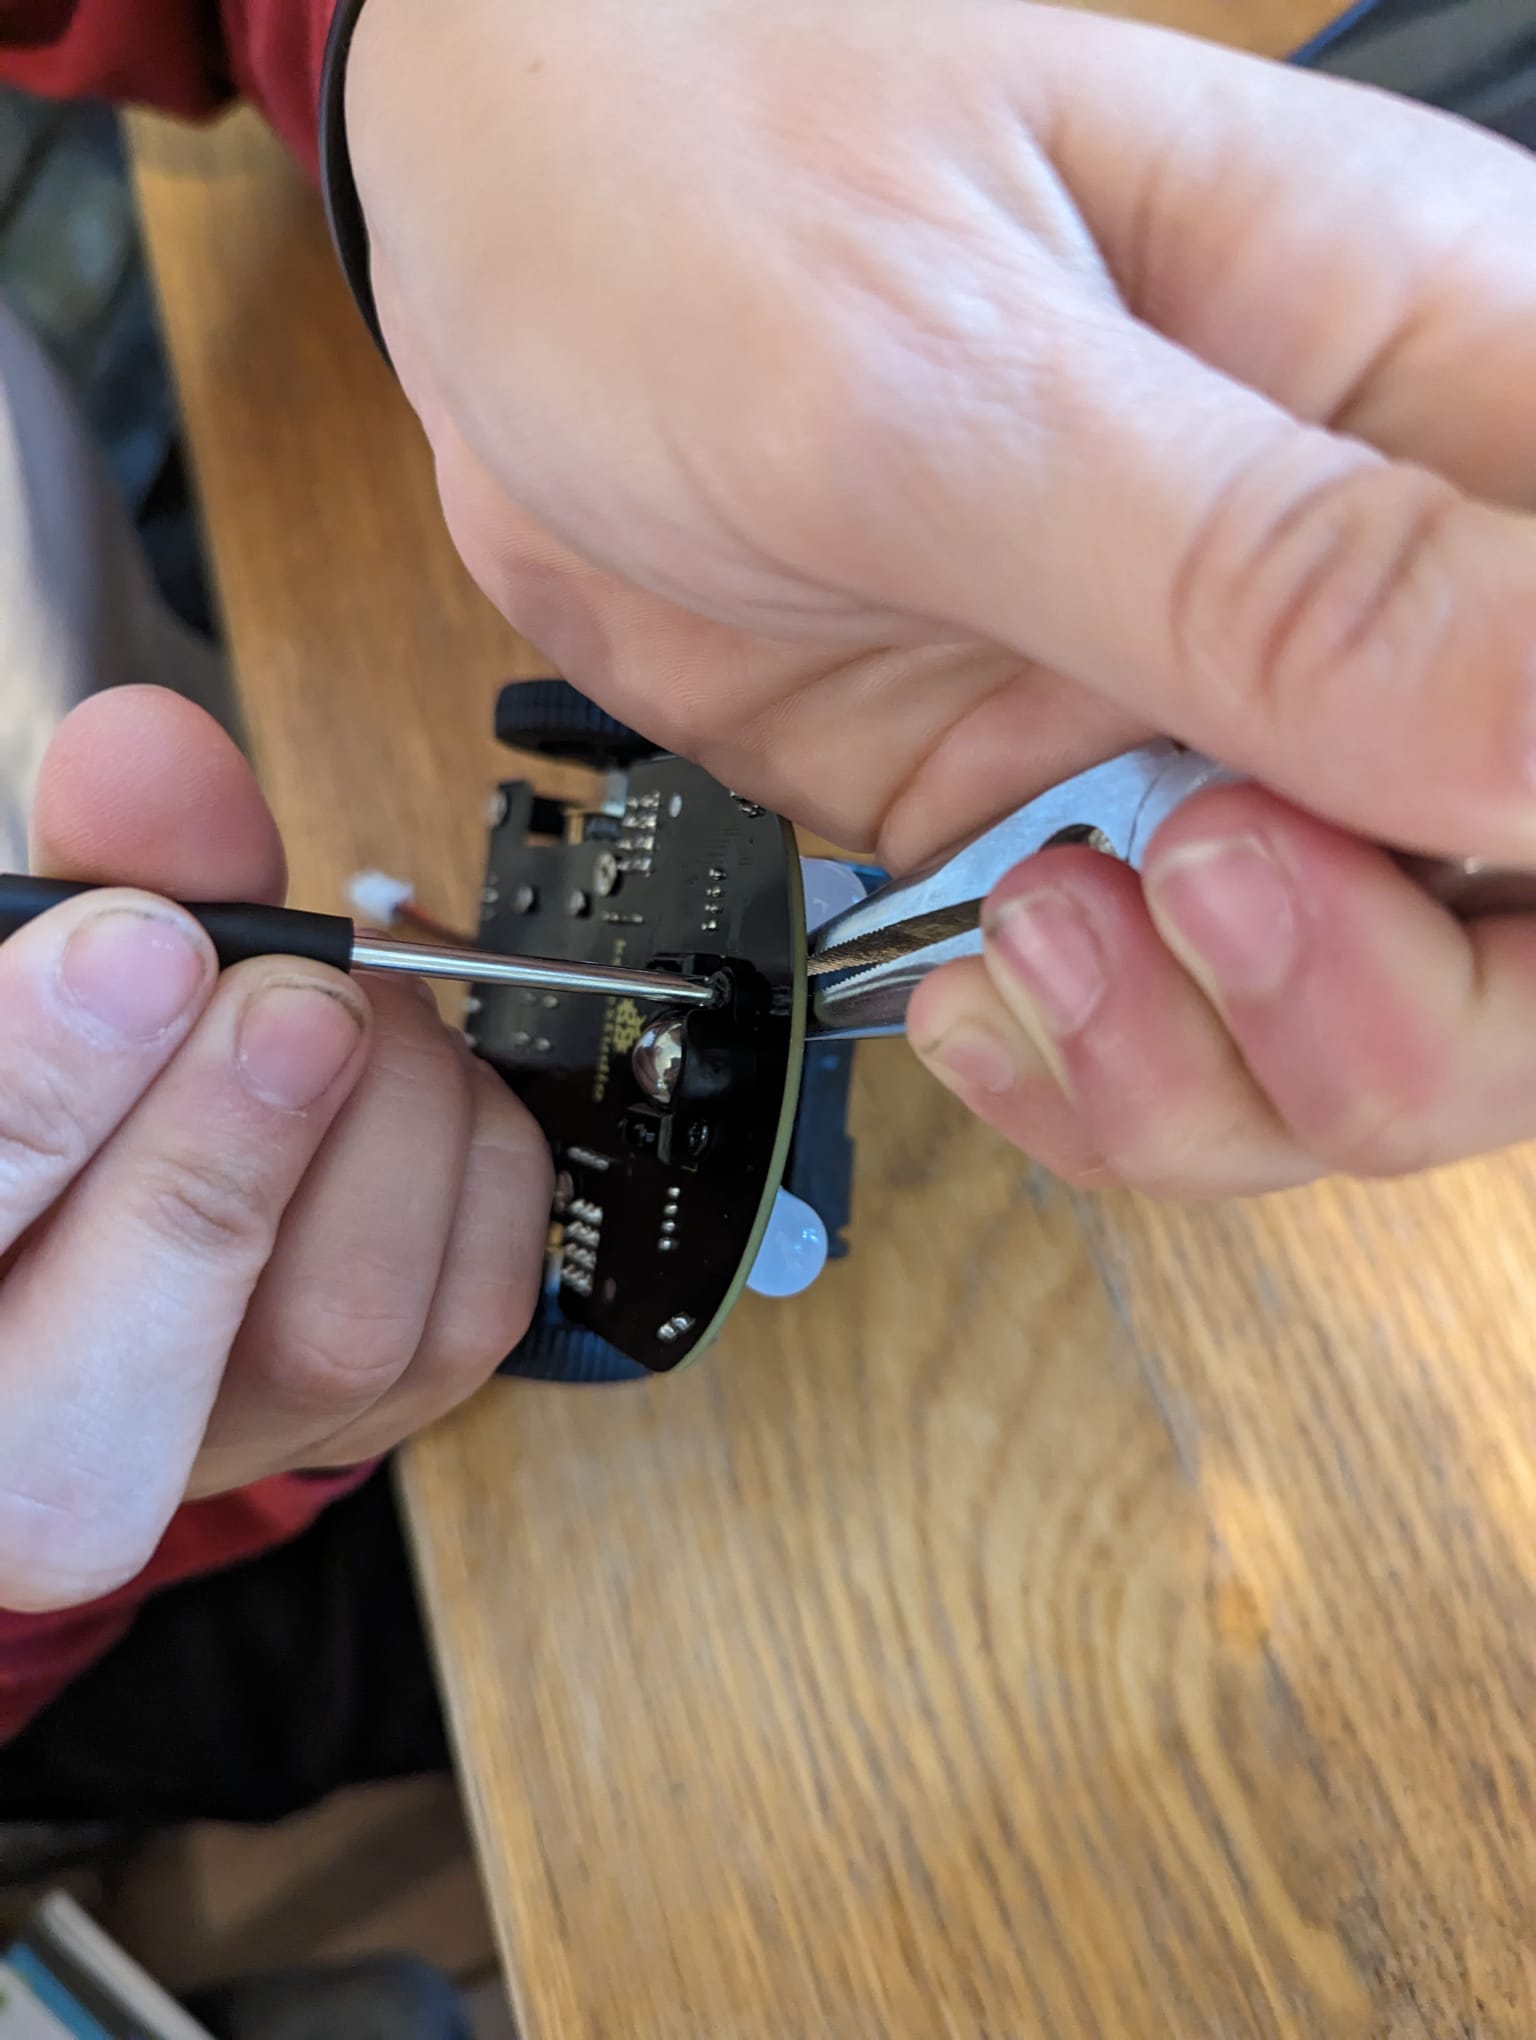
Somewhat expected for such a small robot car, there are some tight spaces in this build. You may need pliers (not provided in kit) to hold the nuts stationary while screwing in the screws. It can be difficult to hold everything in such a tight space. I dropped screws and nuts multiple times.
Step 2: Wiring the Robot Car
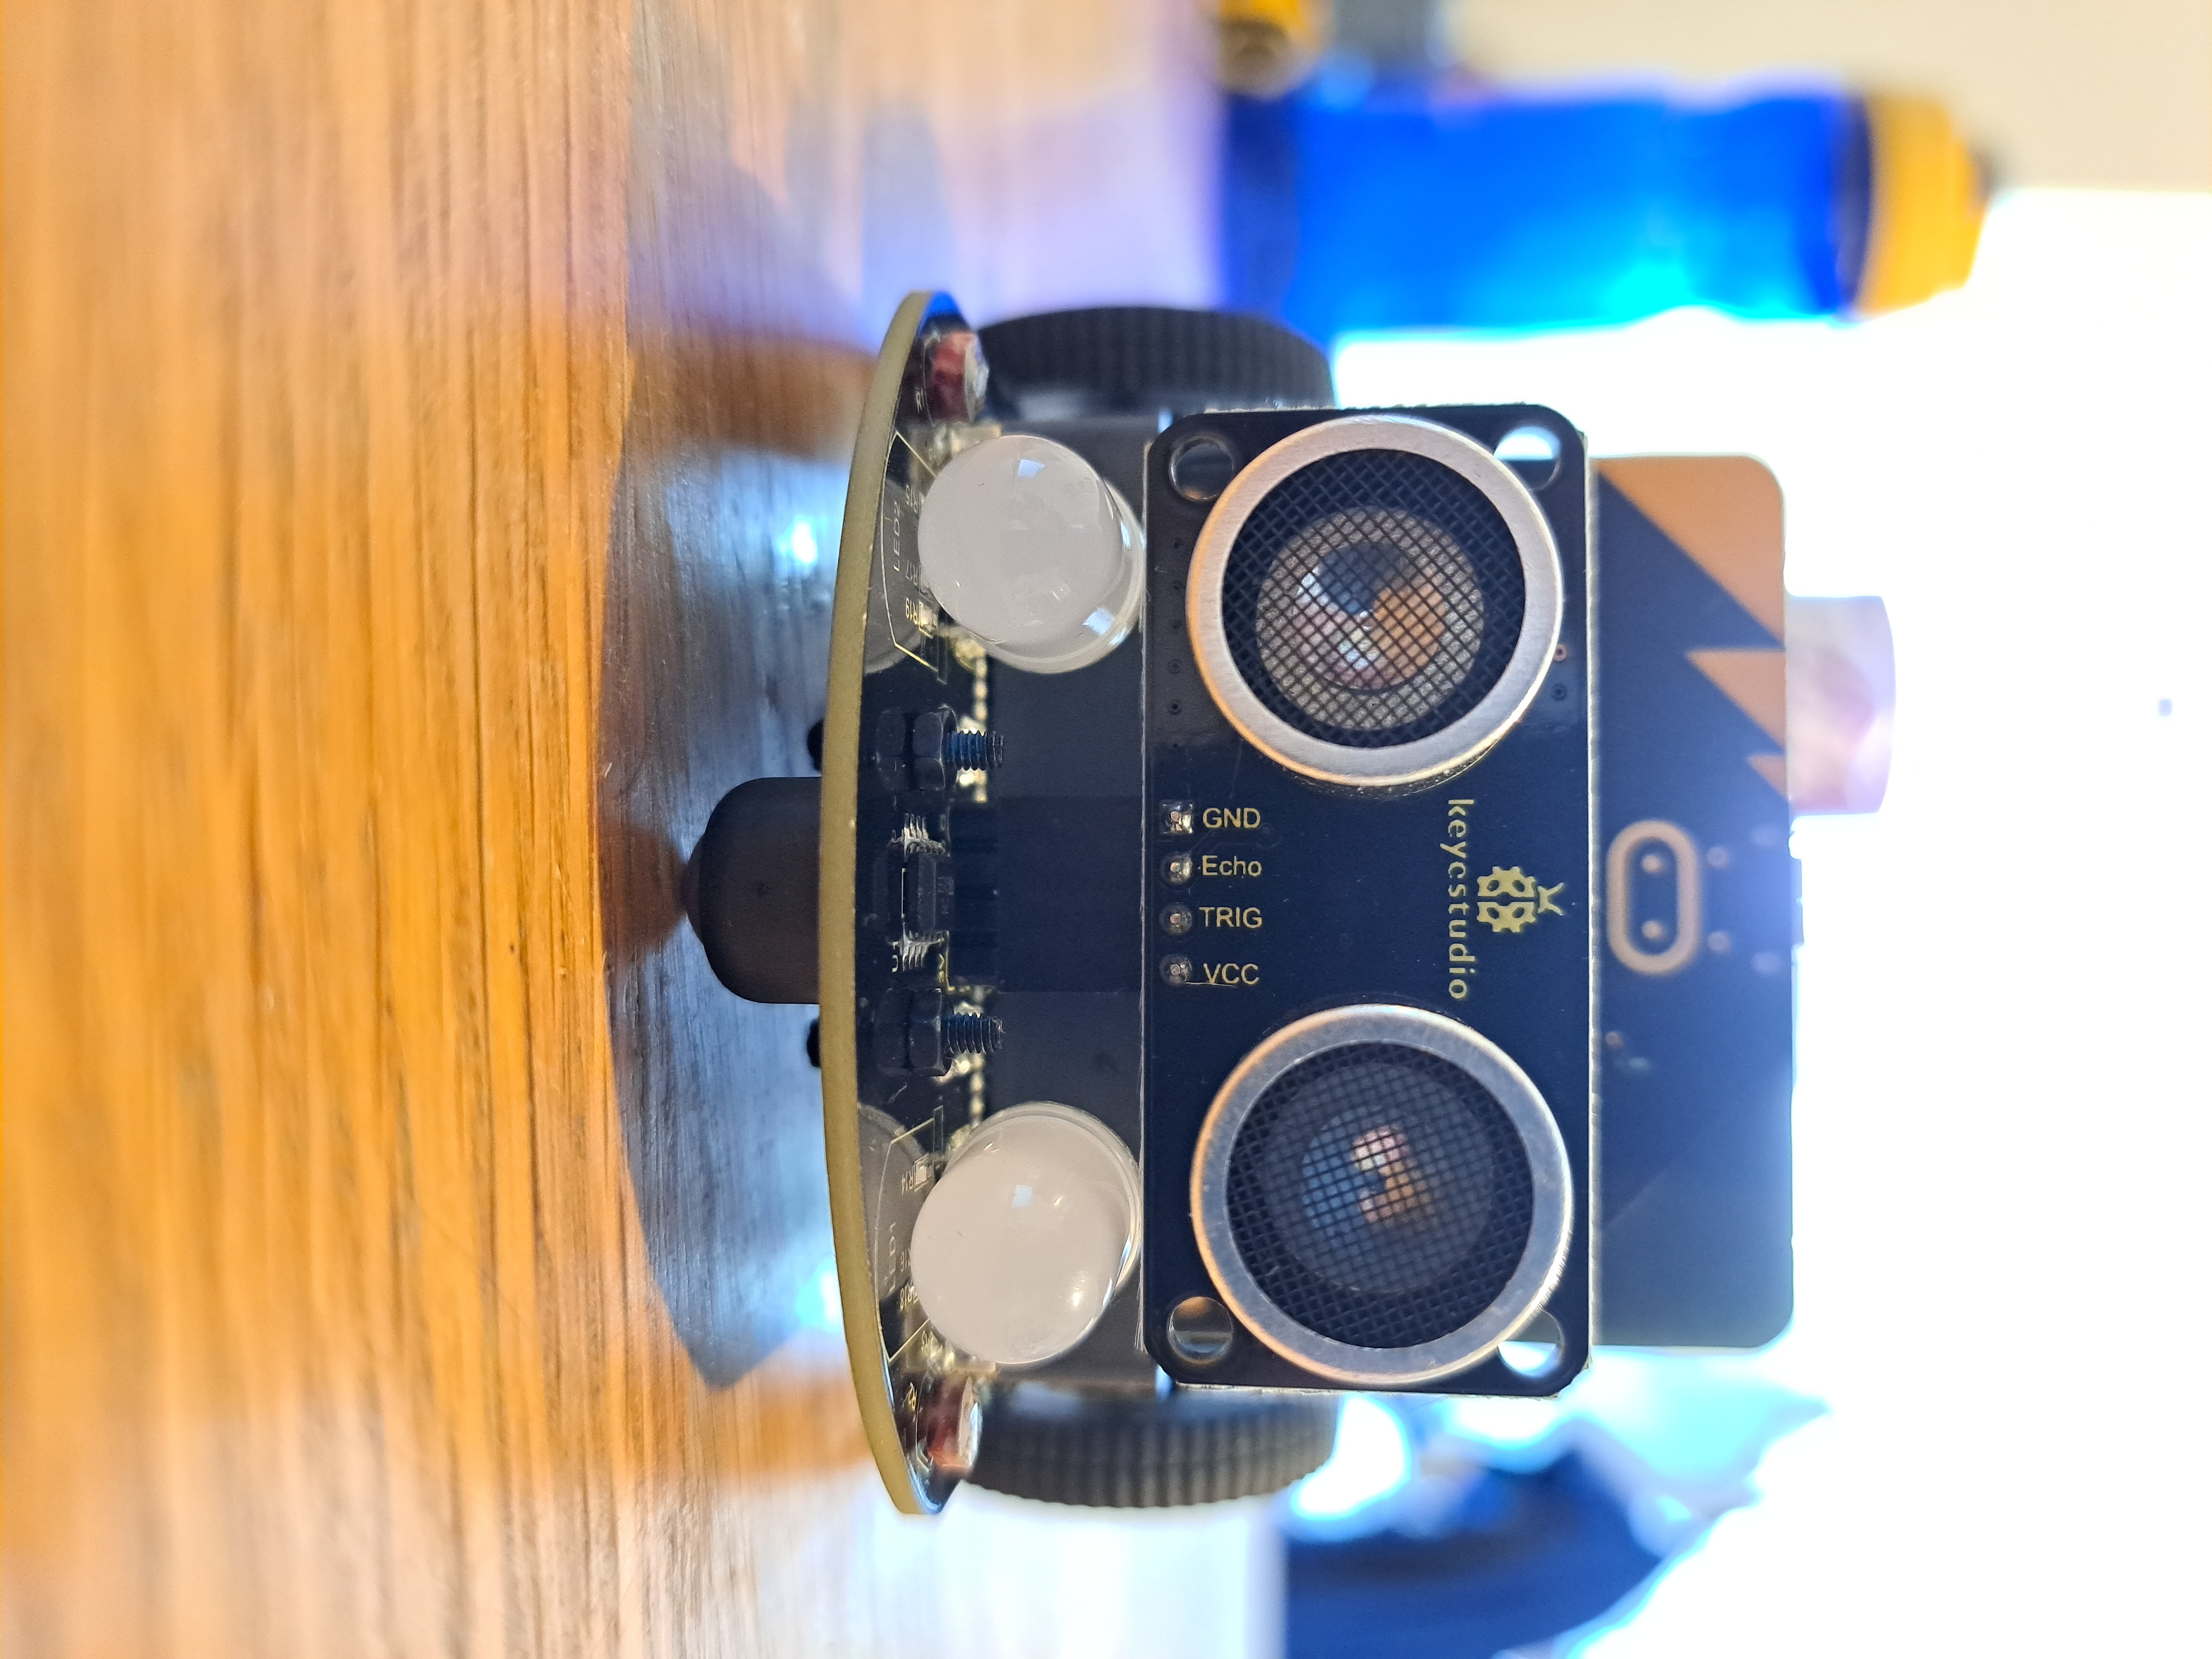
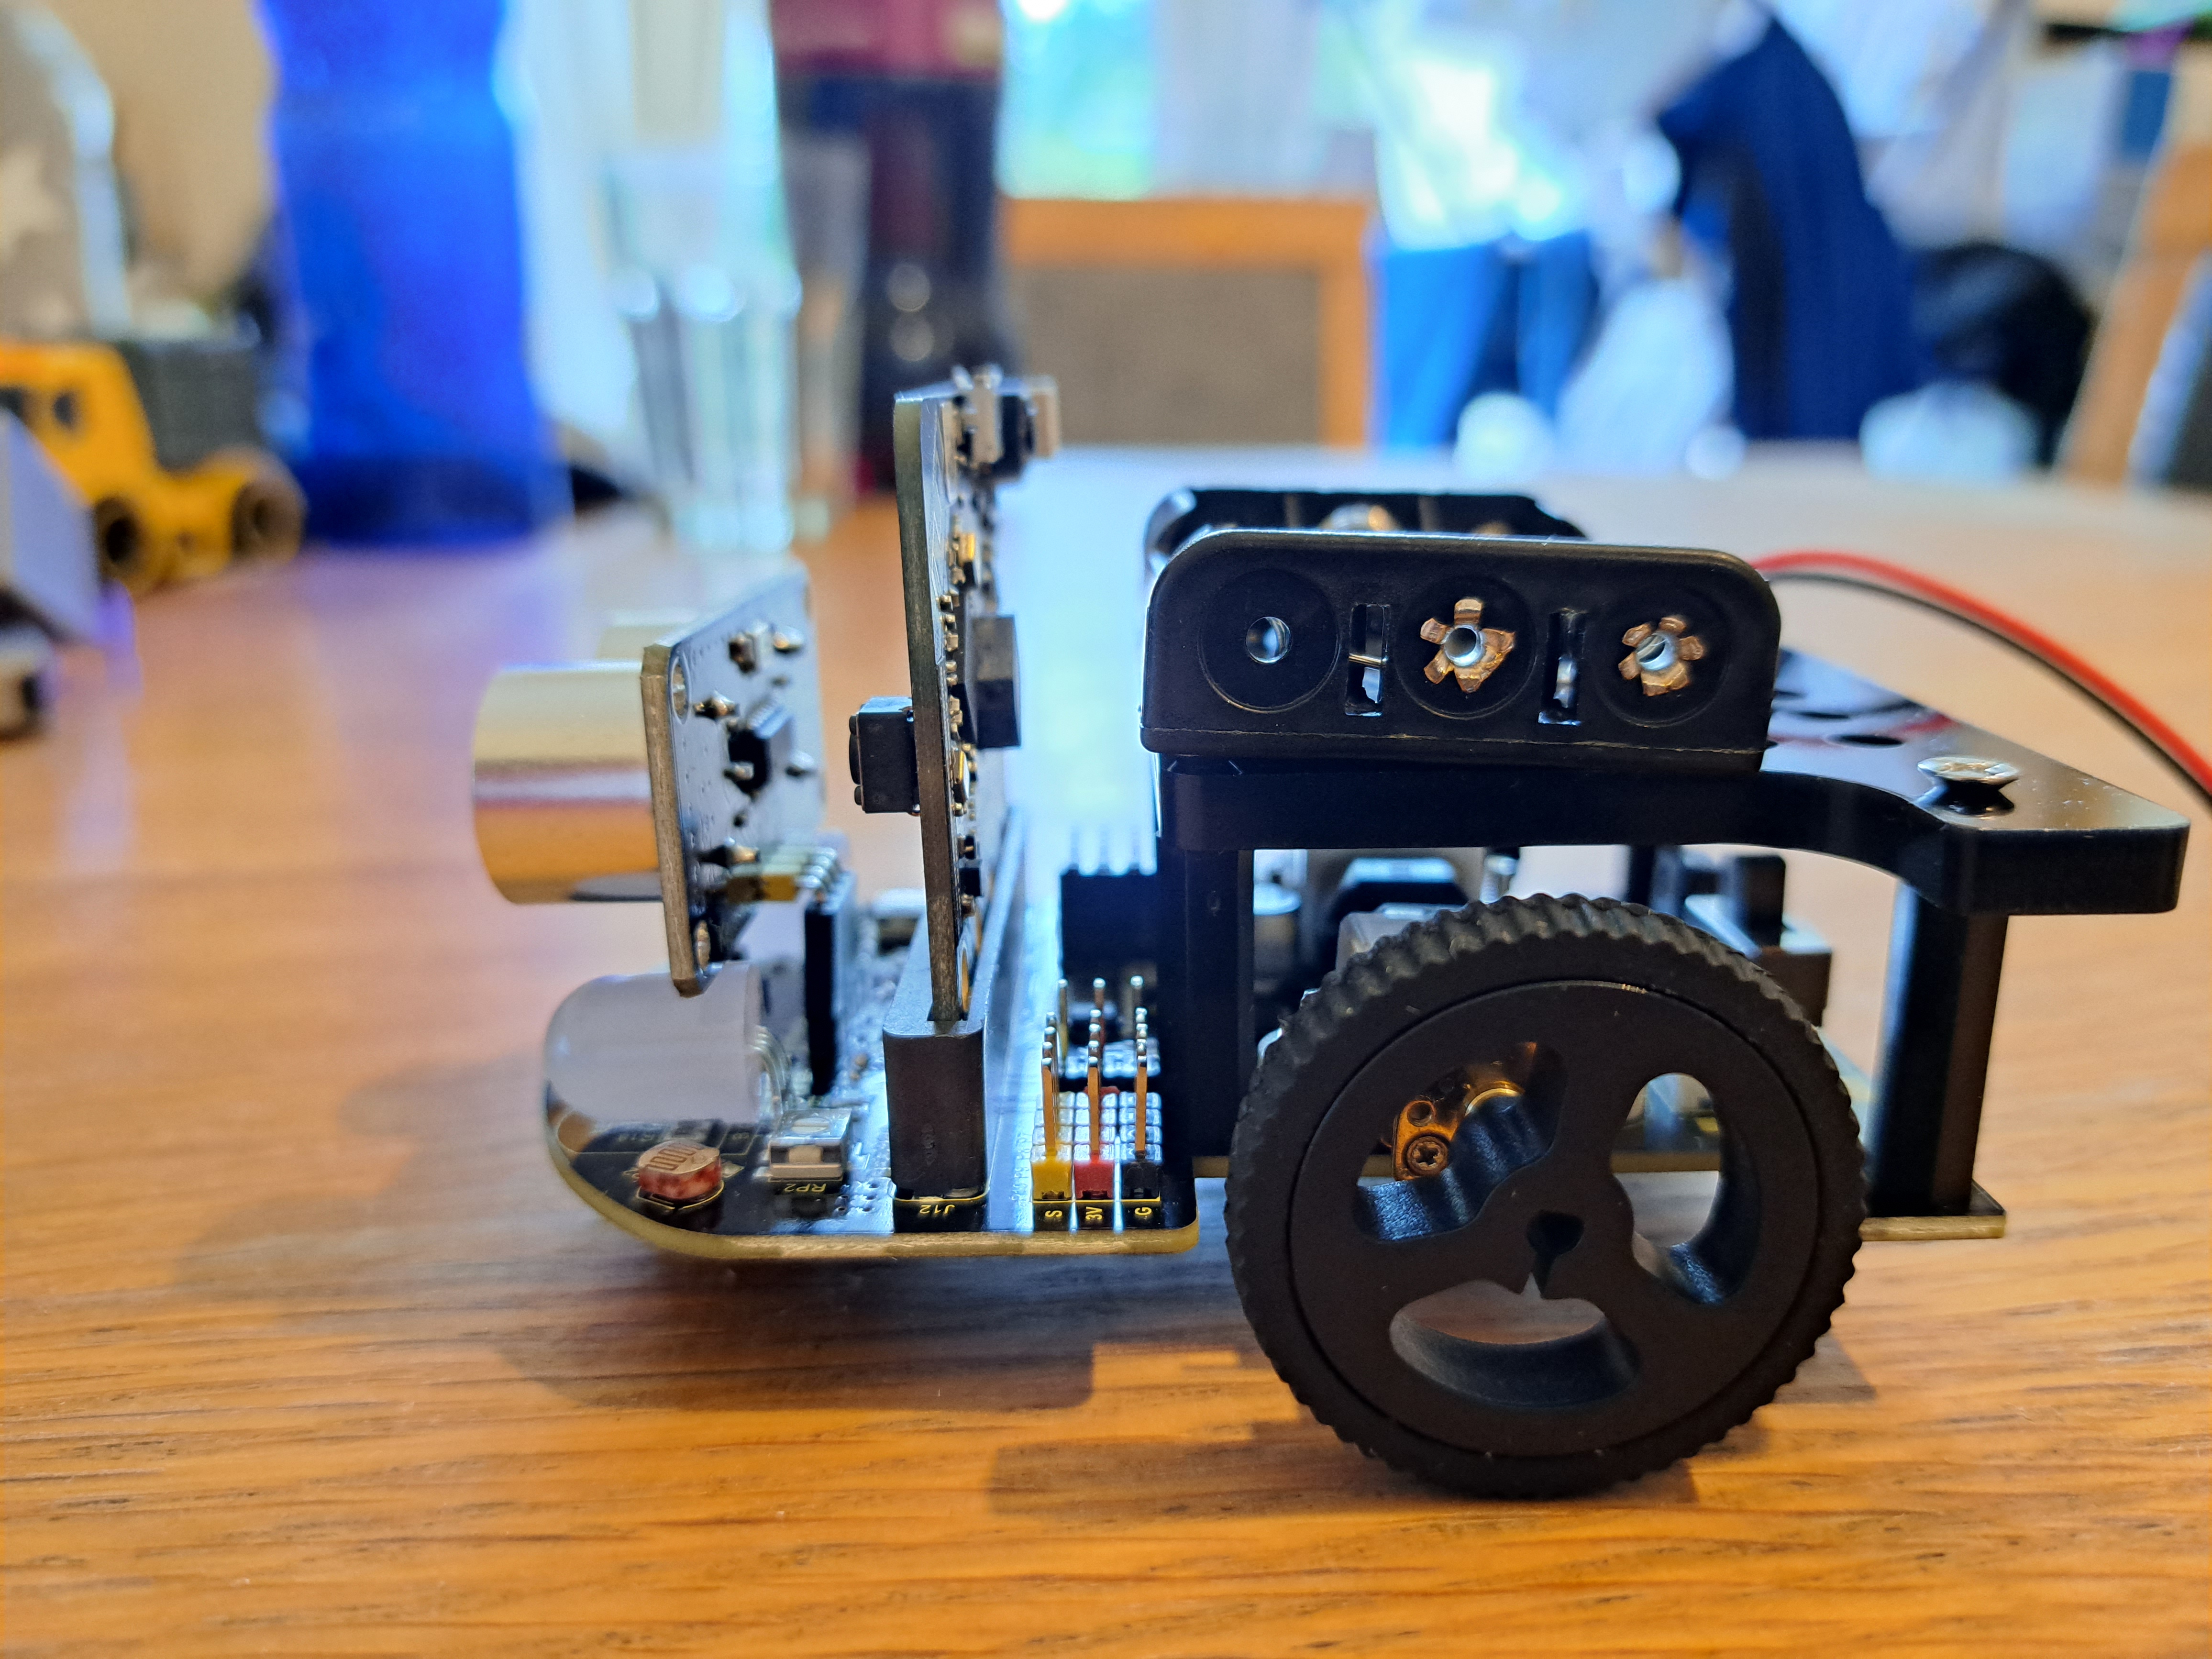
There is only one wire in this kit: from the battery pack into the bottom board. The instruction manual doesn't actually show placing this wire. Users relying solely on the instruction manual may forget to place this wire, meaning the car will not work. It is very straight-forward to place this wire once you realize it needs to be placed!The completed car is shown below.
Step 3: Using the Robot Car
The heart of the robot car is the BBC Micro:bit (not provided in kit). The Micro:bit has many built-in features: 5x5 LED array, temperature, geomagnetic sensors, accelerometer, light detection, speaker, touch-sensitive logo, microphone, and Bluetooth capabilities. In addition to the Micro:bit's capabilities, the instruction manual says this robot car can:-Control multi-color LEDs in front of the car,
-Move forward, backward, veer right, veer left, or stop,
-Track a light,
-Track a line,
-Object Avoid and Object Track, and
-Be controlled via Bluetooth, an infrared remote control, and a downloaded App.
The Micro:bit and car are programmed using MakeCode (or Python but I only used MakeCode). MakeCode is a drag-and-drop program, similar to Scratch. MakeCode allows users to control electronics without needing to understand detailed programming. MakeCode can also show real-time outputs via the "Show Data" function - but ONLY IF MakeCode is being run in Google Chrome. If you are using a different internet browser (such as Microsoft Edge), you will likely need to instead use CoolTerm to see real-time output data. Information on how to use CoolTerm is provided with the kit.
This kit includes 19 tutorials which explain the different features of the BBC Micro:bit and of the robot car. The tutorials are well-organized. Each feature/sensor has its own Word document showing the location of the sensor, a brief explanation of how the sensor works, and an explanation of how to import the provided .hex files or create your own MakeCode code.
In a similar Keyestudio kit, I created my own .hex files in MakeCode. The process is straight-forward, even for first-time users. For this kit, I imported the .hex files provided by Keyestudio. If you import the .hex files, I suggest renaming the codes. Many codes have generic names such as "code-1" when imported, which makes it difficult to find specific codes in your MakeCode Library afterwards. Almost all of the files function correctly. Required code changes are discussed below.
Micro:bit Basic Tutorials:
-"5 x 5 LED Dot Matrix-2.hex" The instruction manual says the LED symbols will cycle forever. The provided code only tells the symbols to cycle through one time. If you want the symbols to cycle forever, move the code from the "On Start" block to the "Forever" block.
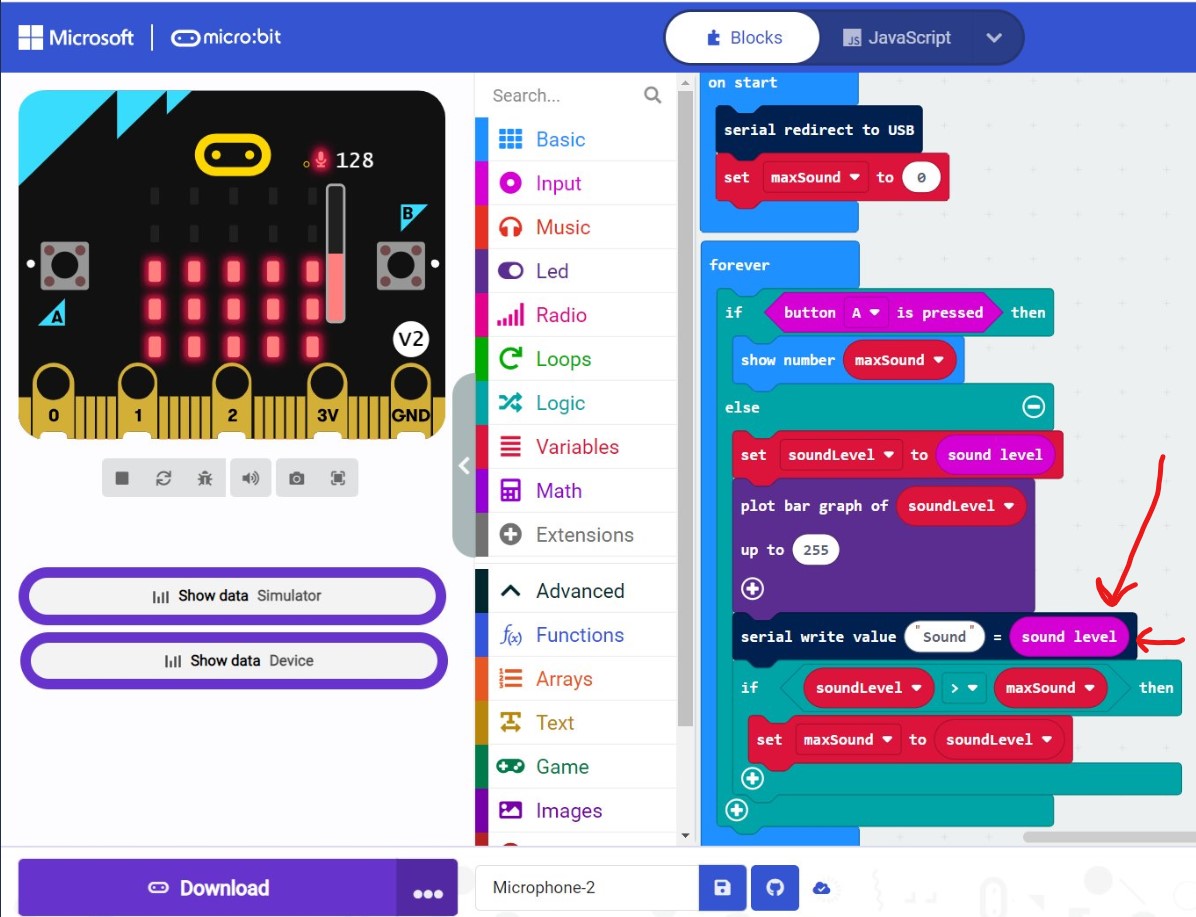
-"Microphone-2.hex" The instruction manual shows using "Show Data" to see Sound Level. The provided code does not allow this, however. If you want to see this data in "Show Data", add "serial write value "sound" = sound level" as shown below.
-Project 12 Bluetooth Wireless Communication I cannot get my Android phone to connect to my Micro:bit via Bluetooth. When I try to download the Micro:bit App from Google Play, I get the following error: "This app isn't available for your device because it was made for an older version of Android." I suspect many users will also receive this error and not be able to use this App.
Micro:bit Robot Car Tutorials:
-Project 13 RGB LED Lights This is a straight-forward tutorial and it works well. "Red" is spelled incorrectly in MakeCode, but this error is unlikely to cause confusion.
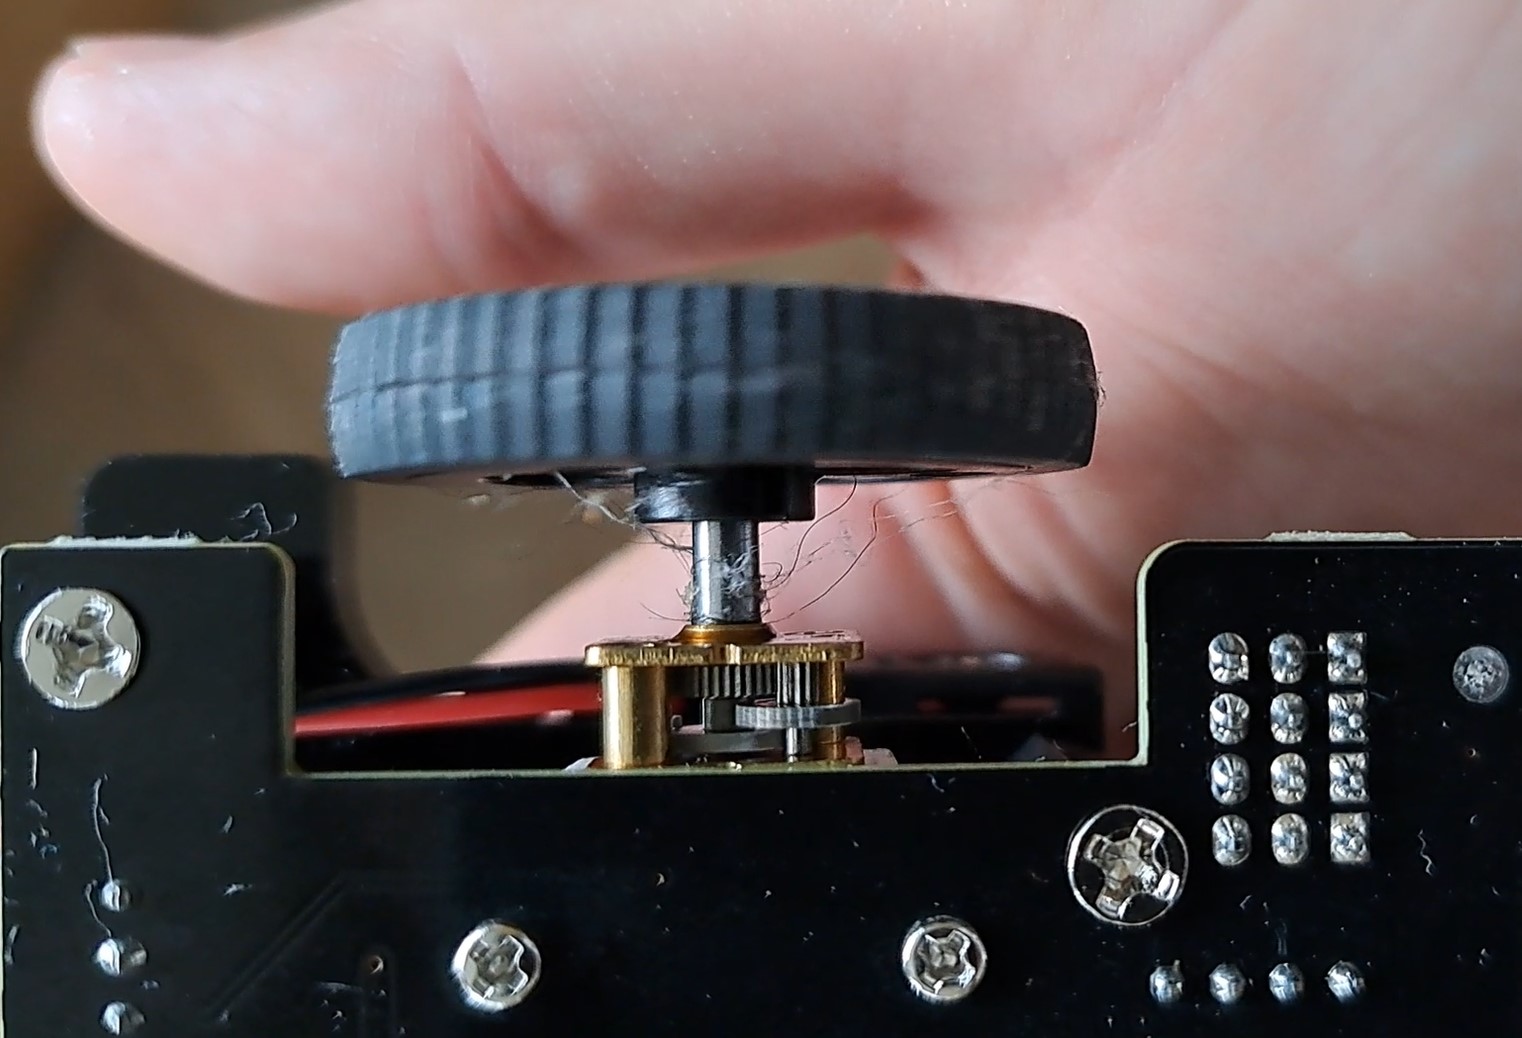
-Project 14 Motor Driving The motors are easy to use and surprisingly powerful given they are powered by 3xAAA batteries. My main concern with the motors is that the gears are open to the environment (not covered up). It is fun to watch the gears spin, but if you have a pet, you will need to regularly pull pet hair from the gears and axles. Otherwise, the car stops working.
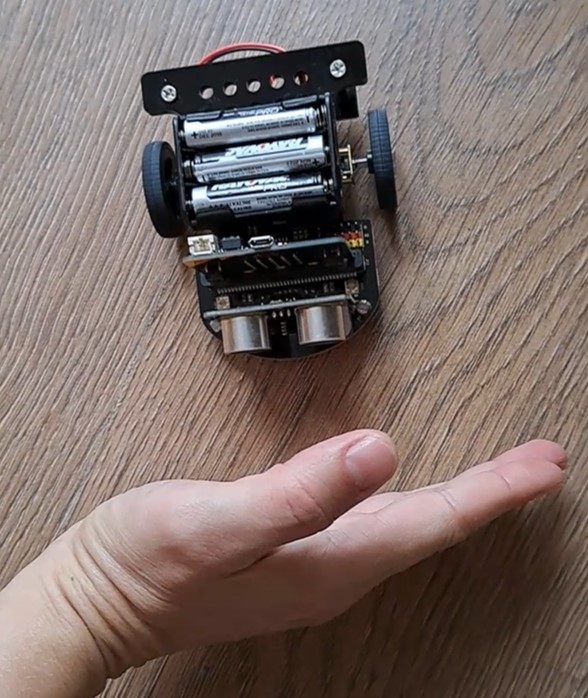
-Project 15 Light Tracking The car has 2 photoresistors: 1 on the right and 1 on the left. If both photoresistors "see" the same amount of light, the car goes forward. If one side of the car "sees" relatively more light, the car drives towards that side. If both sides of the car "sees" less than a specified amount of light, the car stops. I suggest having the car track a flashlight or the light on a phone. Light Tracking works very well with the car, and it is one of my favorite parts of this kit.
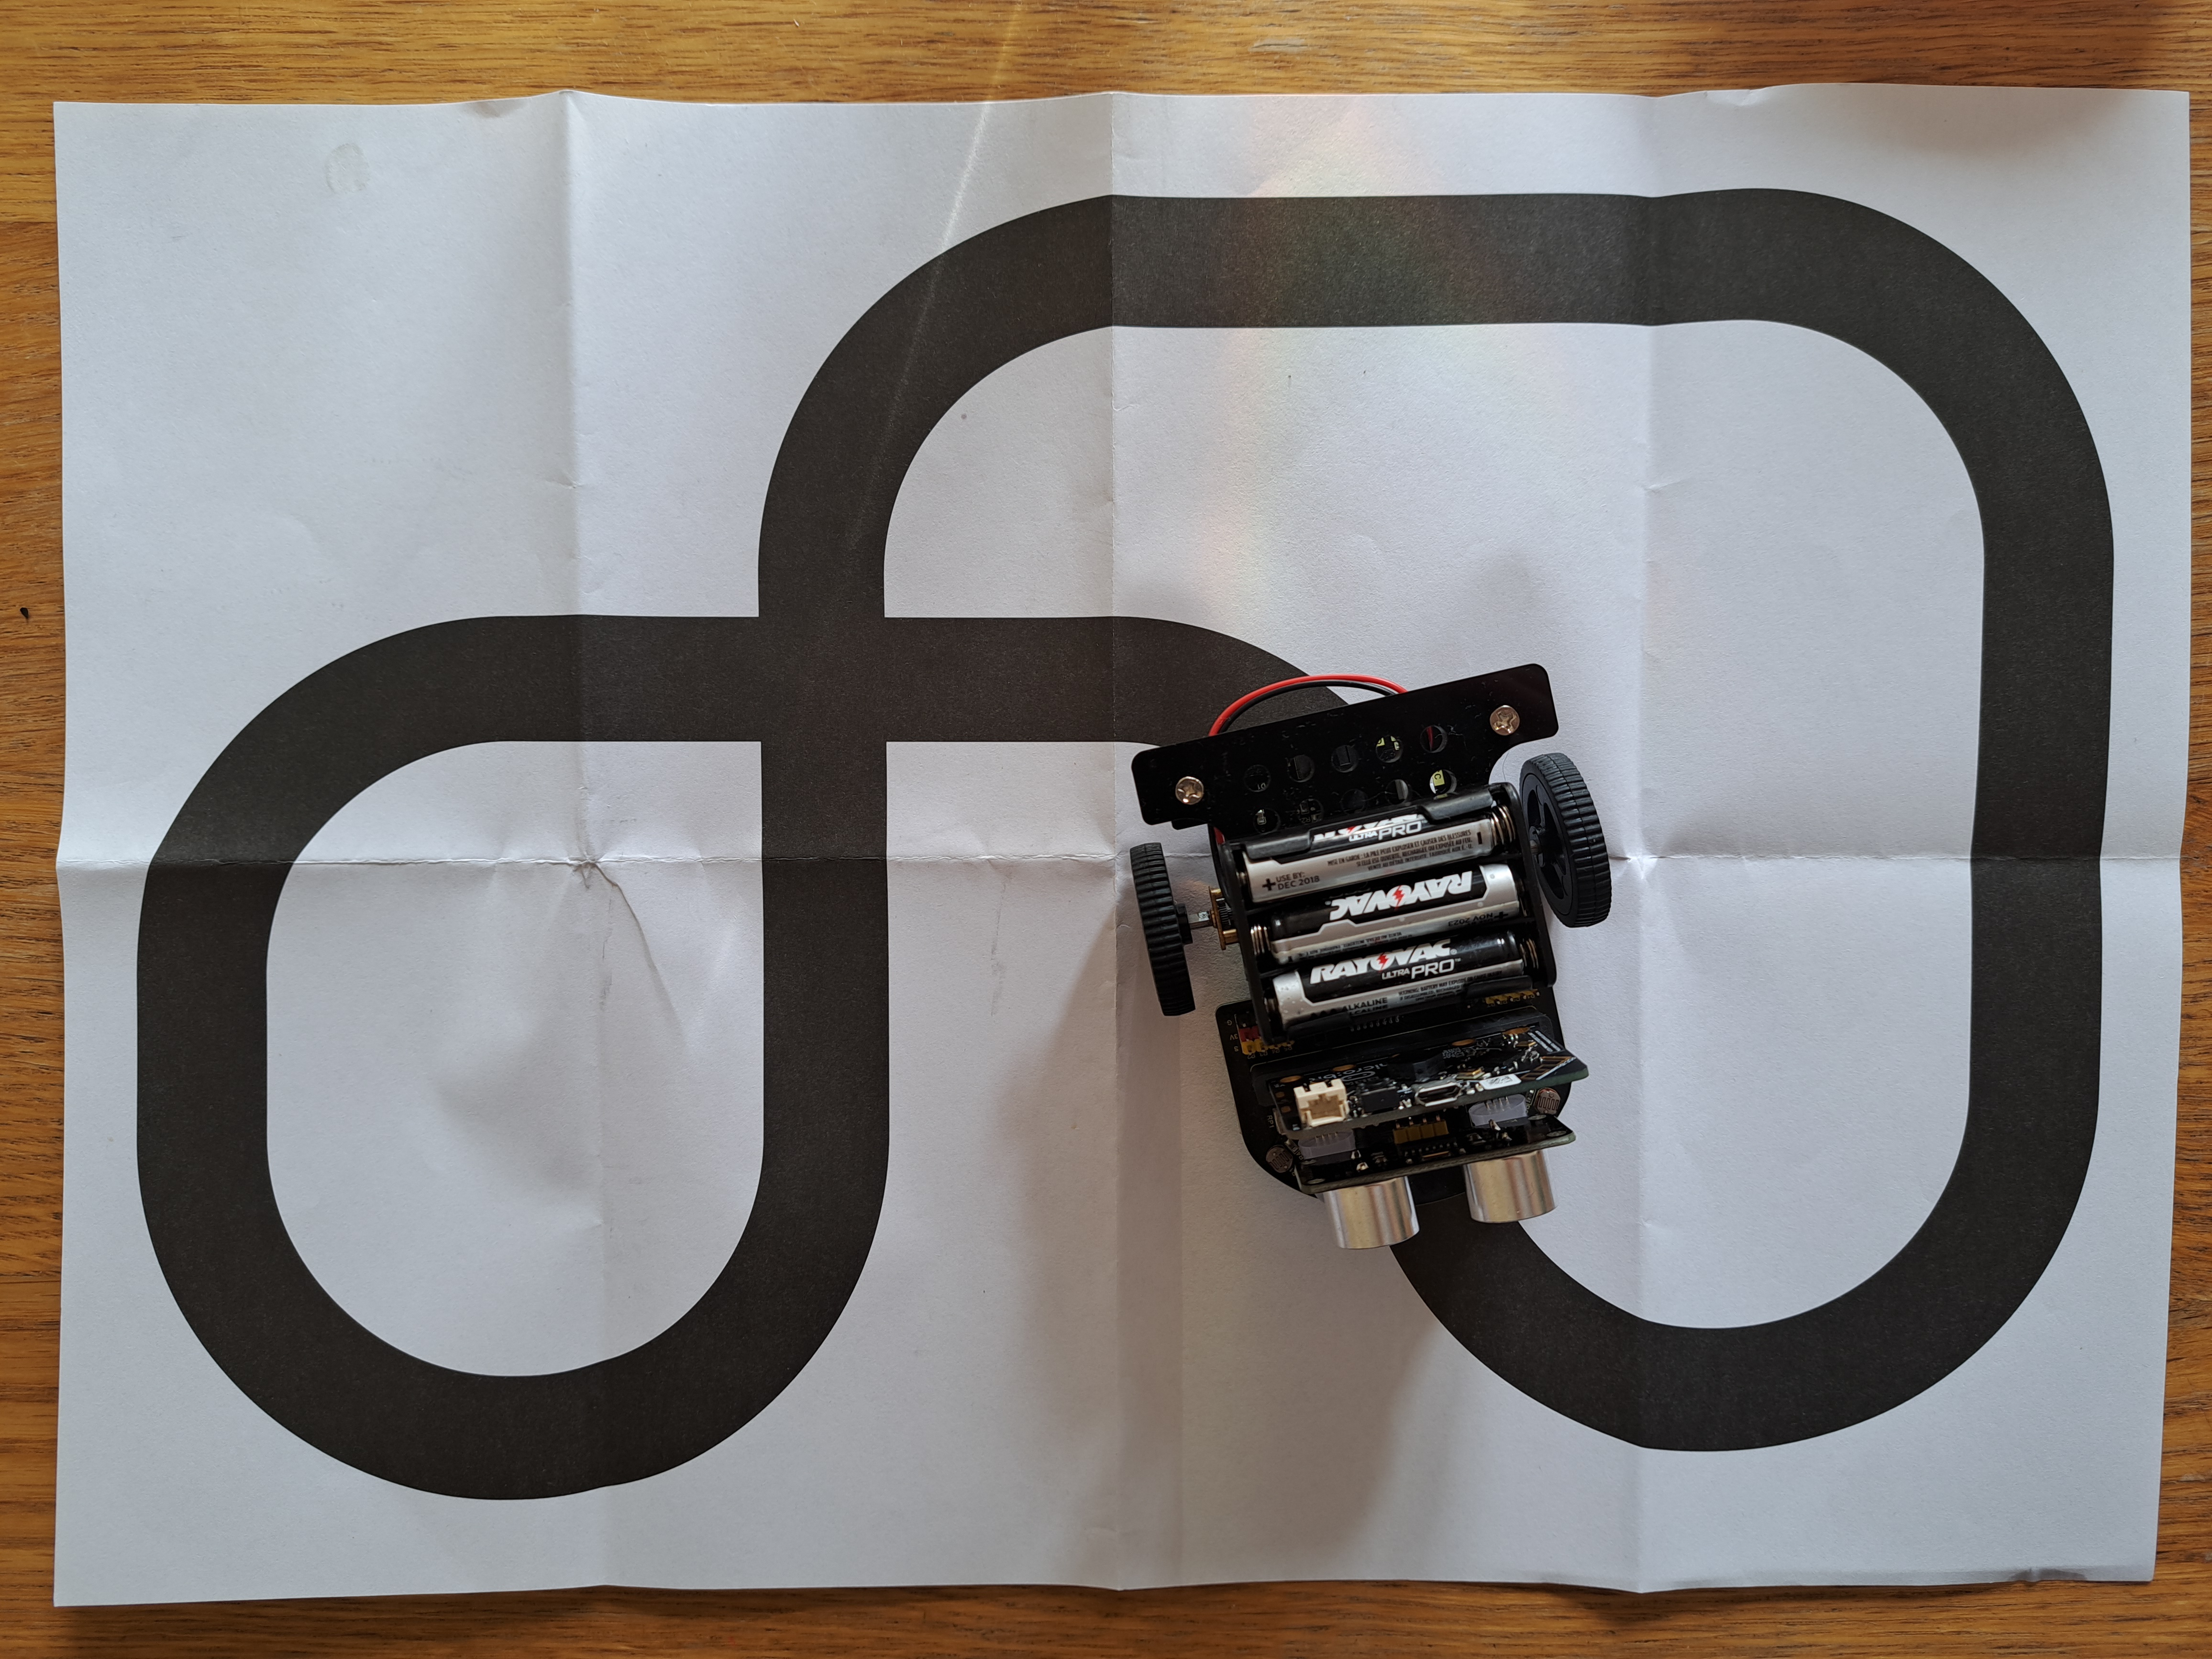
-Project 16 Line Tracking I like that a line to Line Track is provided. I cannot get Line Tracking to work, however. There are 2 infrared sensors on the bottom front of the car. Each sensor determines whether it "sees" light (returns "0") or dark (returns "1"). If both sensors "see" dark, the car goes forward. If neither sensor "sees" dark, the car stops. If only one of the sensors "sees" dark, the car veers towards the side "seeing" dark. The sensors' sensitivities can be adjusted using a screwdriver. I can adjust the sensors to return "1" for dark, but the sensors then also return "1" for light. Similarly, if I adjust the sensors to return "0" for light, the sensors also return "0" for dark. I cannot find any single sensitivity that returns both "0" for light and "1" for dark. (If this paragraph isn't clear, watch my YouTube video - it's easier to explain in a video!)
-Project 17 Object Avoidance and Object Tracking The car uses ultrasound sensors to maintain a specified distance between itself and an object (Object Tracking) or to avoid running into objects (Object Avoidance). Both of these features work well for me. Be aware that the object being tracked or avoided needs to be very close to the ground since the car is relatively small and therefore the ultrasound sensors are close to the ground.
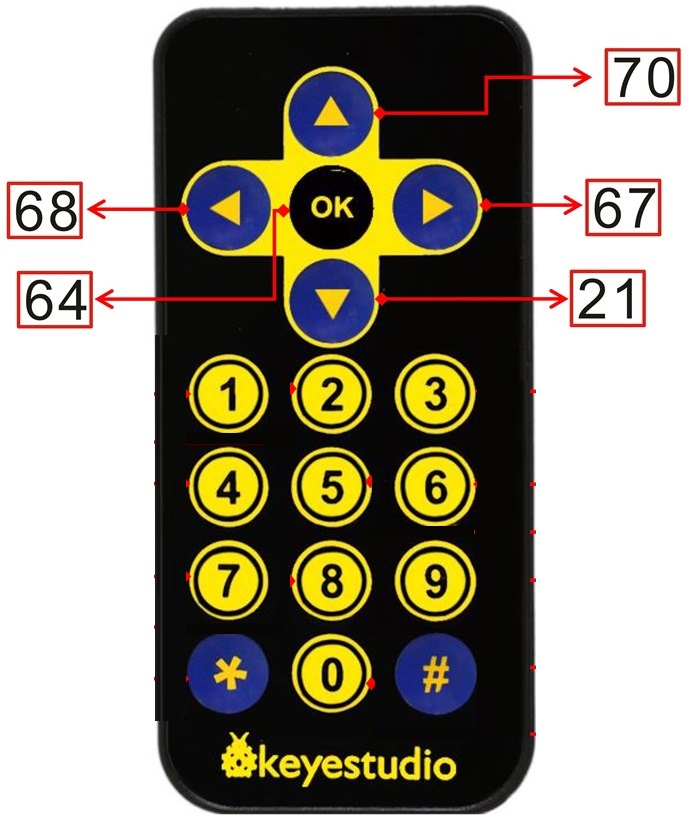
-Project 18 Infrared Remote control An infrared remote control is provided with the kit. When a button is pressed on the remote control, the corresponding number (shown below) is sent to the infrared receiving sensor on the car. The MakeCode then tells the car to move forward or backward, veer right or veer left, or stop according to the number received. The car is easy to control with the remote control.
-Project 19 Bluetooth Smartphone App-I cannot get the App to work. The App downloads successfully, but pressing the buttons in the App has no effect on the car (it does not move, etc). I suspect there is an error within the App because I get an error message written in Chinese characters when I try to use the App. I have highlighted this issue with Keyestudio. Hopefully, the App will be fixed soon.
A Final Overview!
Things I really liked:-Using the well-organized tutorials is very easy.
-Learning principles behind (one approach to) Light Tracking, Line Tracking (although this doesn't work for me!), Object Tracking, and Object Avoidance.
-Learning how to use MakeCode.
-Powering the car with 3xAAA batteries!
-Using the Light Tracking feature!
Things I suggest improving:
-Including a bolt wrench (or something similar) to hold nuts still while screwing on universal wheel.
-Finding a way to use Bluetooth connection on newer Android systems.
-Using different sensors or sensor alignment that allow Line Tracking to work. Line Tracking is great in the bigger KS4034F Micro:bit car so I know improvements are possible!
-Fixing the error(s) within the App.
This kit is a good kit for someone who wants a novelty-type robot car to put on their desk - assuming the person already has a Micro:bit and doesn't mind that half the functions don't work. Personally, I would rather make and use the bigger Micro:bit robot car KS4034F.
Other Articles:


|
Experimental Flying GameFly around in a plane. Some physics, but mainly just playing with websockets. If you can get a friend to play at the same time, you should be able to shoot each other down. |
How SpaceX land first stage boostersThe algorithms that SpaceX (probably) use to control their first stage boosters. Several animations. |

|
© Hugo2015. Session @sessionNumber